> ## Documentation Index
> Fetch the complete documentation index at: https://docs.verbex.ai/llms.txt
> Use this file to discover all available pages before exploring further.
# Make.com Webhook Integration
> Connect your Verbex AI Assistant with Make.com as a custom tool
**What you'll learn**
* How to set up Make.com simple scenario
* How to create a Make.com Connected App
* How to integrate Make.com with Verbex Platform
* How to test and verify the integration
[Make.com](https://www.make.com/en) (formerly Integromat) is a powerful no-code automation platform that allows users to connect apps, services, and tools to automate workflows and tasks without writing code. It provides a visual drag-and-drop interface to create scenarios (automation workflows) by linking triggers, actions, and data across multiple applications.
This guide will show you how to set up a simple scenario in Make.com and integrate it with your Verbex AI Assistant.
## Prerequisites
* A Make.com account
* Understanding of Make.com scenario setup
* Access to your Verbex AI Assistant
* Basic understanding of API integration
Let's walk through setting up a simple scenario in Make.com.
## Scenario Background
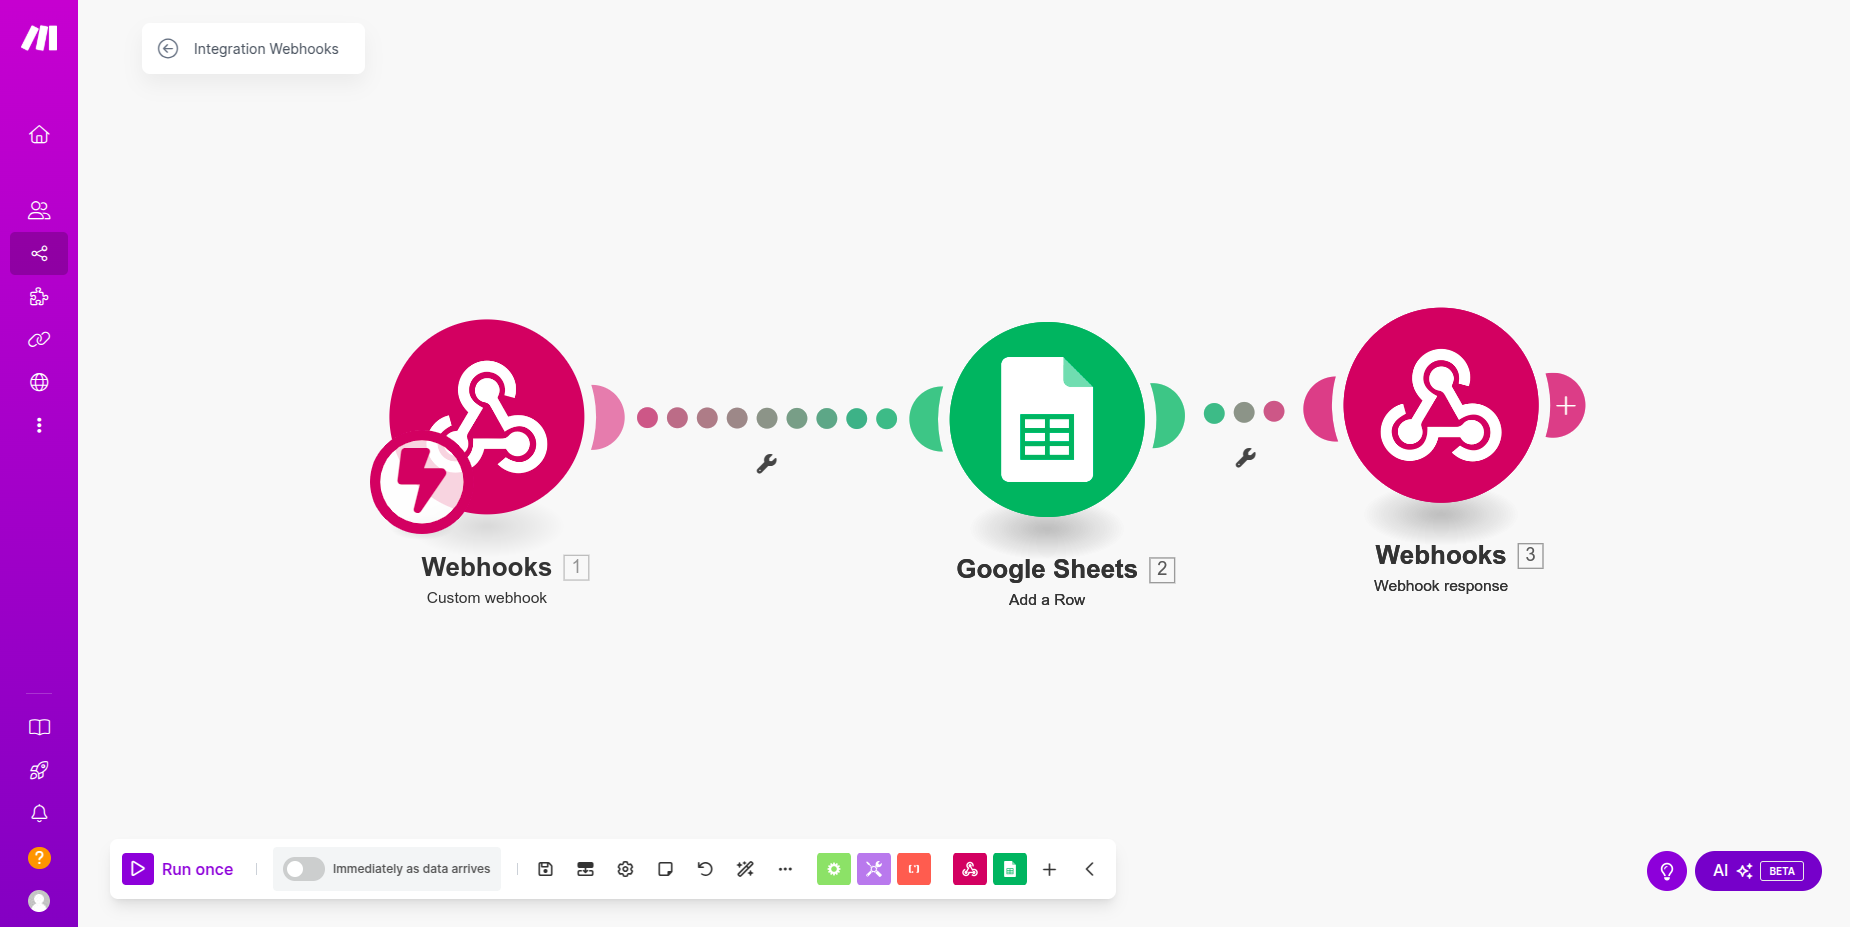
We will create a scenario that will send input to a webhook, webhook will send the input to Google Sheets and update a row in Google Sheets and then Google Sheets will send a response as webhook response.
**Scenario Flow**: Custom Webhook -> Google Sheets -> Webhook Response
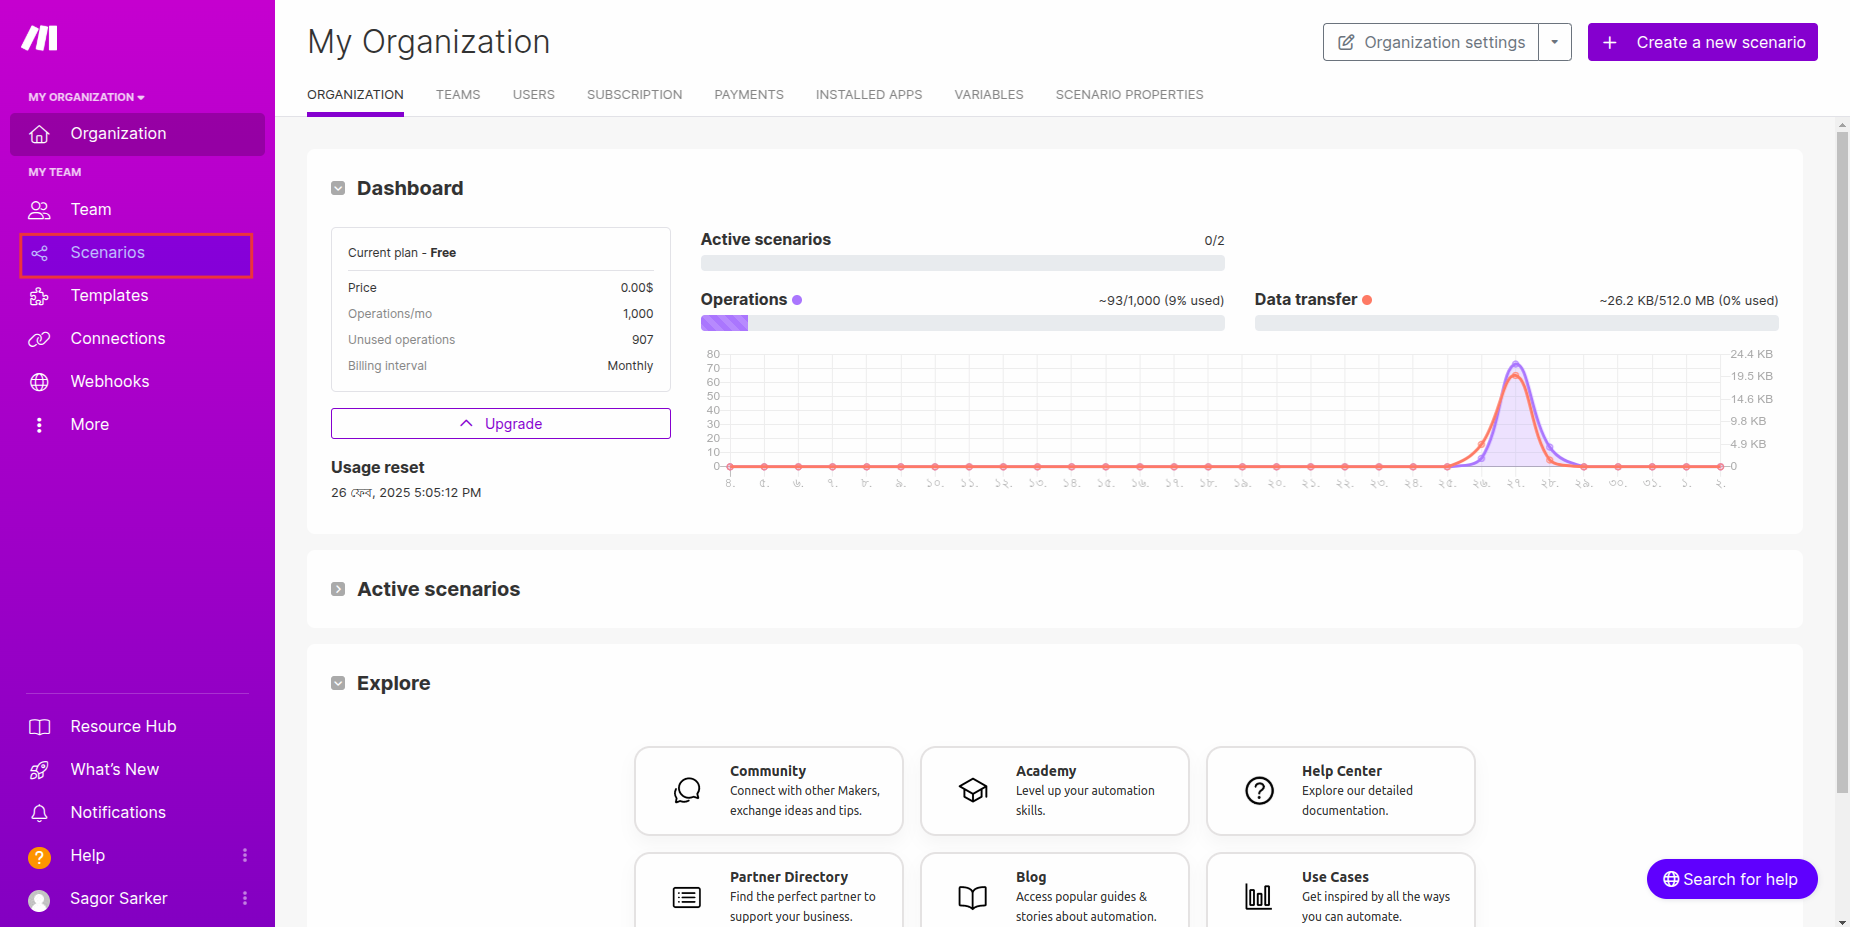
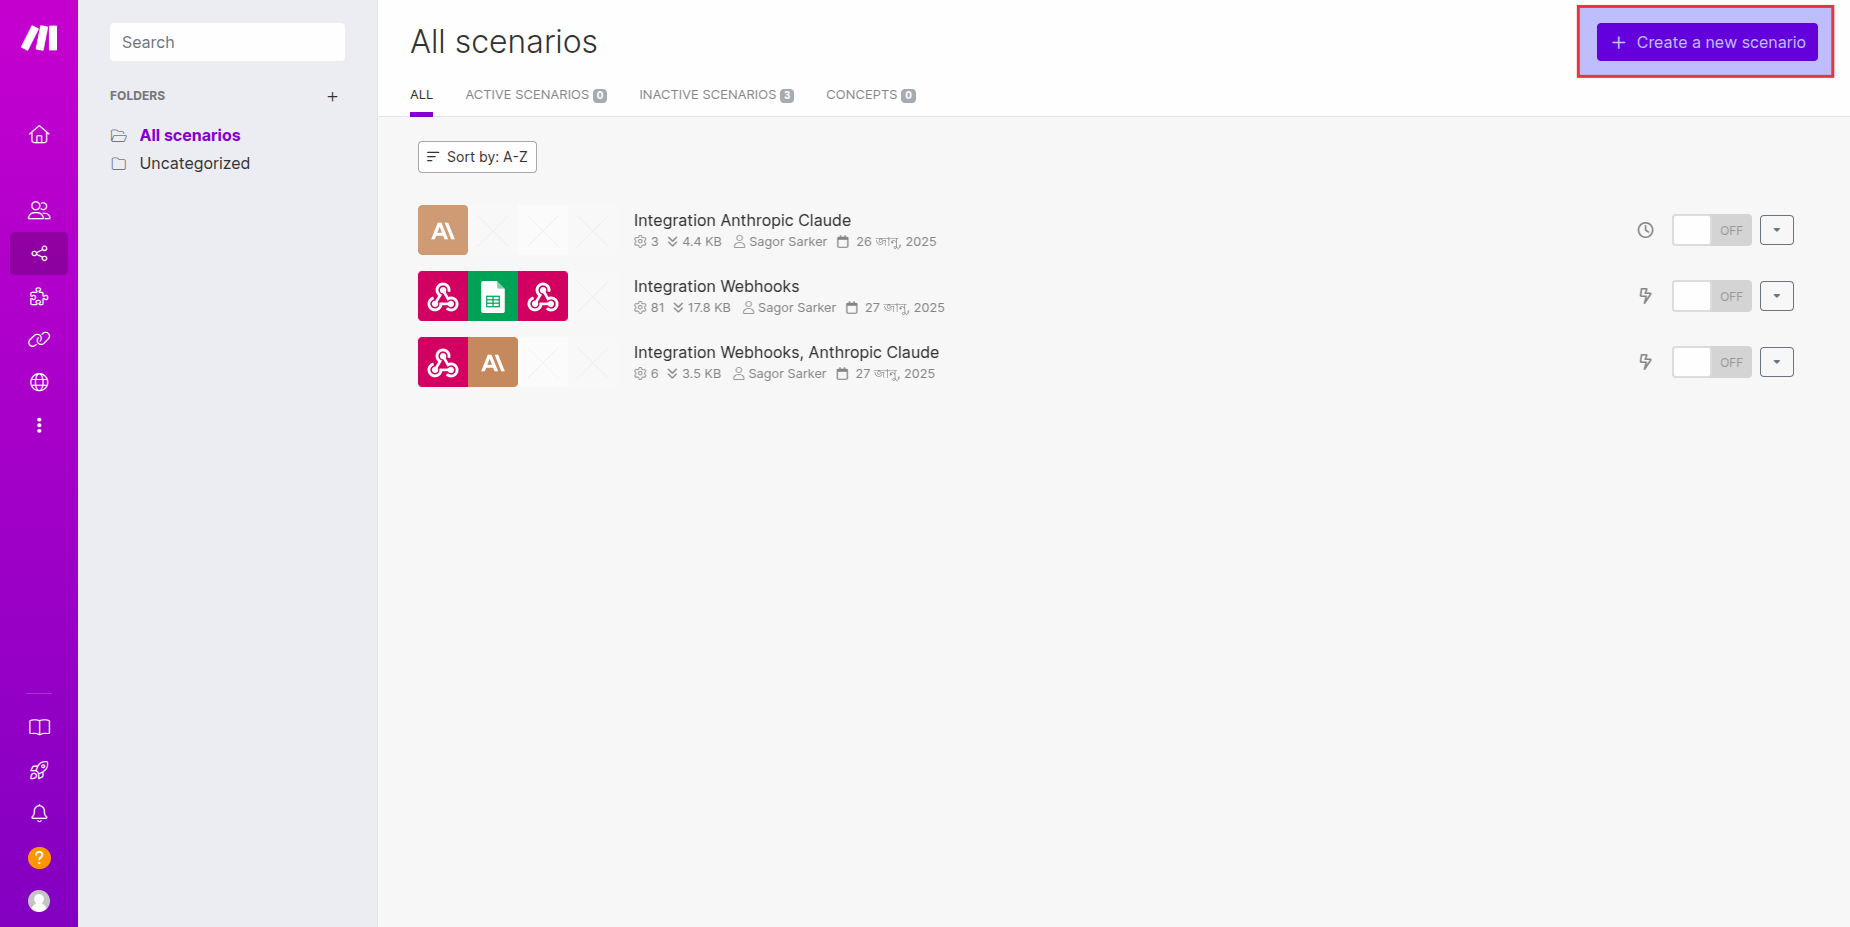
 ## Step 1: Create a Scenario
1. Log into Make.com
2. Navigate to the "Scenarios" tab
## Step 1: Create a Scenario
1. Log into Make.com
2. Navigate to the "Scenarios" tab
 3. Click the "Create Scenario" button
 4. Enter a name for your scenario
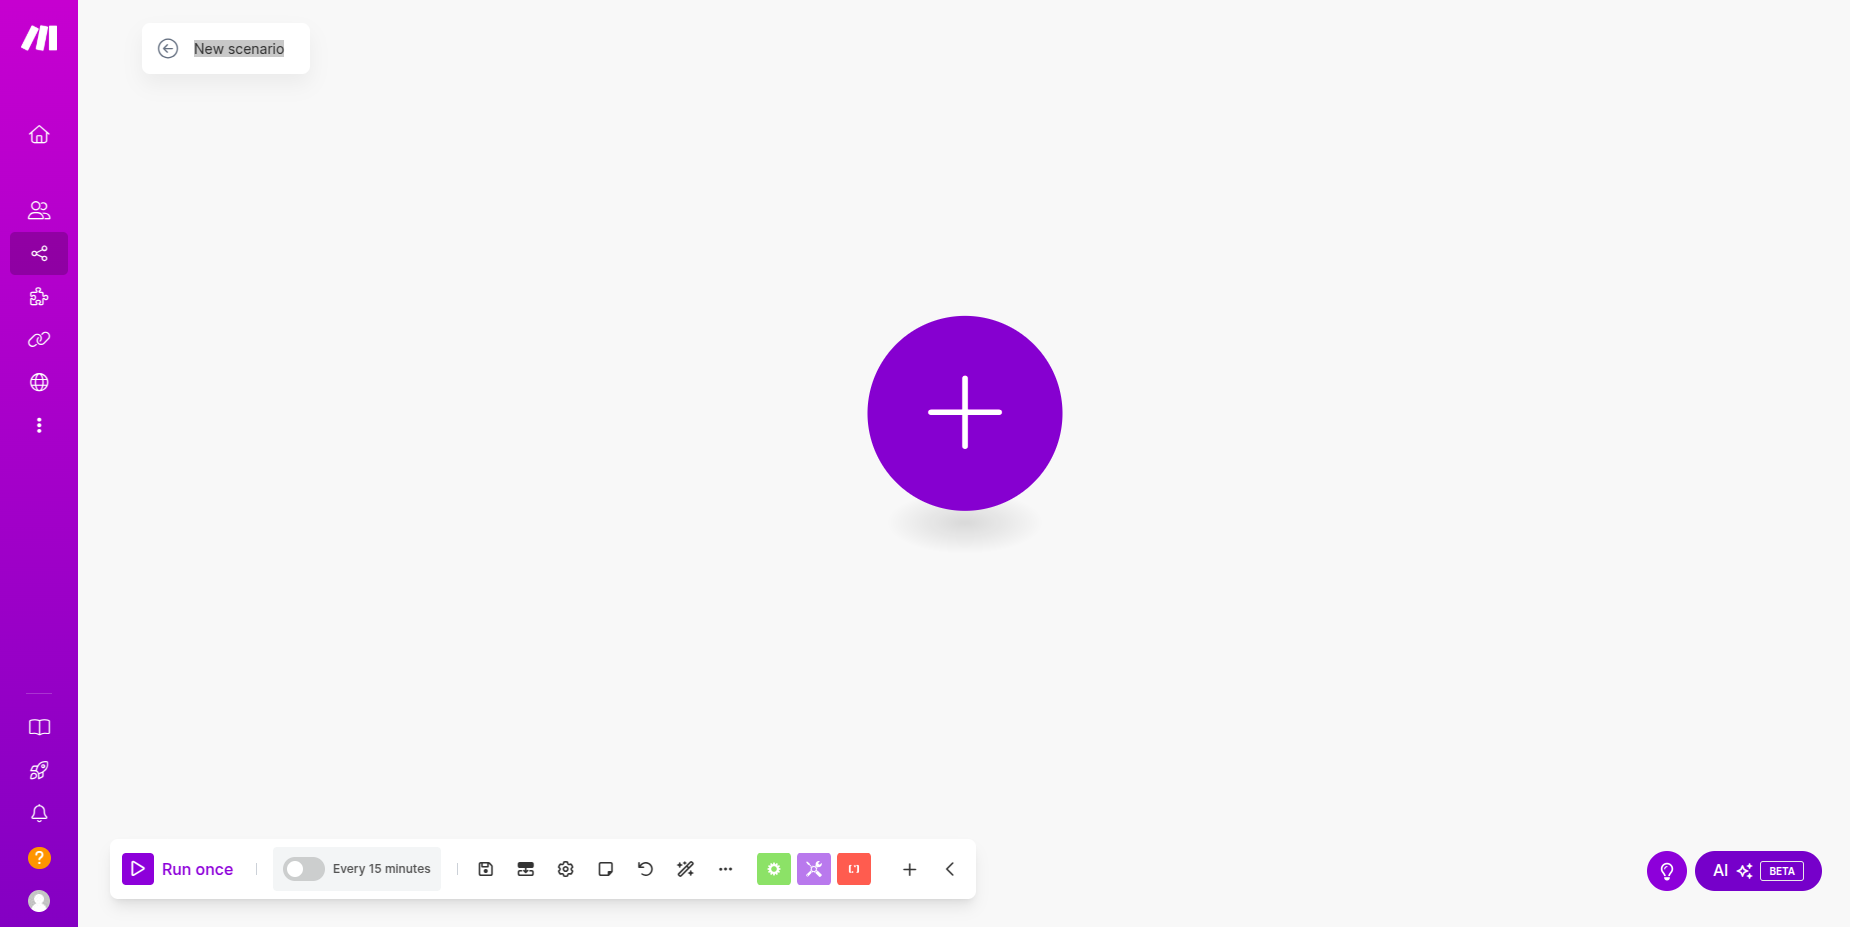 ## Step 2: Configure Scenario
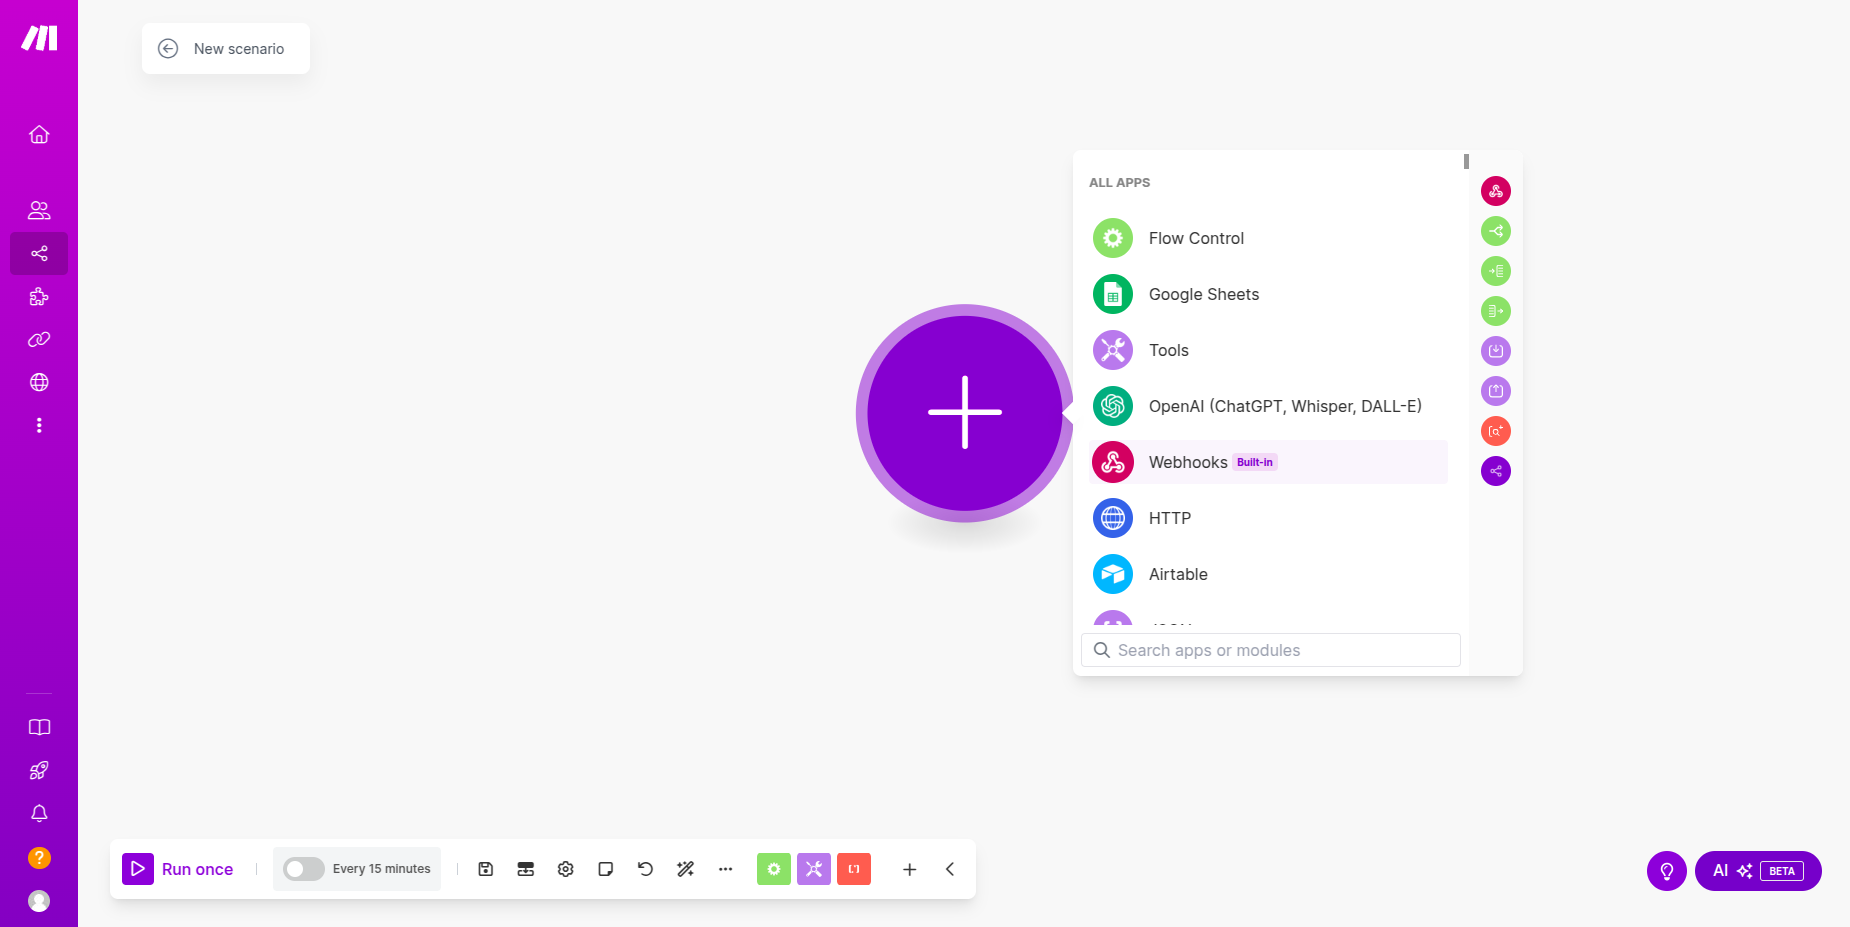
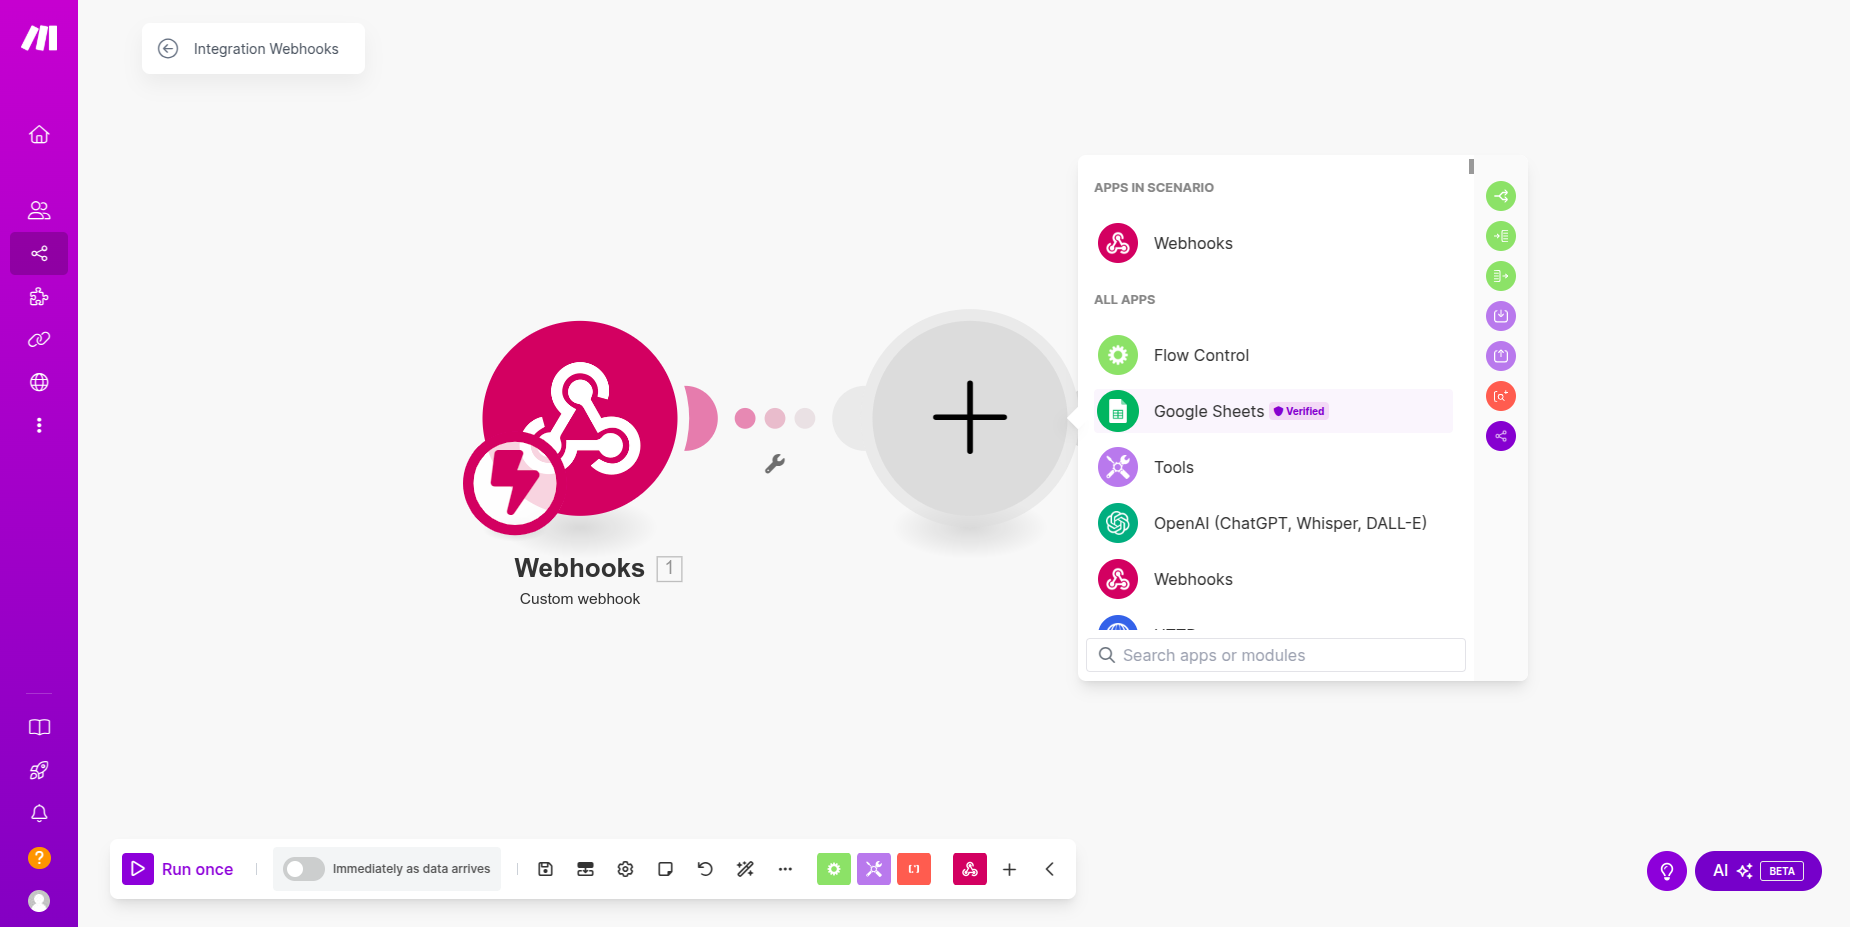
1. Click on "Add Module"
2. Select "Webhook -> Custom Webhook"
## Step 2: Configure Scenario
1. Click on "Add Module"
2. Select "Webhook -> Custom Webhook"
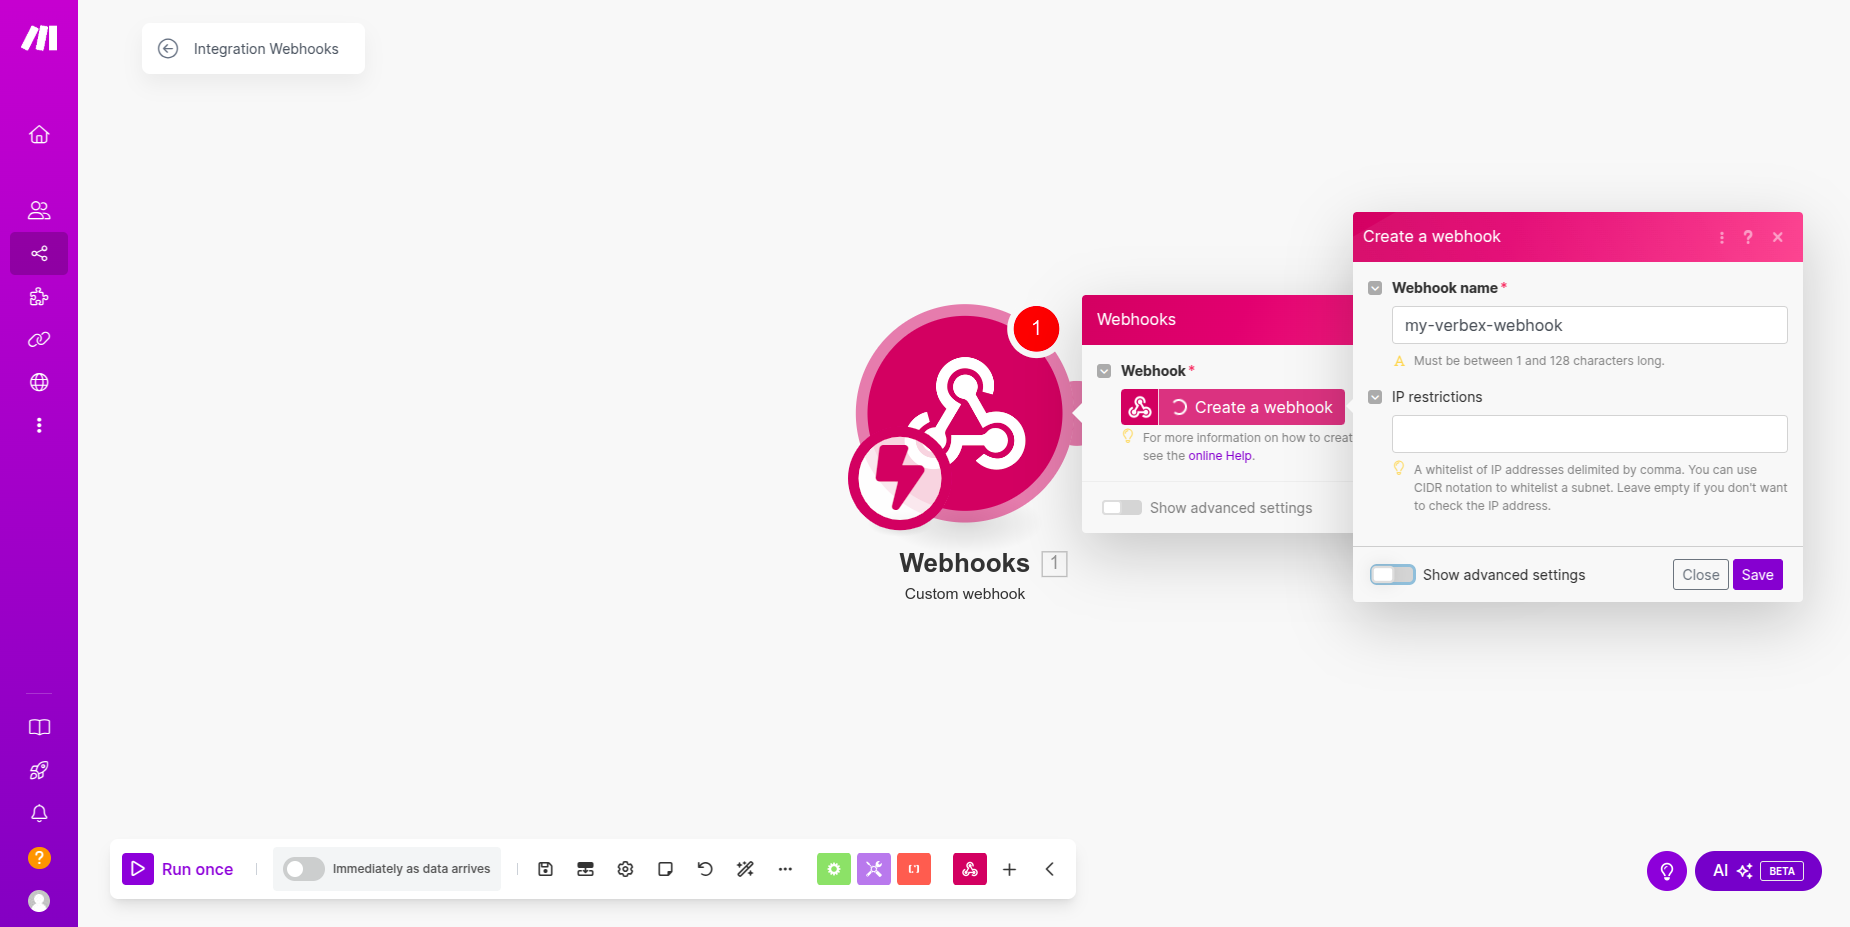
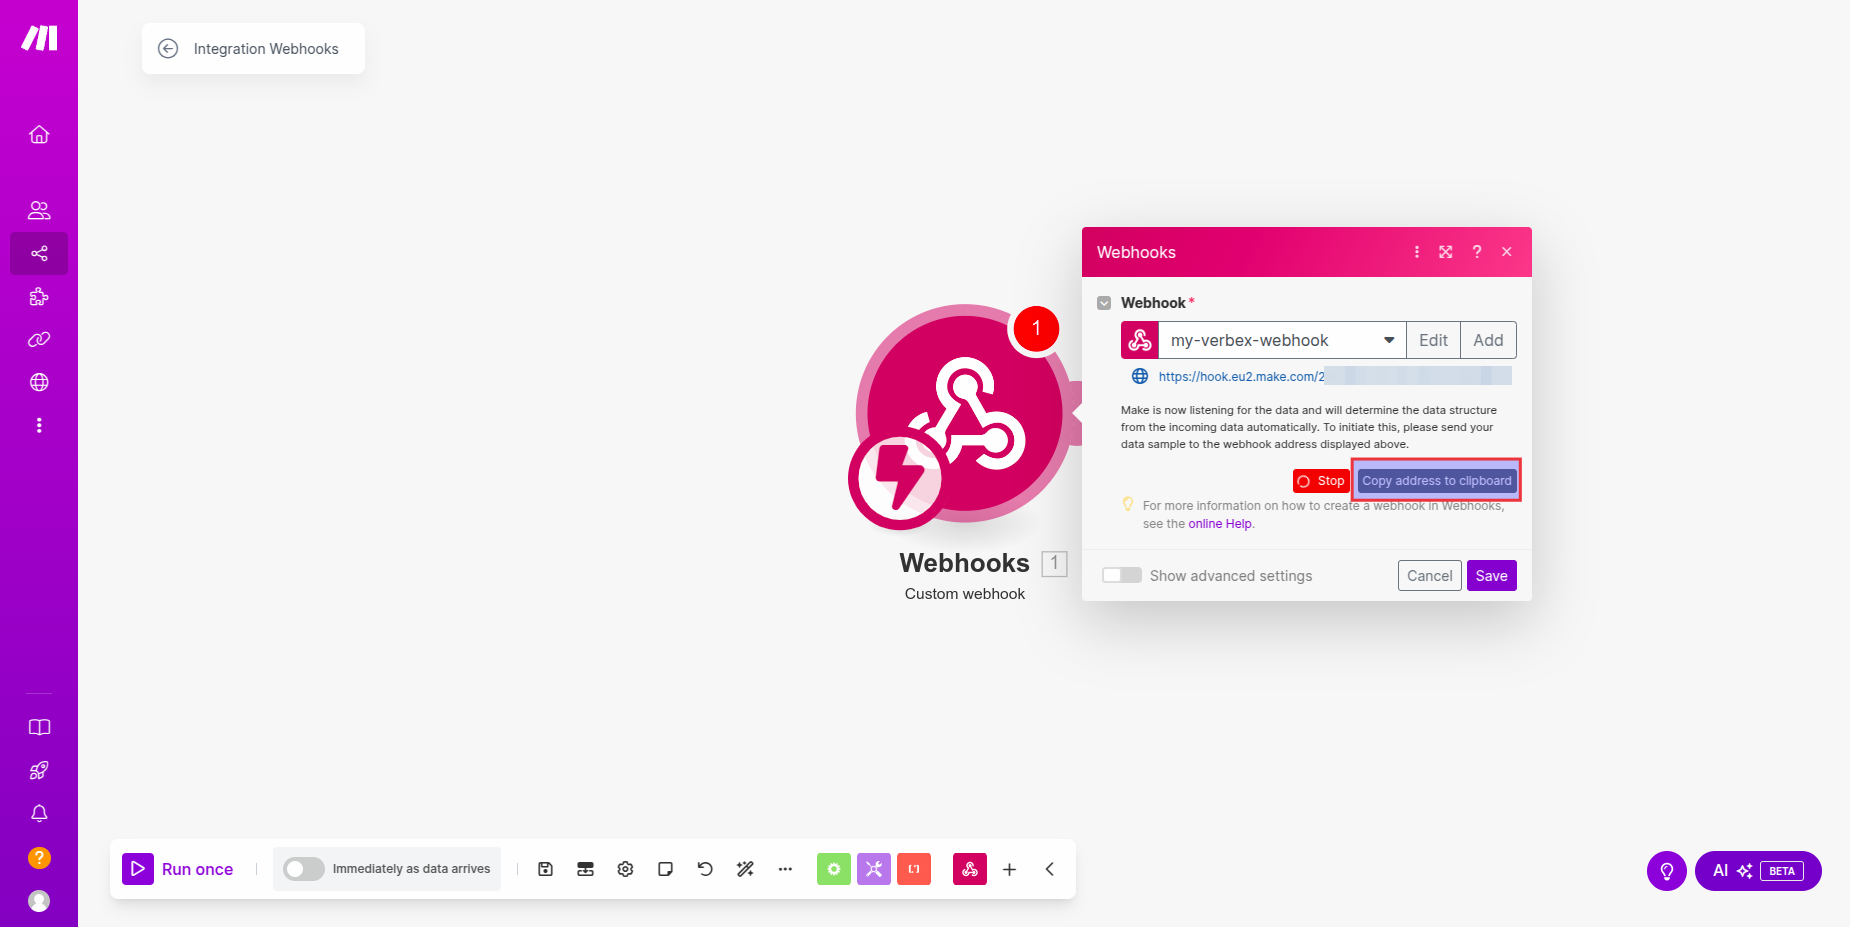
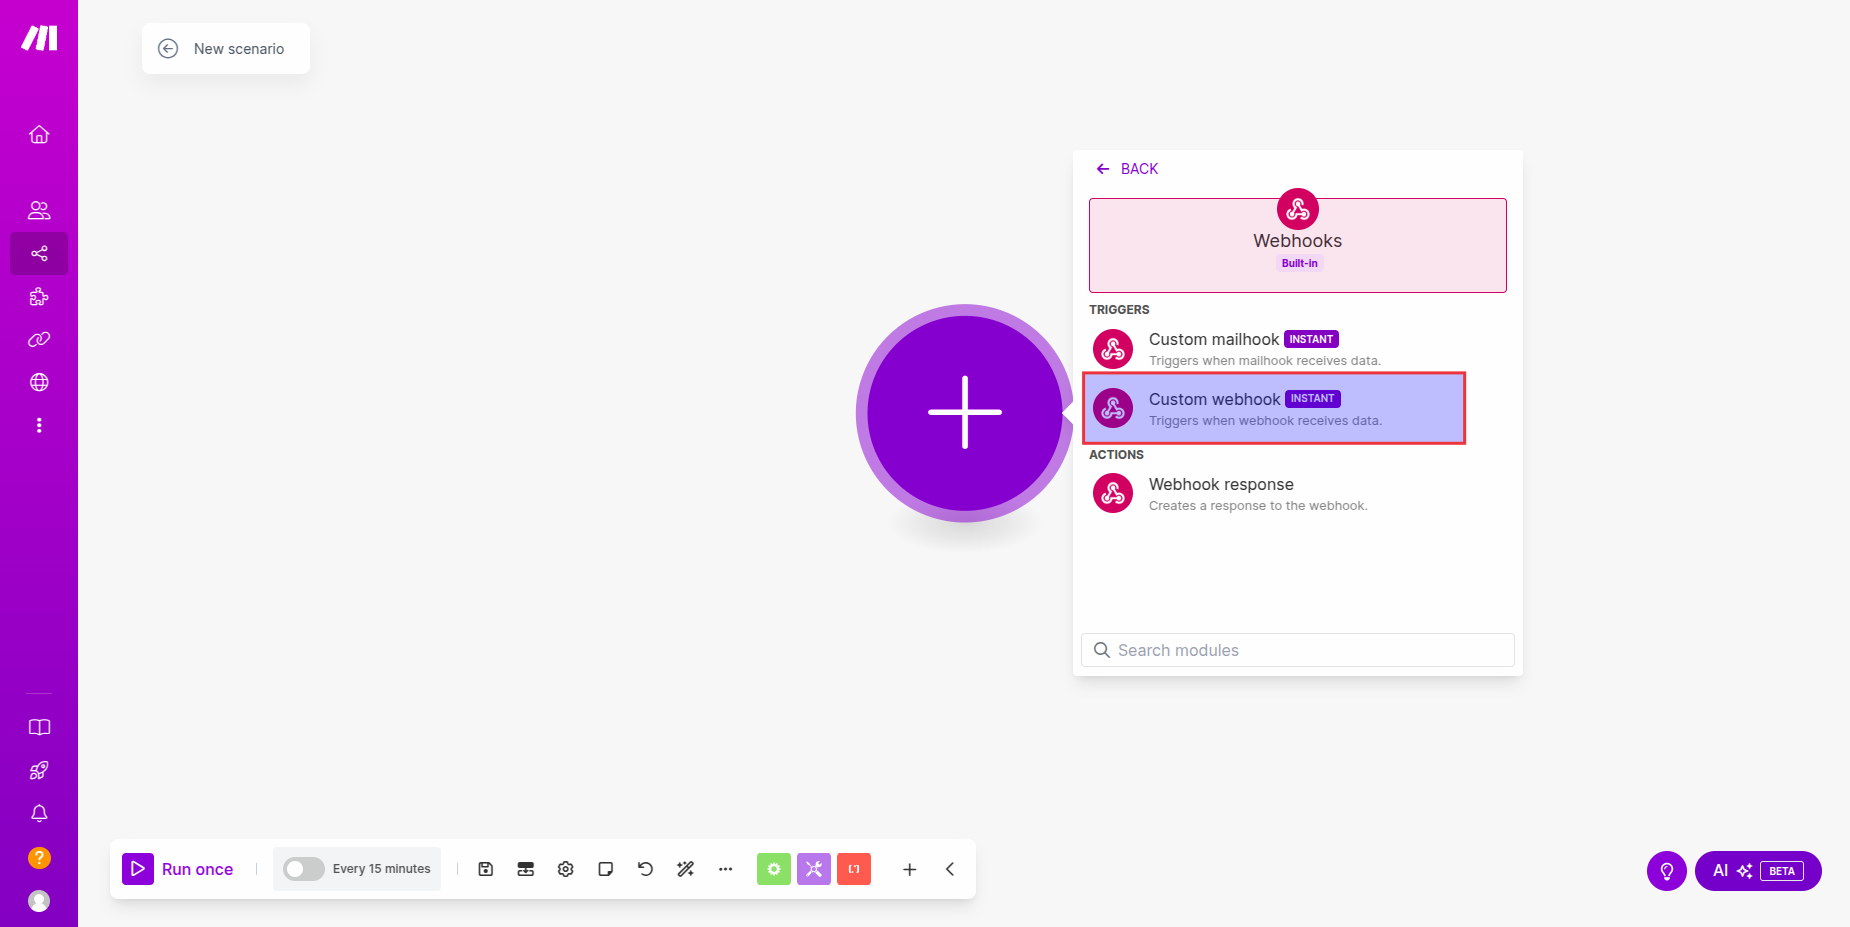 3. Configure your webhook and copy the webhook URL
 4. Create another module and select "Google Sheets -> Update Row"
 5. Configure your Google Sheets and select the sheet and row to update
 6. Create another module and select "Webhook -> Webhook Response"
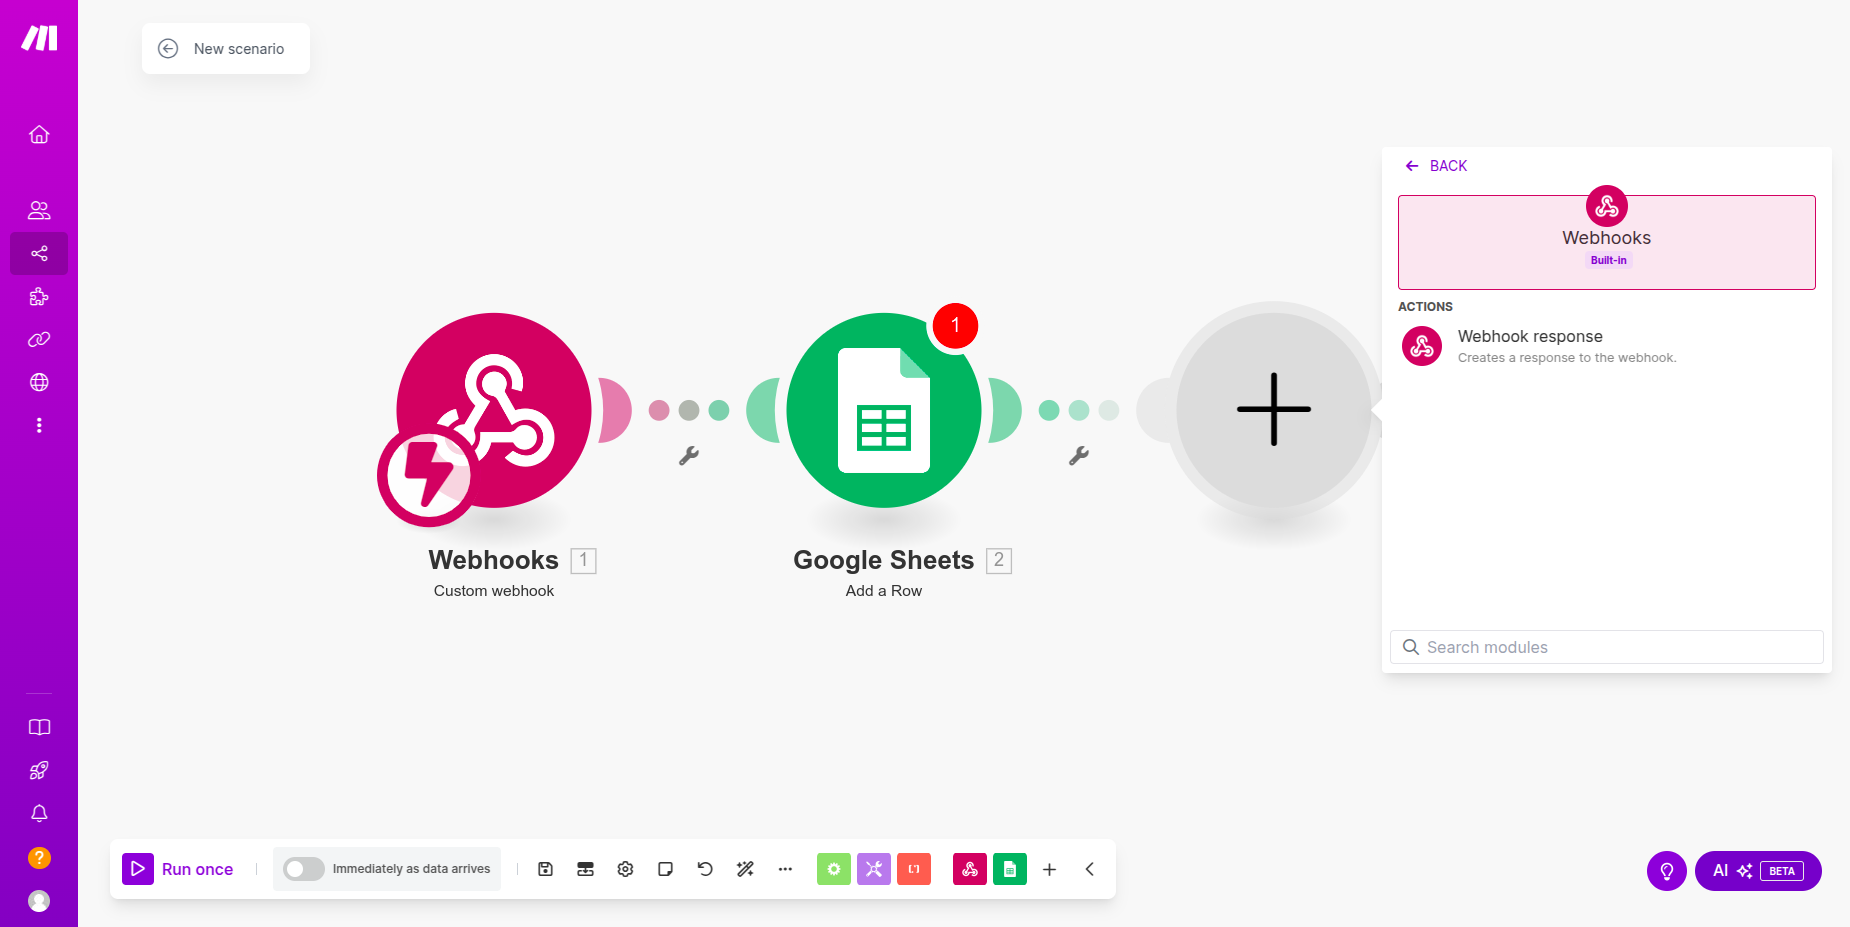 7. Configure your webhook response if necessary.
8. Save and run your scenario and the webhook will listen for the data.
9. Now you can test your scenario by webhook URL by sending data using CURL or Postman. For this you need following information:
* Webhook URL: (eg: [https://hook.eu2.make.com/example-webhook-id](https://hook.eu2.make.com/example-webhook-id))
* Body Parameters: Data you want to send through Verbex AI to webhook.
example:
```json theme={null}
{
"name": "Sagor Sarker",
"email": "sagor@example.com",
"phone_number": "1234567890"
}
```
```bash theme={null}
curl -X POST "https://hook.eu2.make.com/example-webhook-id" \
-H "Content-Type: application/json" \
-d '{
"name": "Sagor Sarker",
"email": "sagor@example.com",
"phone_number": "1234567890"
}'
```
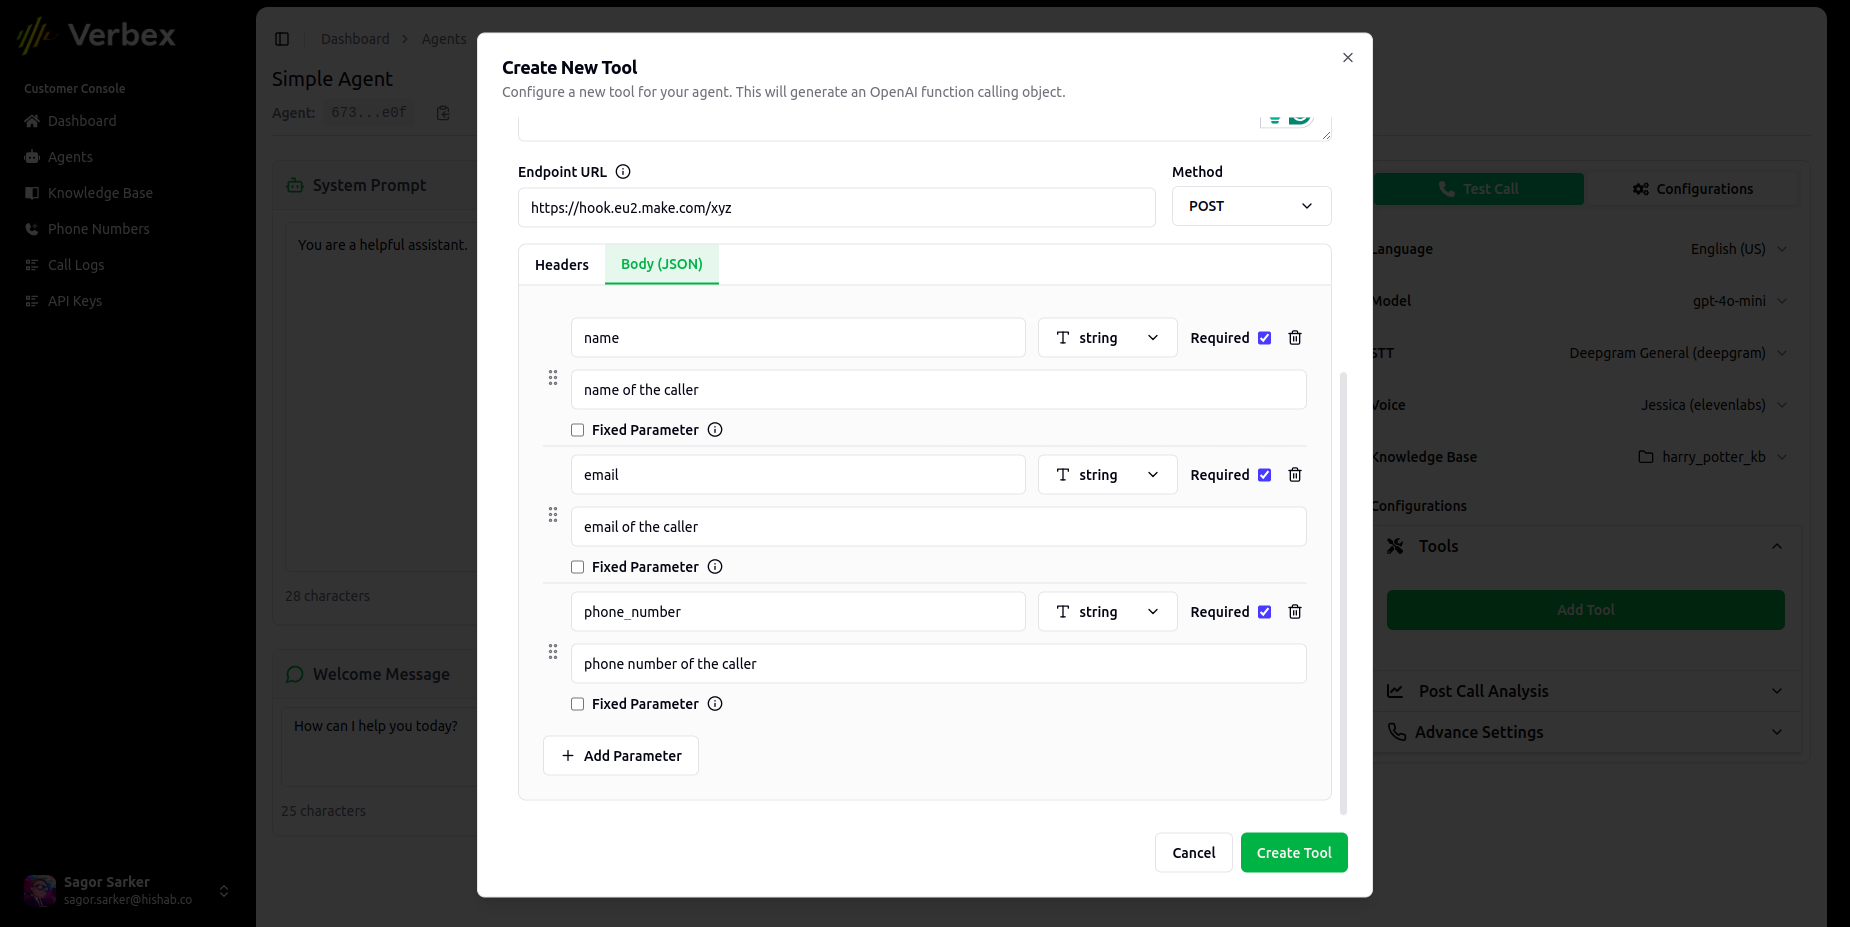
## Step 3: Connect Make Webhook with Verbex AI
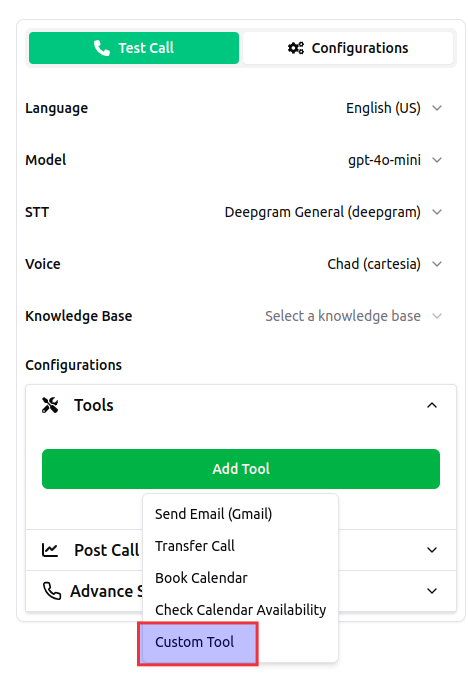
1. Go to "Add Tool -> Custom Tool"
2. Configure the tool:
* **Name**: make\_webhook
* **Description**: Make Webhook to send name, email, phone to Google Sheets
* **Endpoint URL**: Custom Webhook URL (eg: [https://hook.eu2.make.com/example-webhook-id](https://hook.eu2.make.com/example-webhook-id))
* **Method**: POST
* **Headers**: For webhook based connection no authentication is required.
7. Configure your webhook response if necessary.
8. Save and run your scenario and the webhook will listen for the data.
9. Now you can test your scenario by webhook URL by sending data using CURL or Postman. For this you need following information:
* Webhook URL: (eg: [https://hook.eu2.make.com/example-webhook-id](https://hook.eu2.make.com/example-webhook-id))
* Body Parameters: Data you want to send through Verbex AI to webhook.
example:
```json theme={null}
{
"name": "Sagor Sarker",
"email": "sagor@example.com",
"phone_number": "1234567890"
}
```
```bash theme={null}
curl -X POST "https://hook.eu2.make.com/example-webhook-id" \
-H "Content-Type: application/json" \
-d '{
"name": "Sagor Sarker",
"email": "sagor@example.com",
"phone_number": "1234567890"
}'
```
## Step 3: Connect Make Webhook with Verbex AI
1. Go to "Add Tool -> Custom Tool"
2. Configure the tool:
* **Name**: make\_webhook
* **Description**: Make Webhook to send name, email, phone to Google Sheets
* **Endpoint URL**: Custom Webhook URL (eg: [https://hook.eu2.make.com/example-webhook-id](https://hook.eu2.make.com/example-webhook-id))
* **Method**: POST
* **Headers**: For webhook based connection no authentication is required.
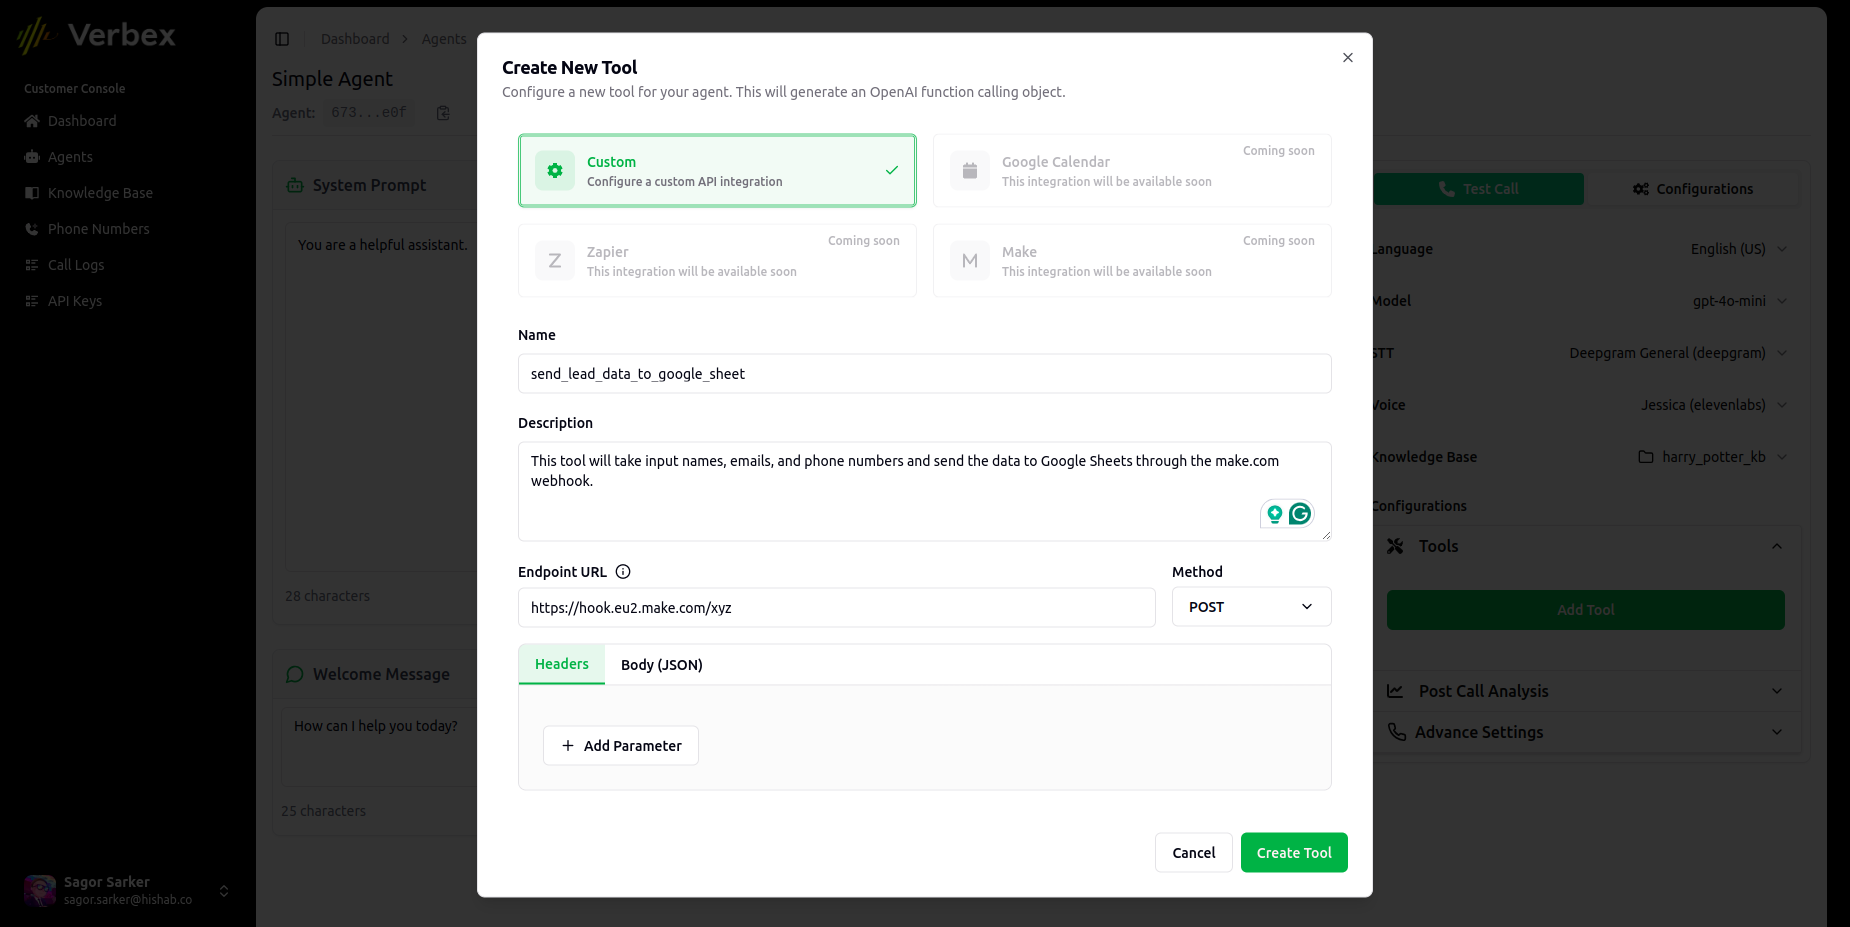 3. Configure Body Parameters: This params will be sent to Make.com and update a row in Google Sheets.
```json theme={null}
{
"name": "string",
"email": "string",
"phone": "string"
}
```
3. Configure Body Parameters: This params will be sent to Make.com and update a row in Google Sheets.
```json theme={null}
{
"name": "string",
"email": "string",
"phone": "string"
}
```
 4. Test your custom tool in Verbex AI webcall and make sure everything is working as expected in Make.com scenario.
For more details, refer to the [Make.com Documentation](https://www.make.com/en/help/app/make).
4. Test your custom tool in Verbex AI webcall and make sure everything is working as expected in Make.com scenario.
For more details, refer to the [Make.com Documentation](https://www.make.com/en/help/app/make).