> ## Documentation Index
> Fetch the complete documentation index at: https://docs.verbex.ai/llms.txt
> Use this file to discover all available pages before exploring further.
# Zapier Webhook Integration
> Connect your Verbex AI Assistant with Zapier Zap as a custom tool
**What you'll learn**
* How to set up Zapier Zap
* How to create a Zapier Webhook
* How to integrate Zapier with Verbex Platform
* How to test and verify the integration
[Zapier](https://zapier.com/) is a platform that allows you to automate tasks across different apps. It provides a visual interface to create automated workflows by connecting triggers, actions, and data across multiple applications.
## Prerequisites
* A Zapier account
* A Verbex account
* Understanding of Zapier Zap
* Understanding of Verbex Agent and Custom Tools
## Zap Summary
We will create a Zapier Zap to send data to a webhook and then to Google Sheets.
**Zapier Flow**: Webhook -> Google Sheets
## Create a Zapier Zap
1. Go to [Zapier](https://zapier.com/) and sign in.
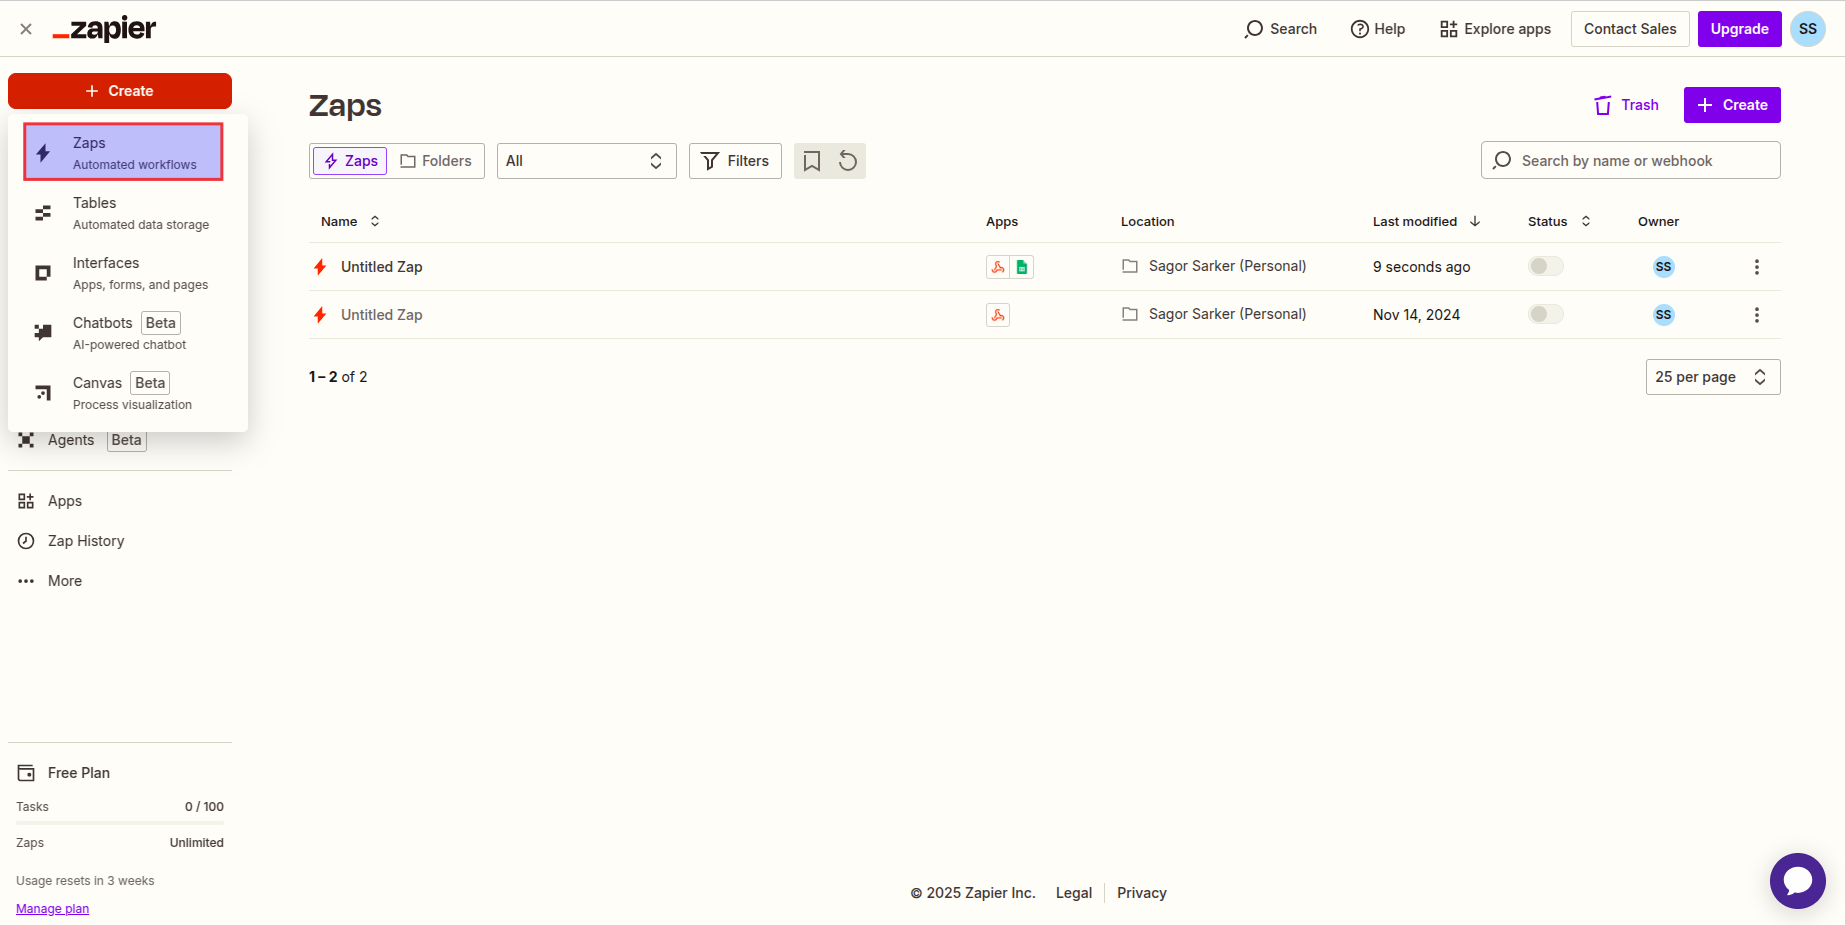
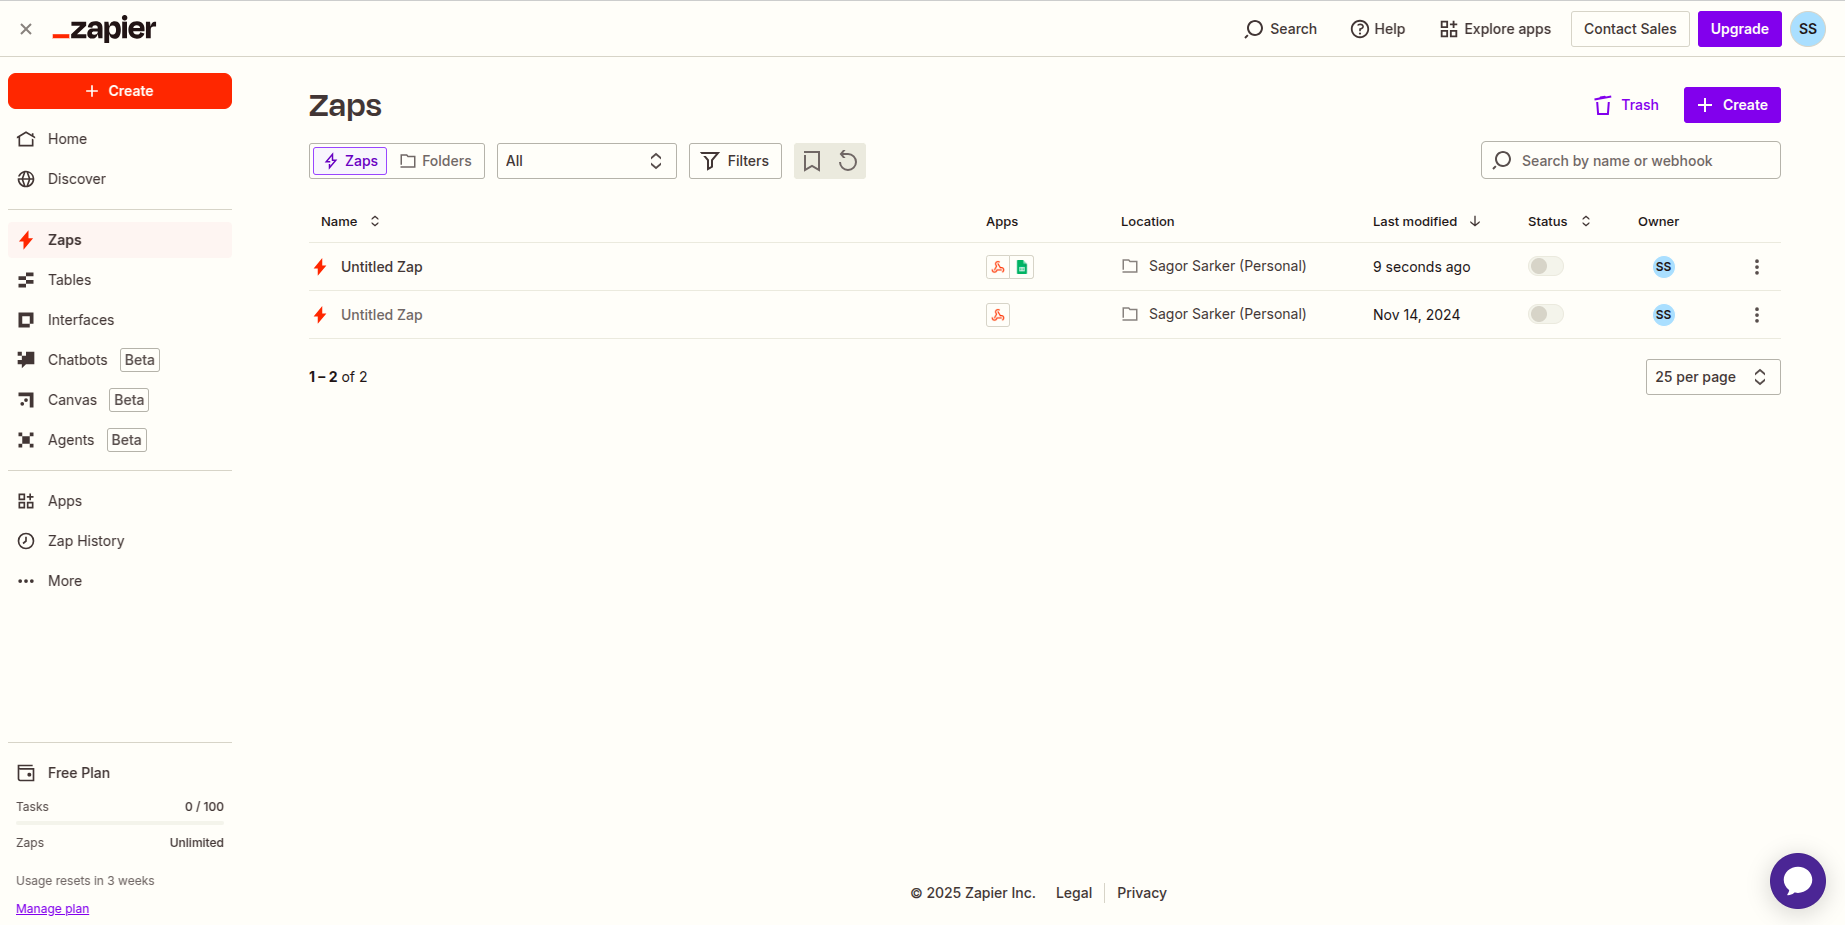 2. Click on the "Create a Zap" button.
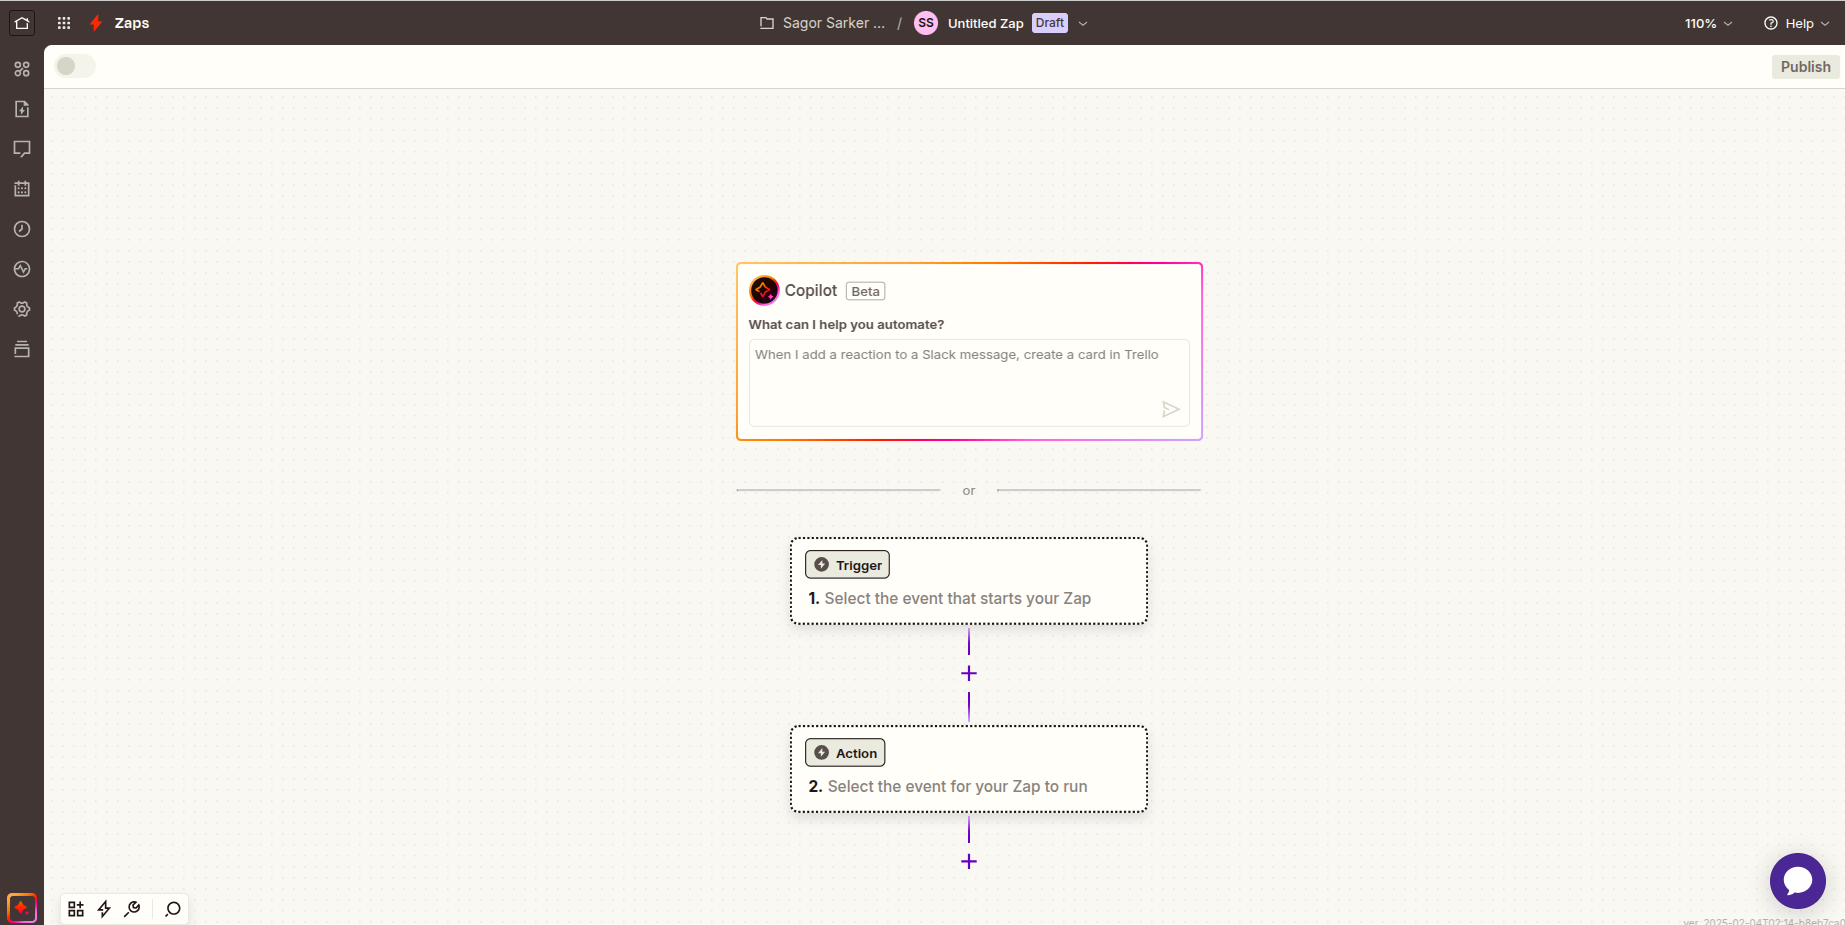
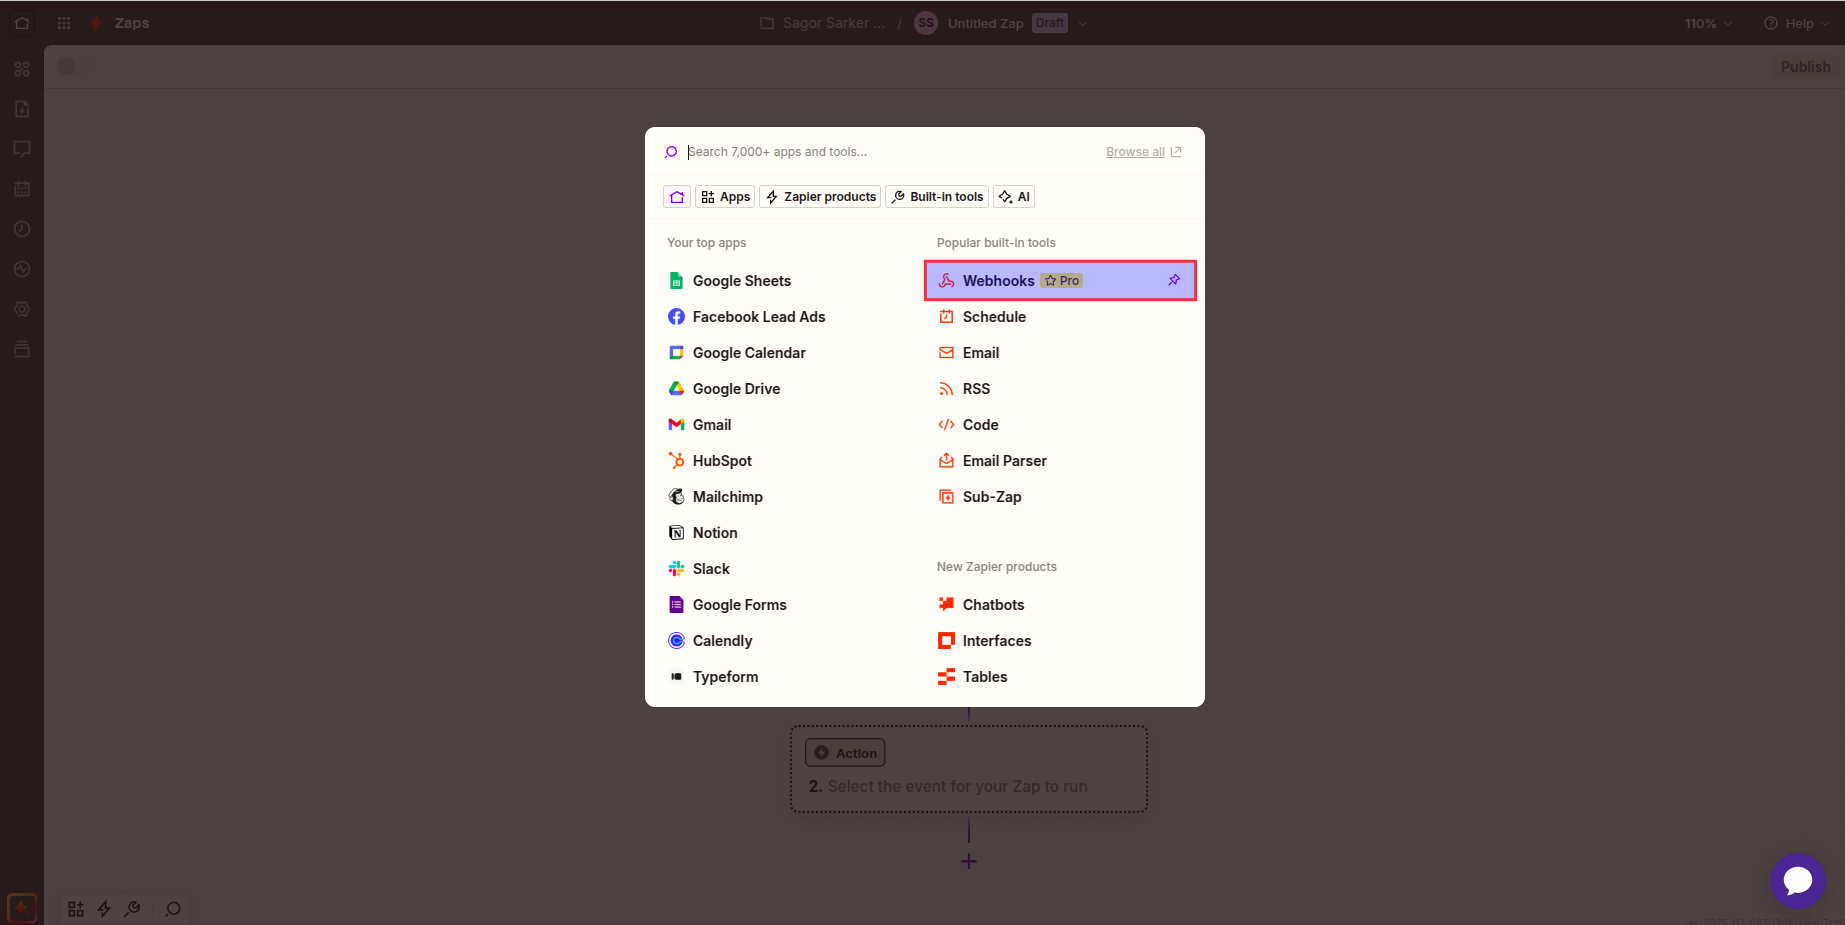
 3. Select "Webhook" as the trigger. Setup the trigger to listen for a request.
 4. Configure the webhook trigger event to "Catch Hook"
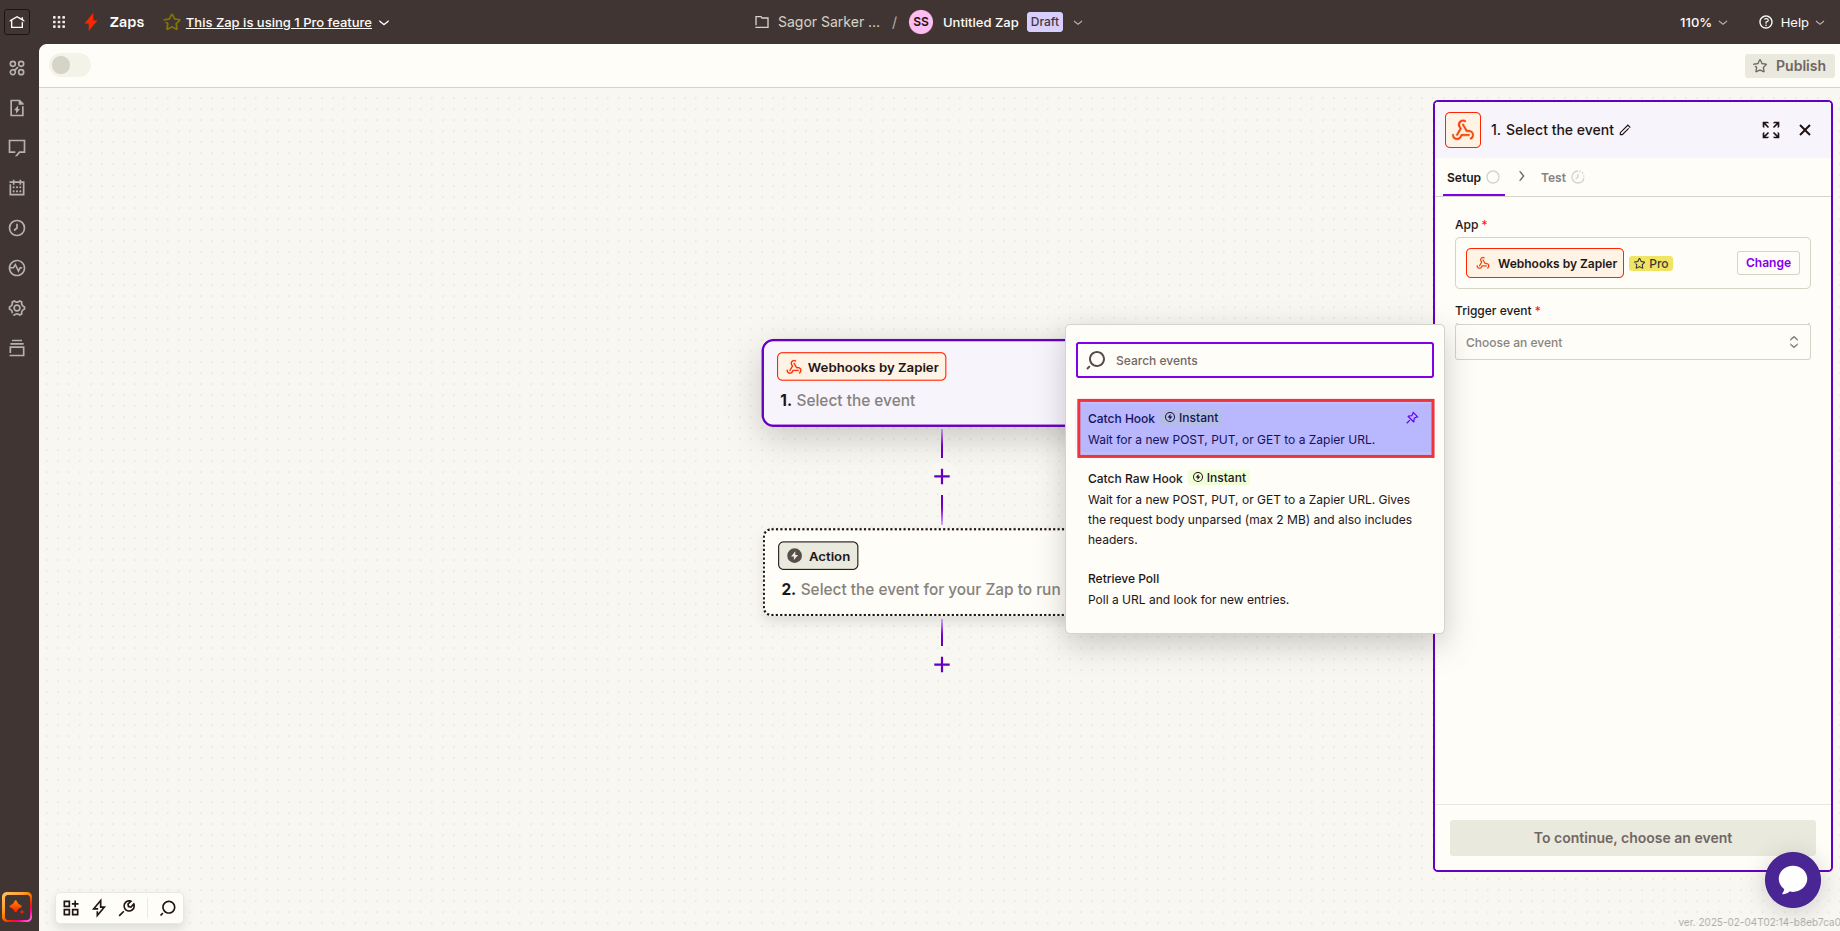 5. After configuring you will get a webhook URL. Copy it for later use.
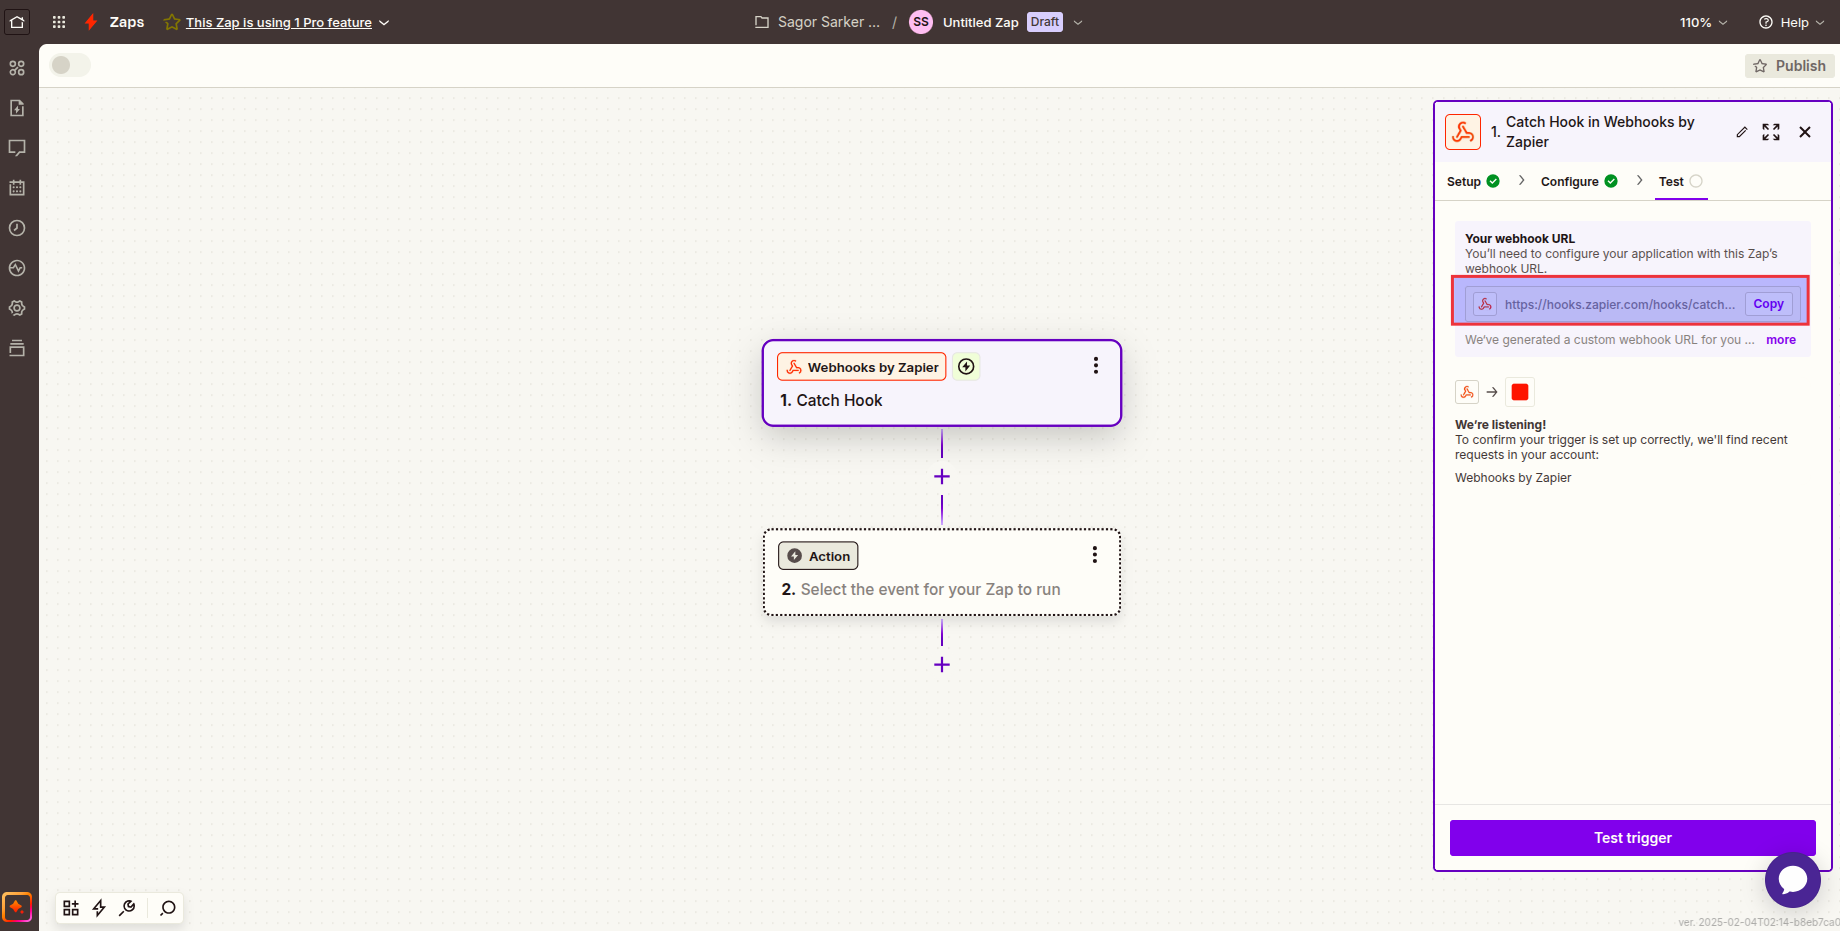 6. Now test the webhook by sending a request to the URL. Here is an example CURL request:
```bash Send data to webhook theme={null}
curl -X POST "https://hooks.zapier.com/hooks/xyz" \
-H "Content-Type: application/json" \
-d '{"name": "Sagor3", "email": "sagor3@gmail.com"}'
```
```json Response from webhook theme={null}
{
"attempt": "0194d08d-fc38-c8c0-482e-7e202b923762",
"id": "0194d08d-fc38-c8c0-482e-7e202b923762",
"request_id": "0194d08d-fc38-c8c0-482e-7e202b923762",
"status": "success"
}
```
You can see the send data in Webhook test section.
6. Now test the webhook by sending a request to the URL. Here is an example CURL request:
```bash Send data to webhook theme={null}
curl -X POST "https://hooks.zapier.com/hooks/xyz" \
-H "Content-Type: application/json" \
-d '{"name": "Sagor3", "email": "sagor3@gmail.com"}'
```
```json Response from webhook theme={null}
{
"attempt": "0194d08d-fc38-c8c0-482e-7e202b923762",
"id": "0194d08d-fc38-c8c0-482e-7e202b923762",
"request_id": "0194d08d-fc38-c8c0-482e-7e202b923762",
"status": "success"
}
```
You can see the send data in Webhook test section.
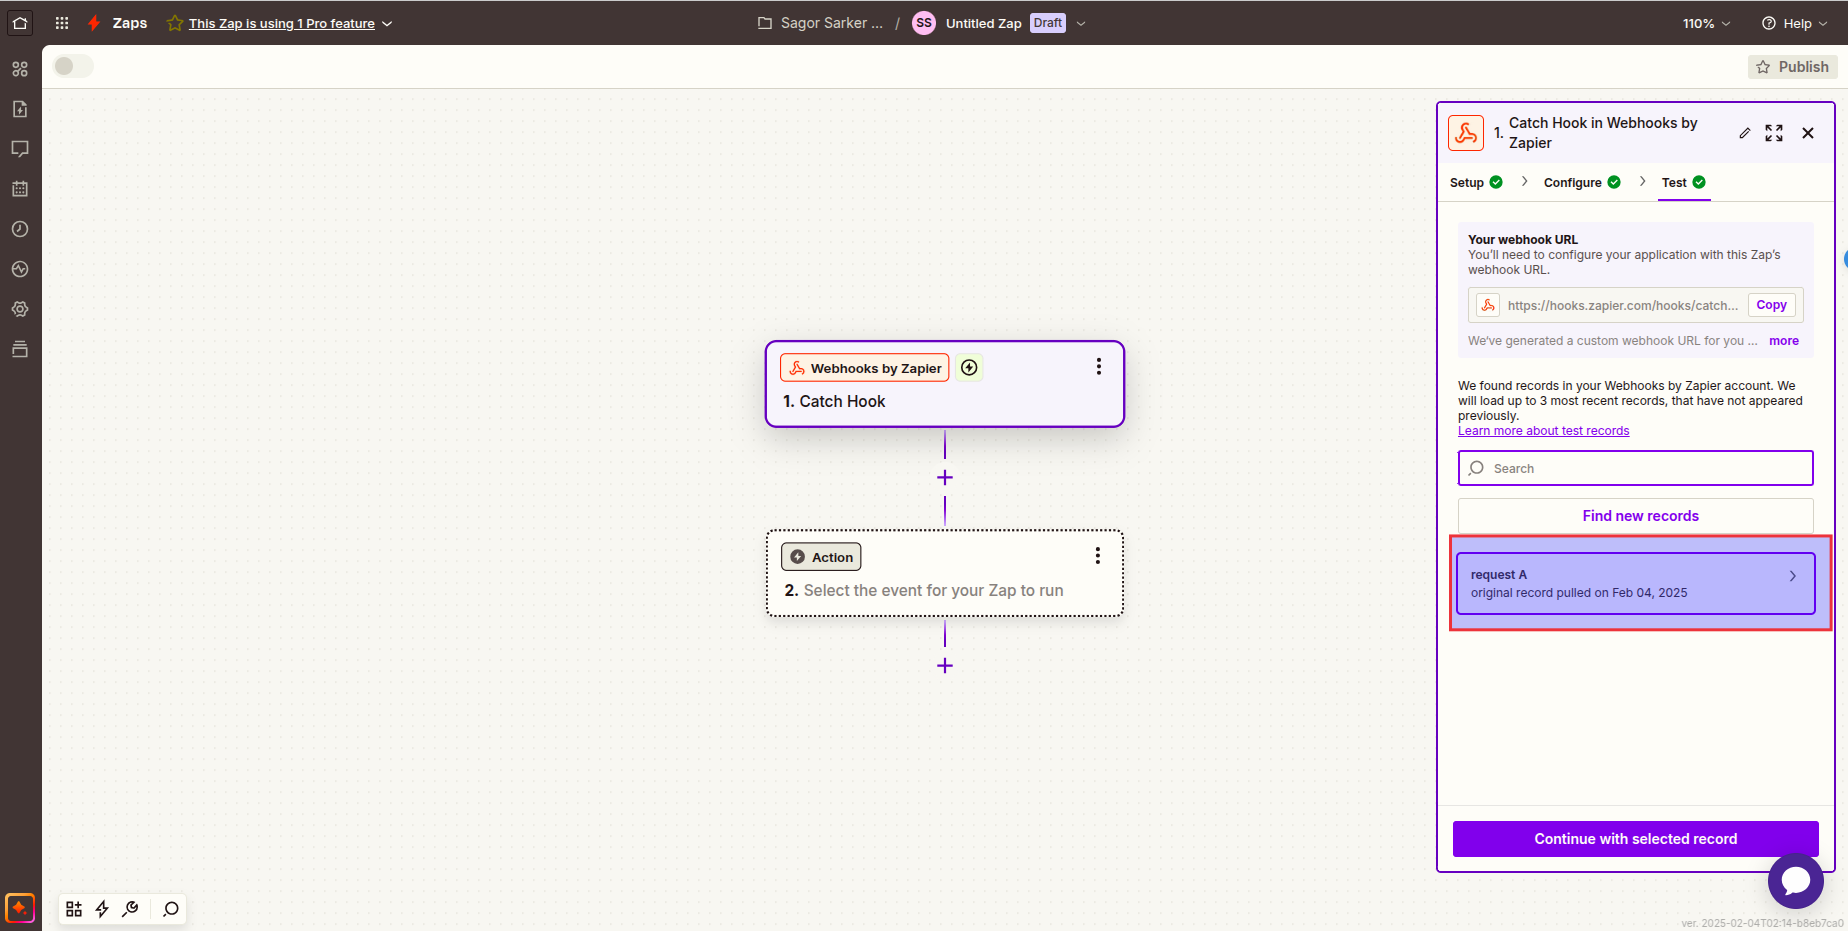 7. Now add another trigger "Google Sheets"
 8. Configure it "Create Spreadsheet Row(s)" as the trigger.
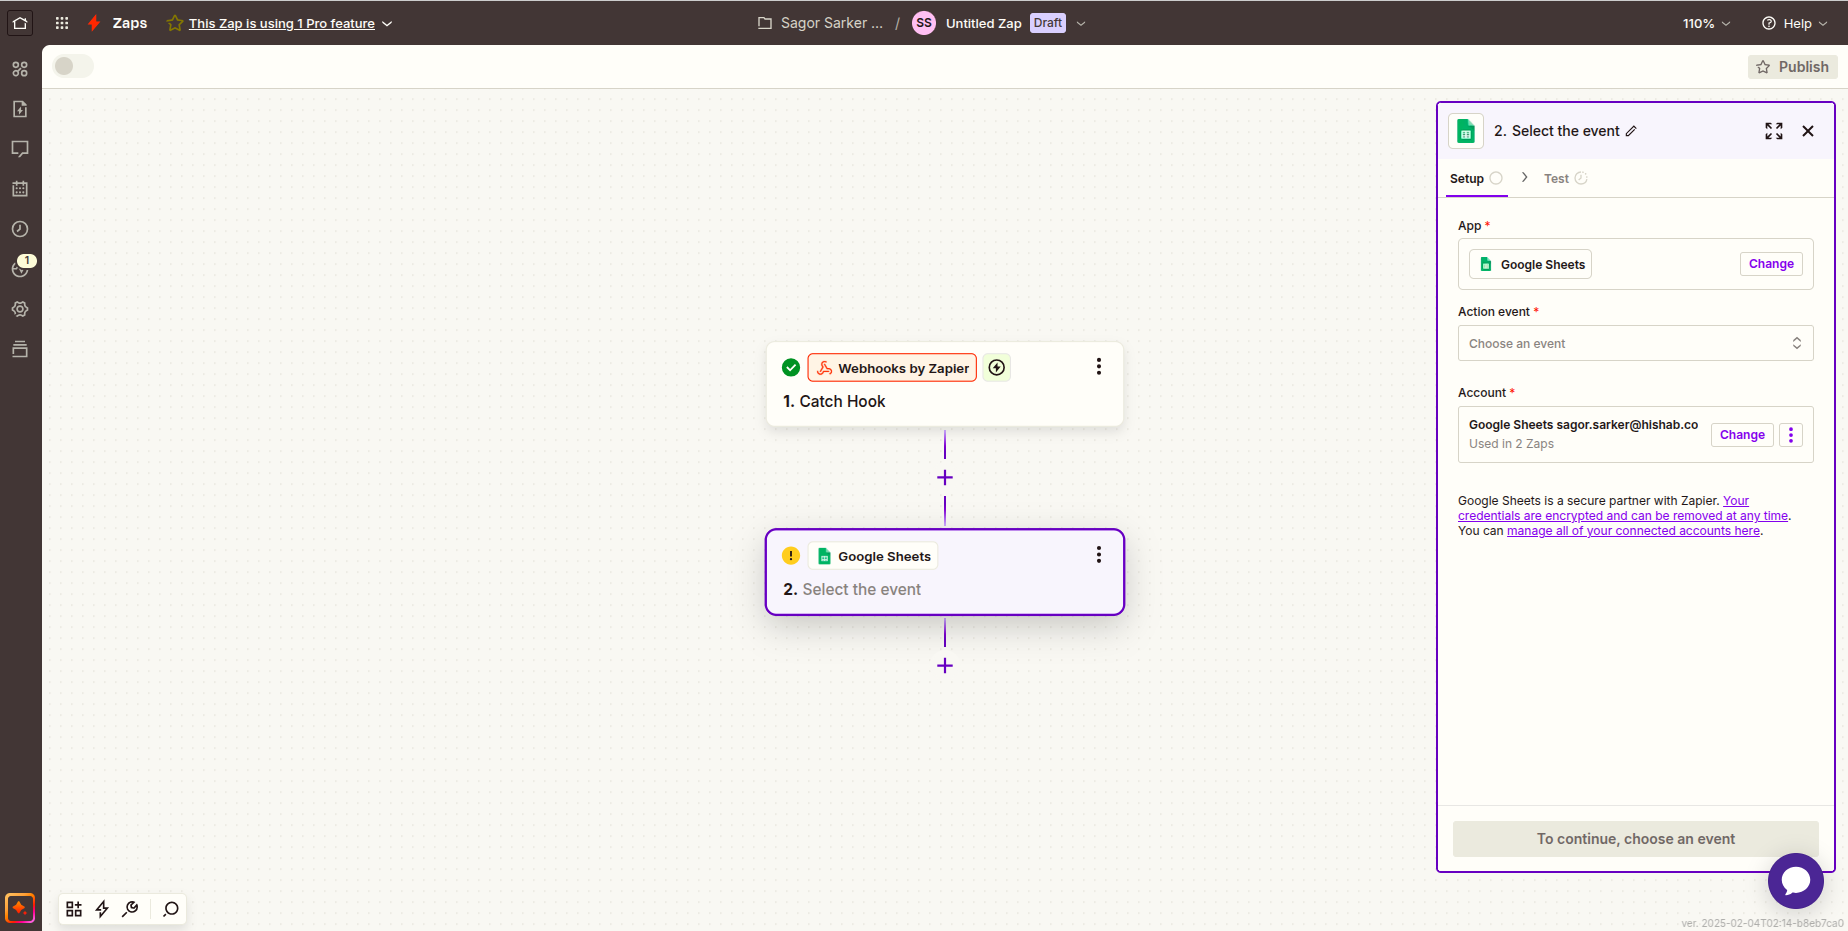
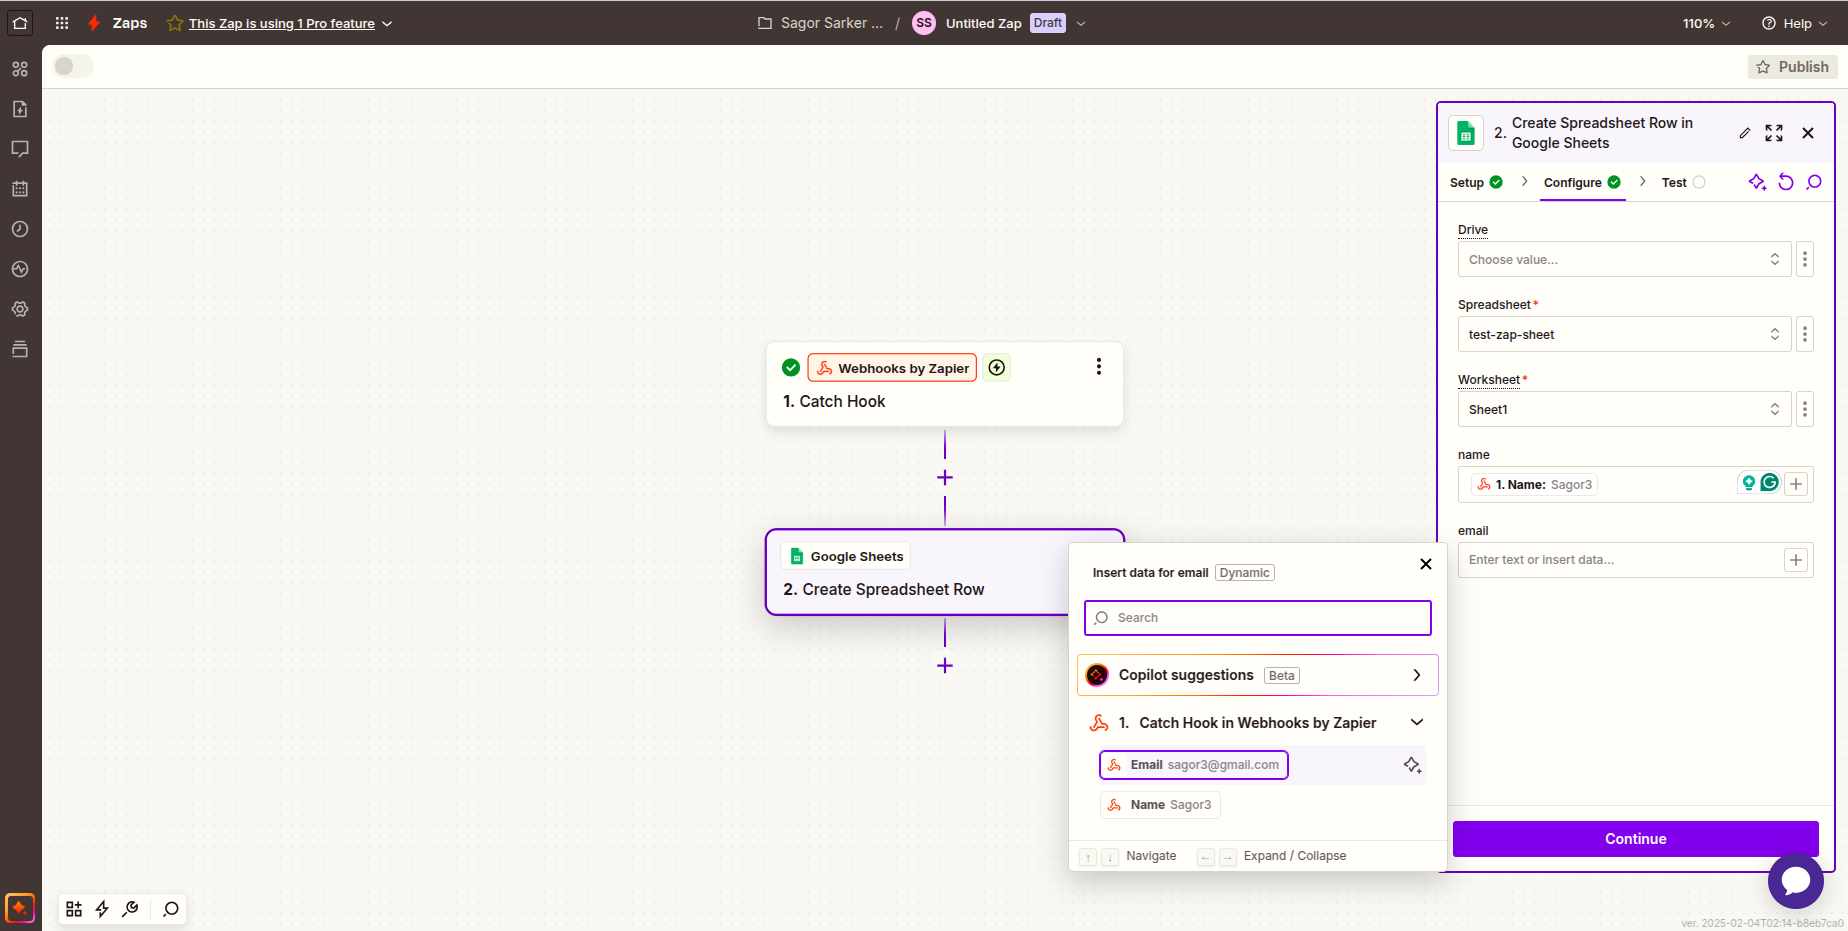
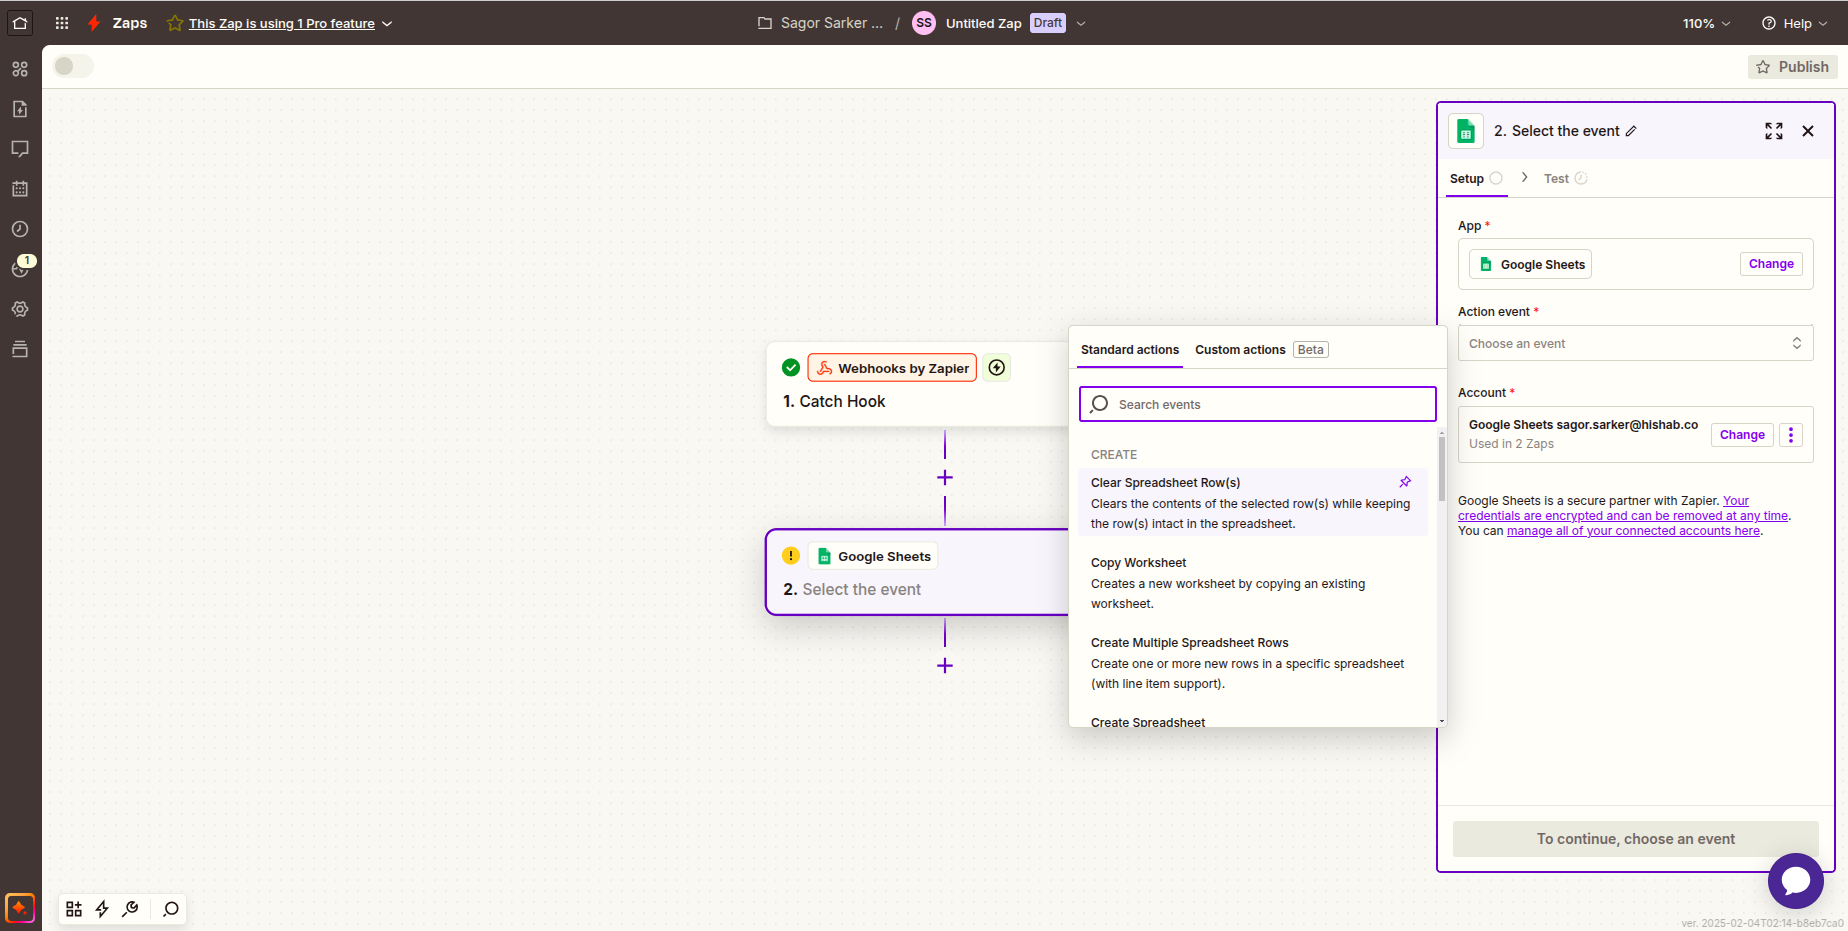 9. Configure it more with your Google Sheet, sheet name, column names etc. Remember while filling the column you can point the value from webhook data.
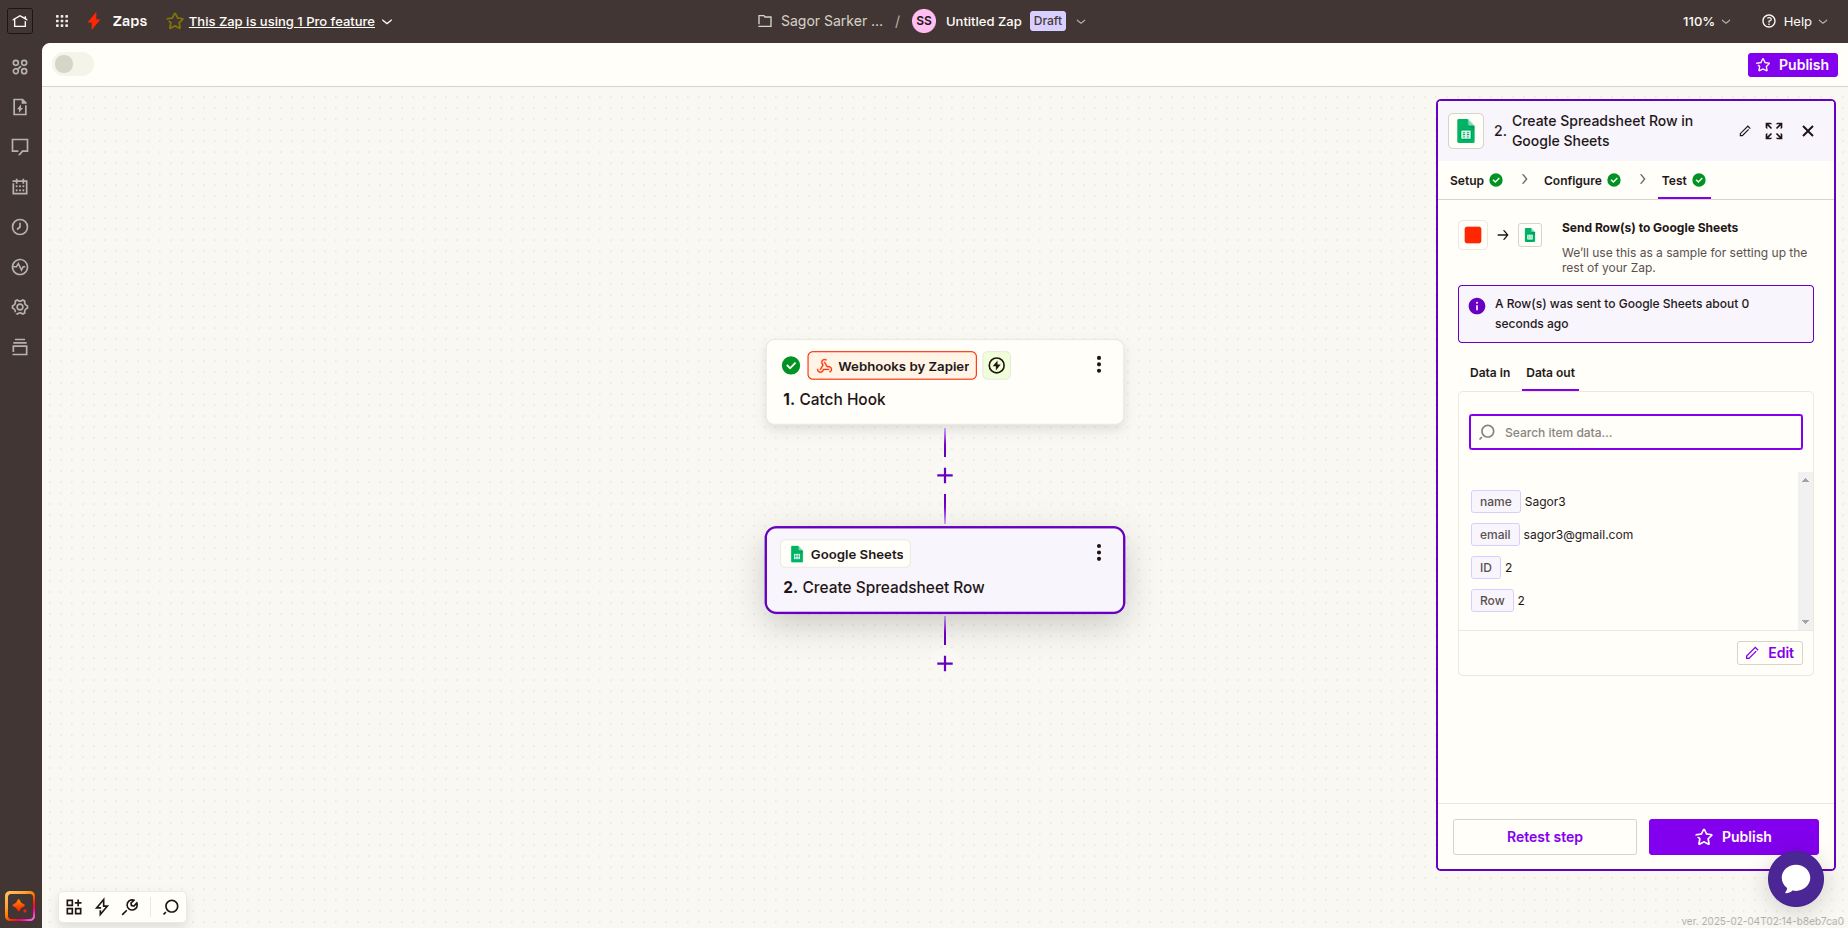
 10. Now test the zap by clicking on the "Test" button. You can see the test results in "Data in" and "Data out" section.
 11. Now you can see the data in your Google Sheet.
 ## Zapier Webhook Integration with Verbex
1. Go to your Verbex agent page. Select your agent to configure the tool.
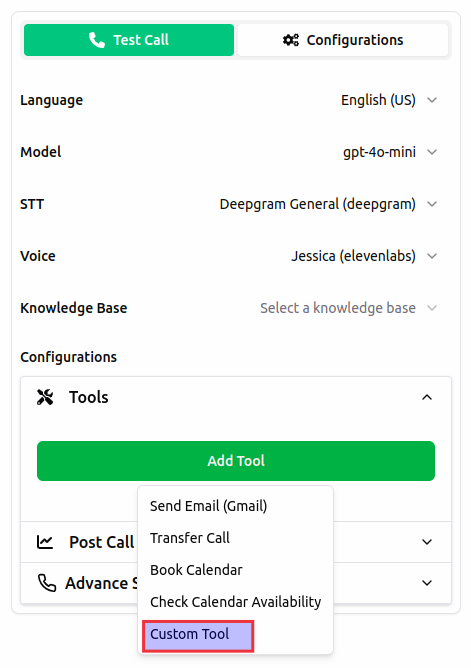
2. Click on the "Tools" tab and select "Custom Tools" from the left sidebar.
## Zapier Webhook Integration with Verbex
1. Go to your Verbex agent page. Select your agent to configure the tool.
2. Click on the "Tools" tab and select "Custom Tools" from the left sidebar.
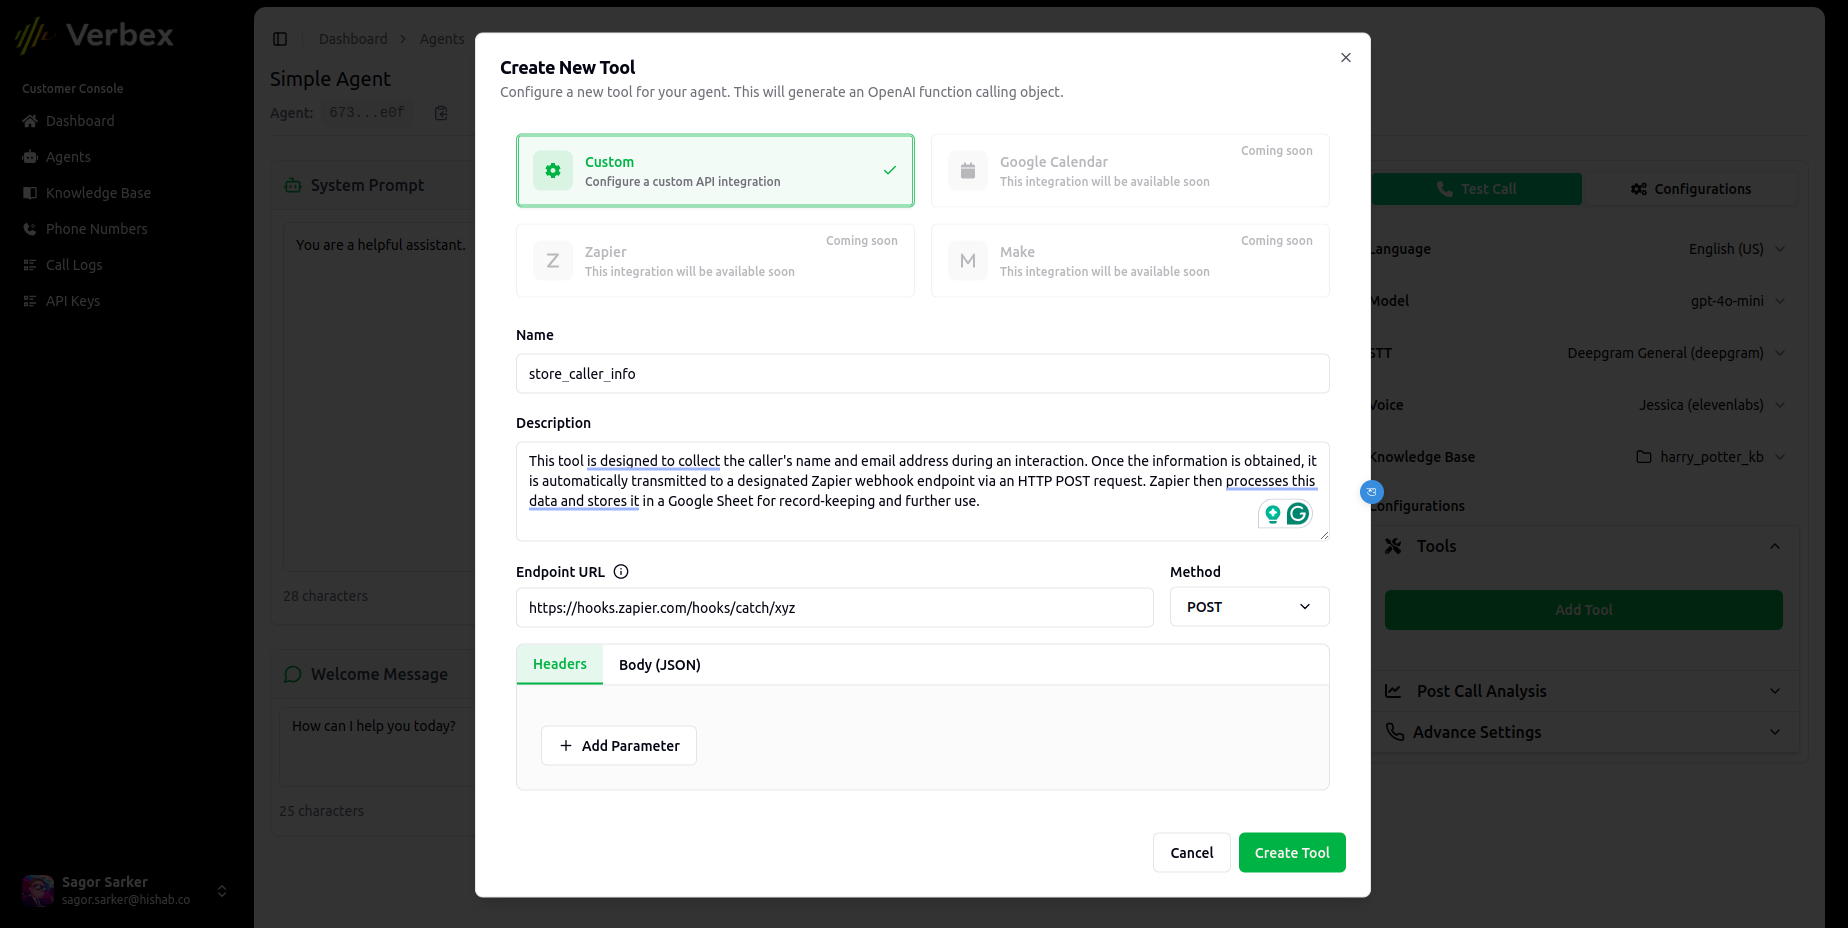
 3. Fill the custom tool details with Zapier Webhook Integration details.
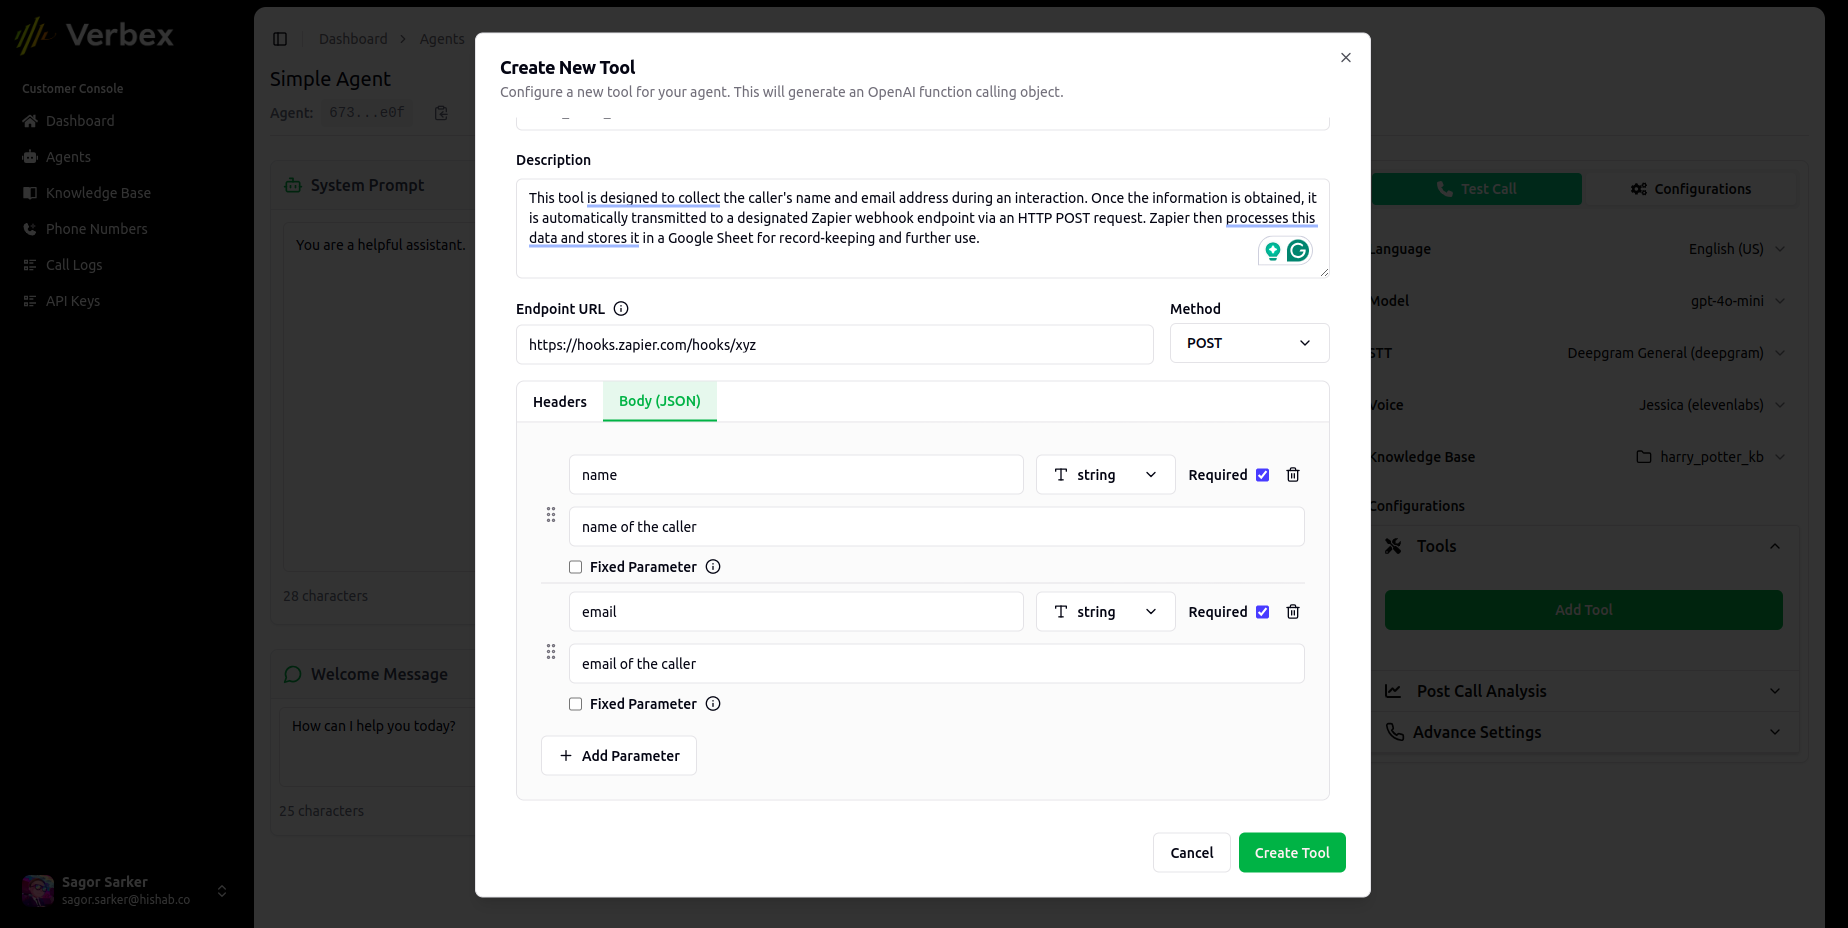 4. Click on the "Create Tool" button to save the tool.
5. Now everything is setup and you can test your agent with the tool.
You can test the tool by asking the agent to store your name and email in Zapier and Google Sheet. It will ask your name and email and store it in Zapier and Google Sheet.
To learn more about Zapier follow [Zapier Documentation →](https://docs.zapier.com/platform/home)
When creating Zaps and custom tools, always use descriptive names. This helps in easily identifying and managing them later.
Always test your Zaps and custom tools thoroughly to ensure they work as expected. Use the "Test" button in Zapier and verify the data in your Google Sheets.
Ensure that any credentials or sensitive information used in your integrations are stored securely. Avoid hardcoding them in your scripts.
Always refer to the official documentation of the tools you are integrating, such as Zapier and Verbex, for the latest updates and best practices.
Regularly monitor the performance of your Zaps and custom tools. Optimize them for better performance and to handle any changes in the workflow.
4. Click on the "Create Tool" button to save the tool.
5. Now everything is setup and you can test your agent with the tool.
You can test the tool by asking the agent to store your name and email in Zapier and Google Sheet. It will ask your name and email and store it in Zapier and Google Sheet.
To learn more about Zapier follow [Zapier Documentation →](https://docs.zapier.com/platform/home)
When creating Zaps and custom tools, always use descriptive names. This helps in easily identifying and managing them later.
Always test your Zaps and custom tools thoroughly to ensure they work as expected. Use the "Test" button in Zapier and verify the data in your Google Sheets.
Ensure that any credentials or sensitive information used in your integrations are stored securely. Avoid hardcoding them in your scripts.
Always refer to the official documentation of the tools you are integrating, such as Zapier and Verbex, for the latest updates and best practices.
Regularly monitor the performance of your Zaps and custom tools. Optimize them for better performance and to handle any changes in the workflow.