

What you’ll learn
- How to set up Salesforce API credentials
- How to create a Salesforce Connected App
- How to integrate Salesforce with Verbex Platform
- How to test and verify the integration
Prerequisites
- A Salesforce account with administrative access
- Access to your Verbex AI Assistant
- Basic understanding of API integration
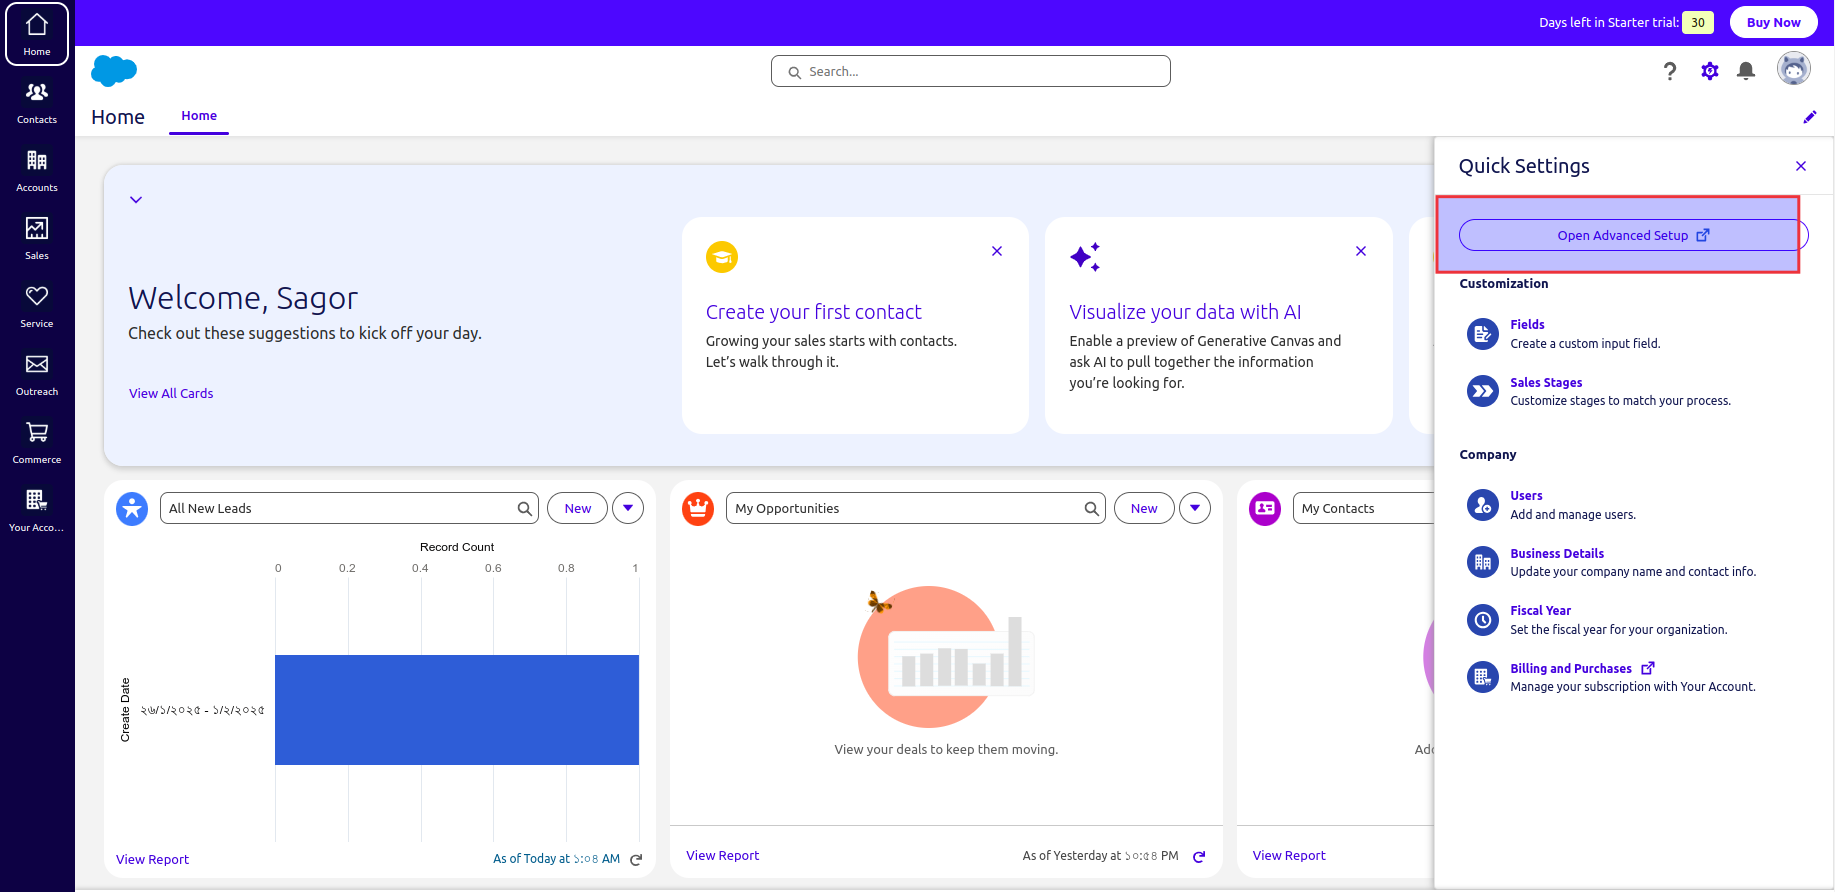
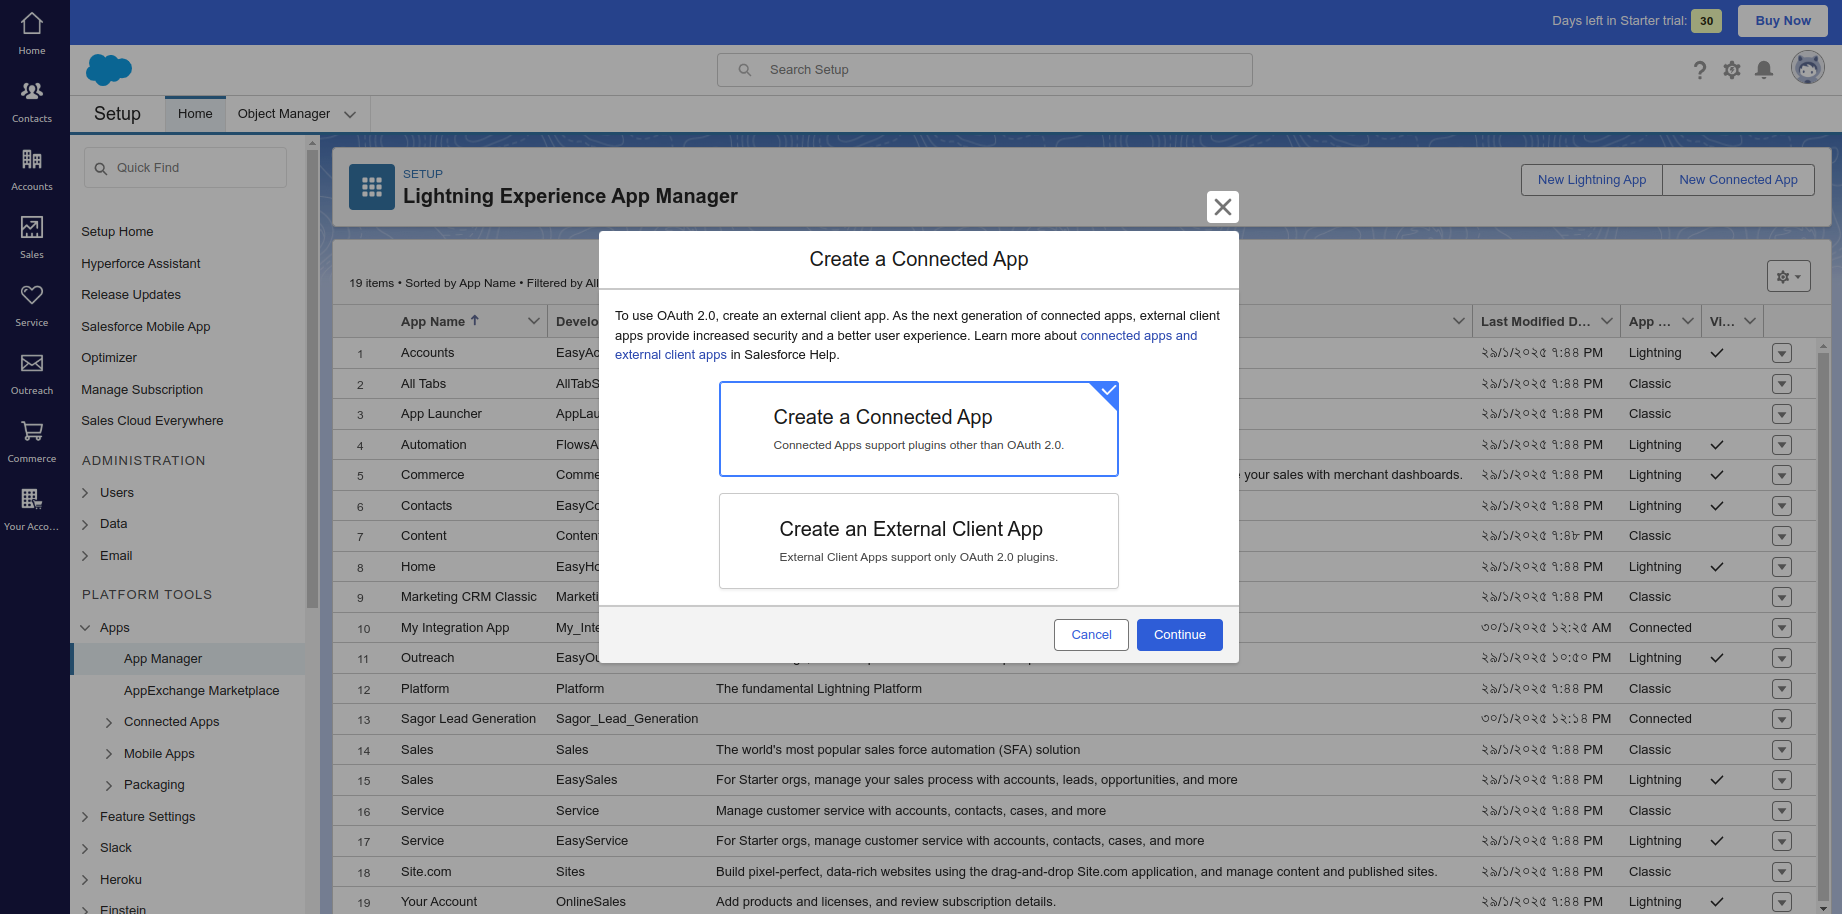
Step 1: Create Salesforce Connected App
- Log into Salesforce
- Navigate to Setup:
- Click the settings gear icon

- Select “Open Advanced Setup”
- Create Connected App:
- Go to “App -> App Manager”
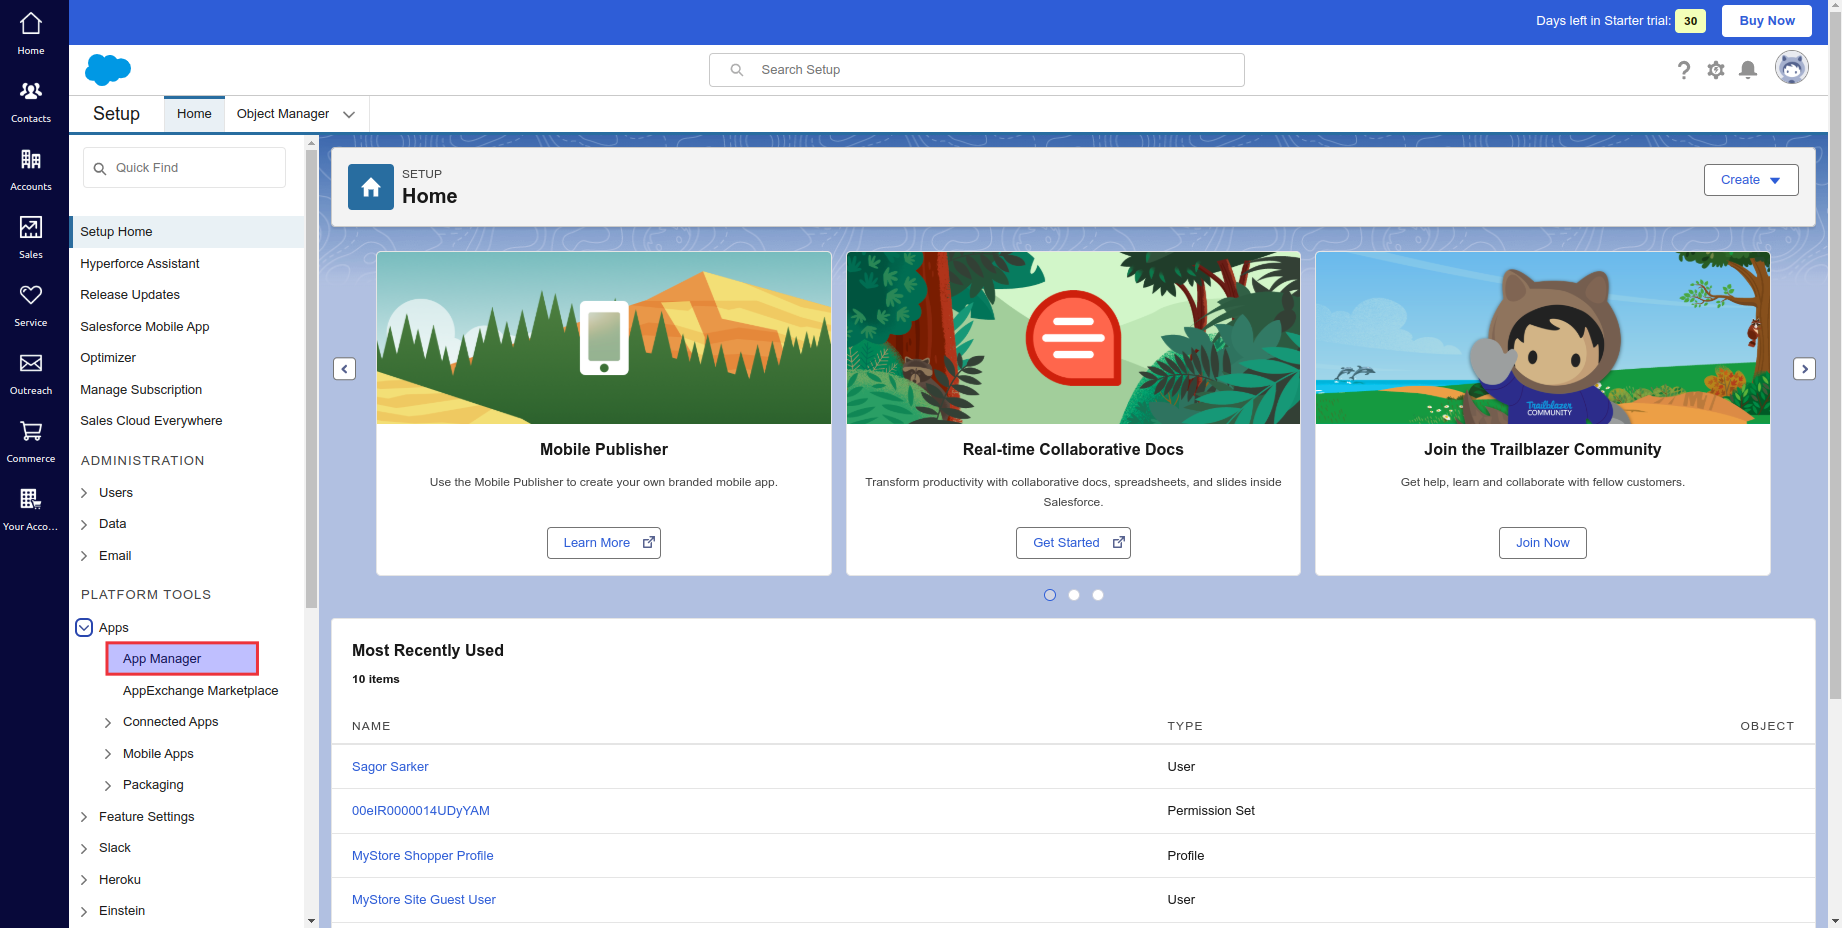
- Click “New Connected App”
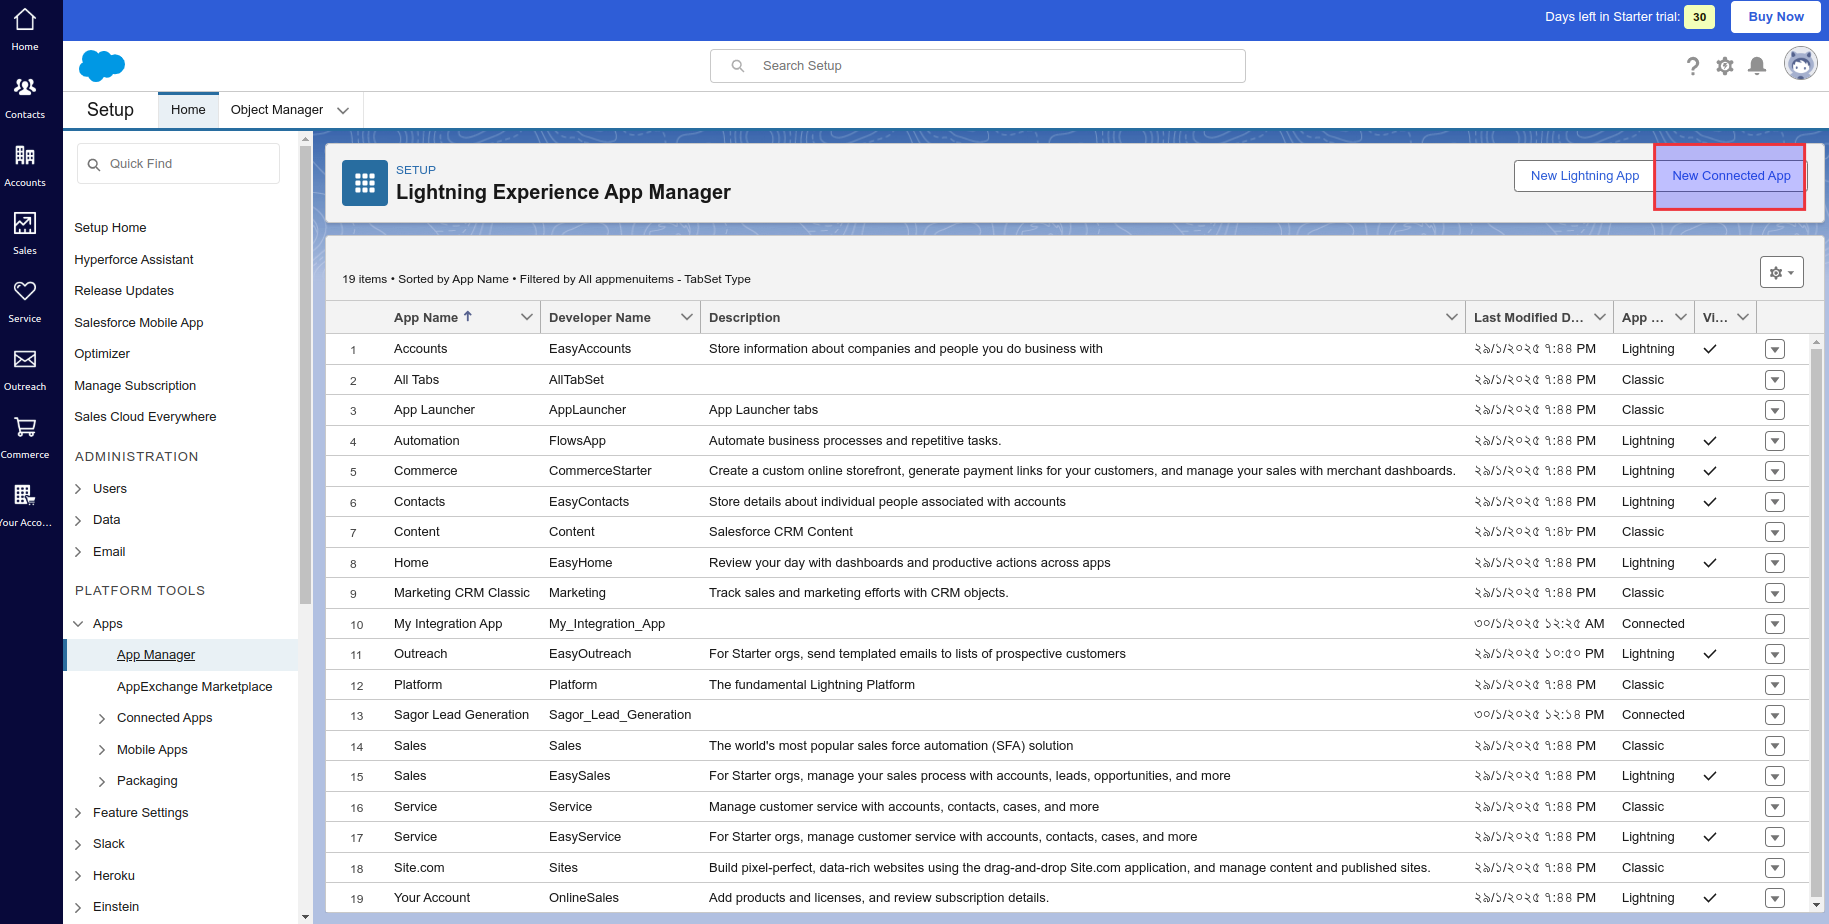
- Select “Create a Connected App”
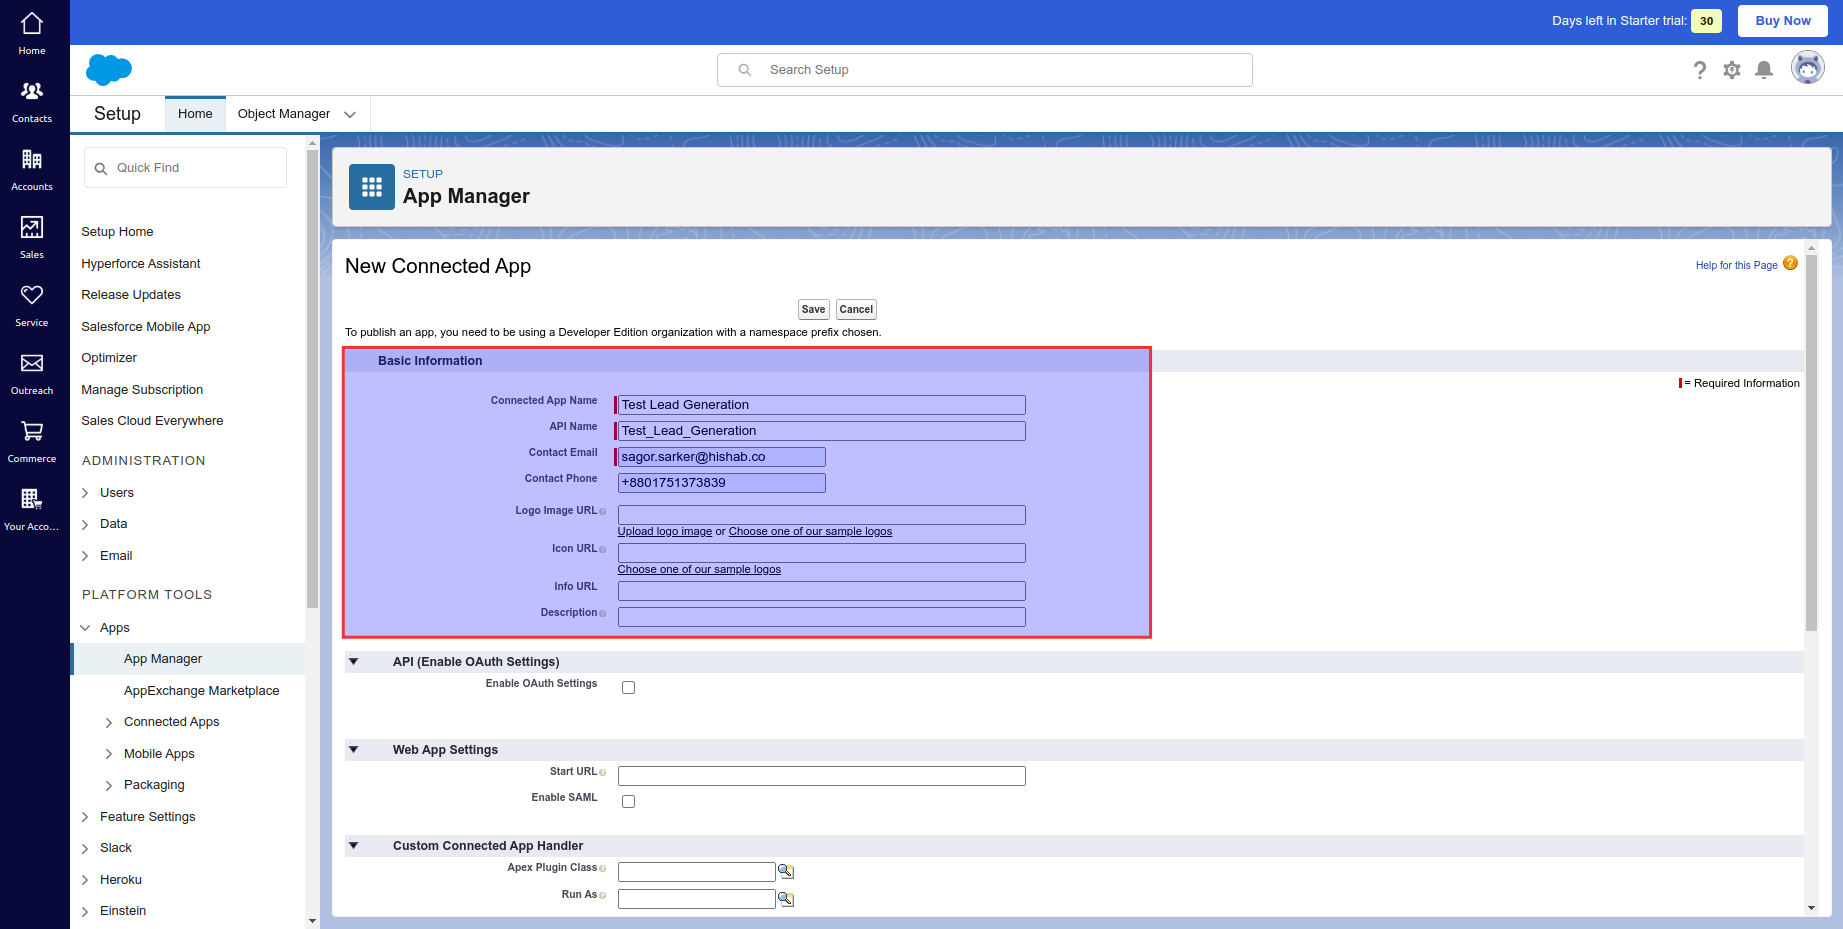
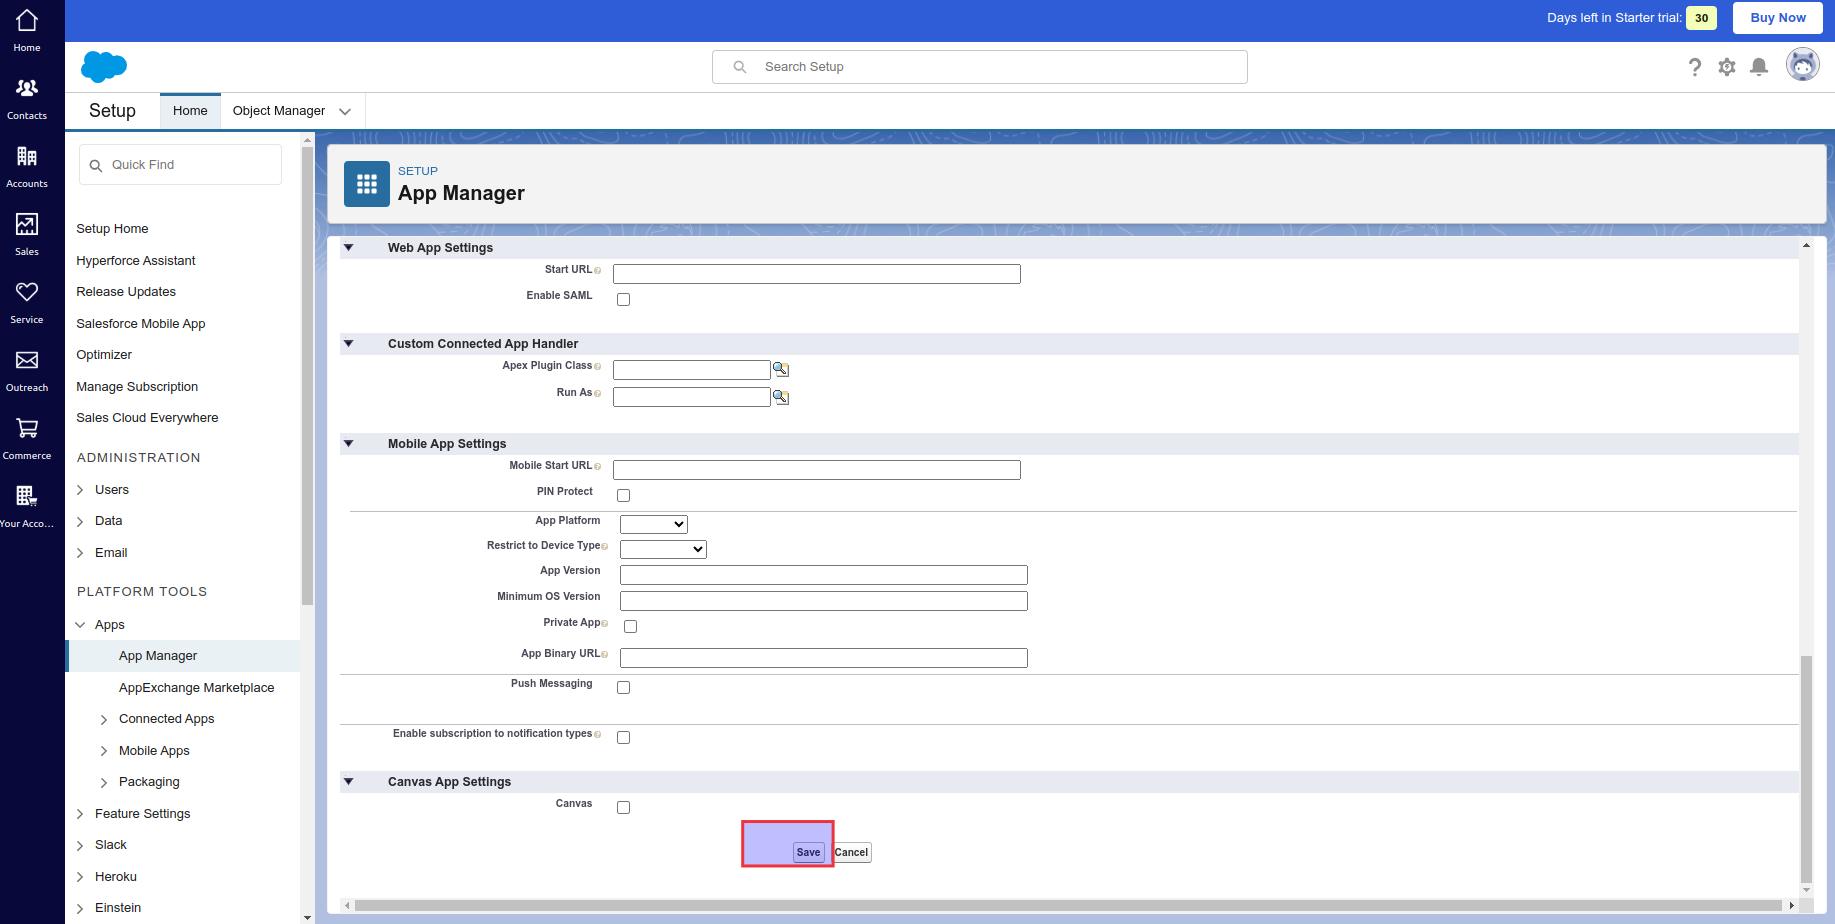
Step 2: Configure OAuth Settings
-
Fill in Basic Information
-
Configure OAuth settings

-
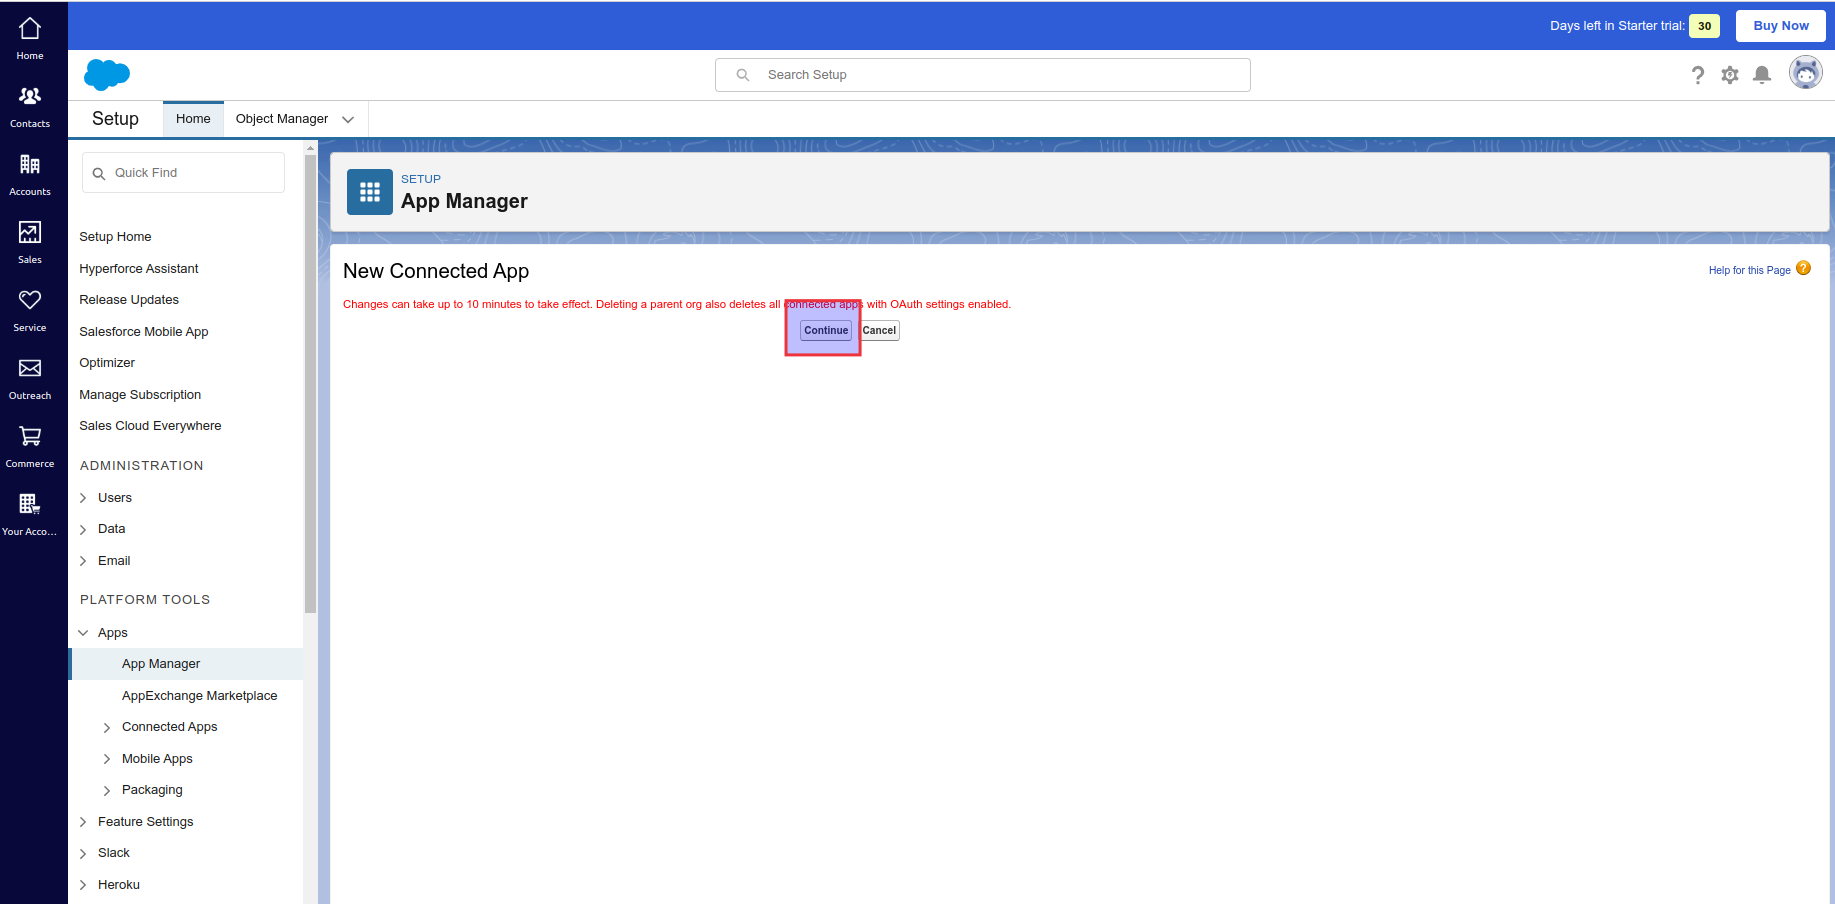
Save and continue
-
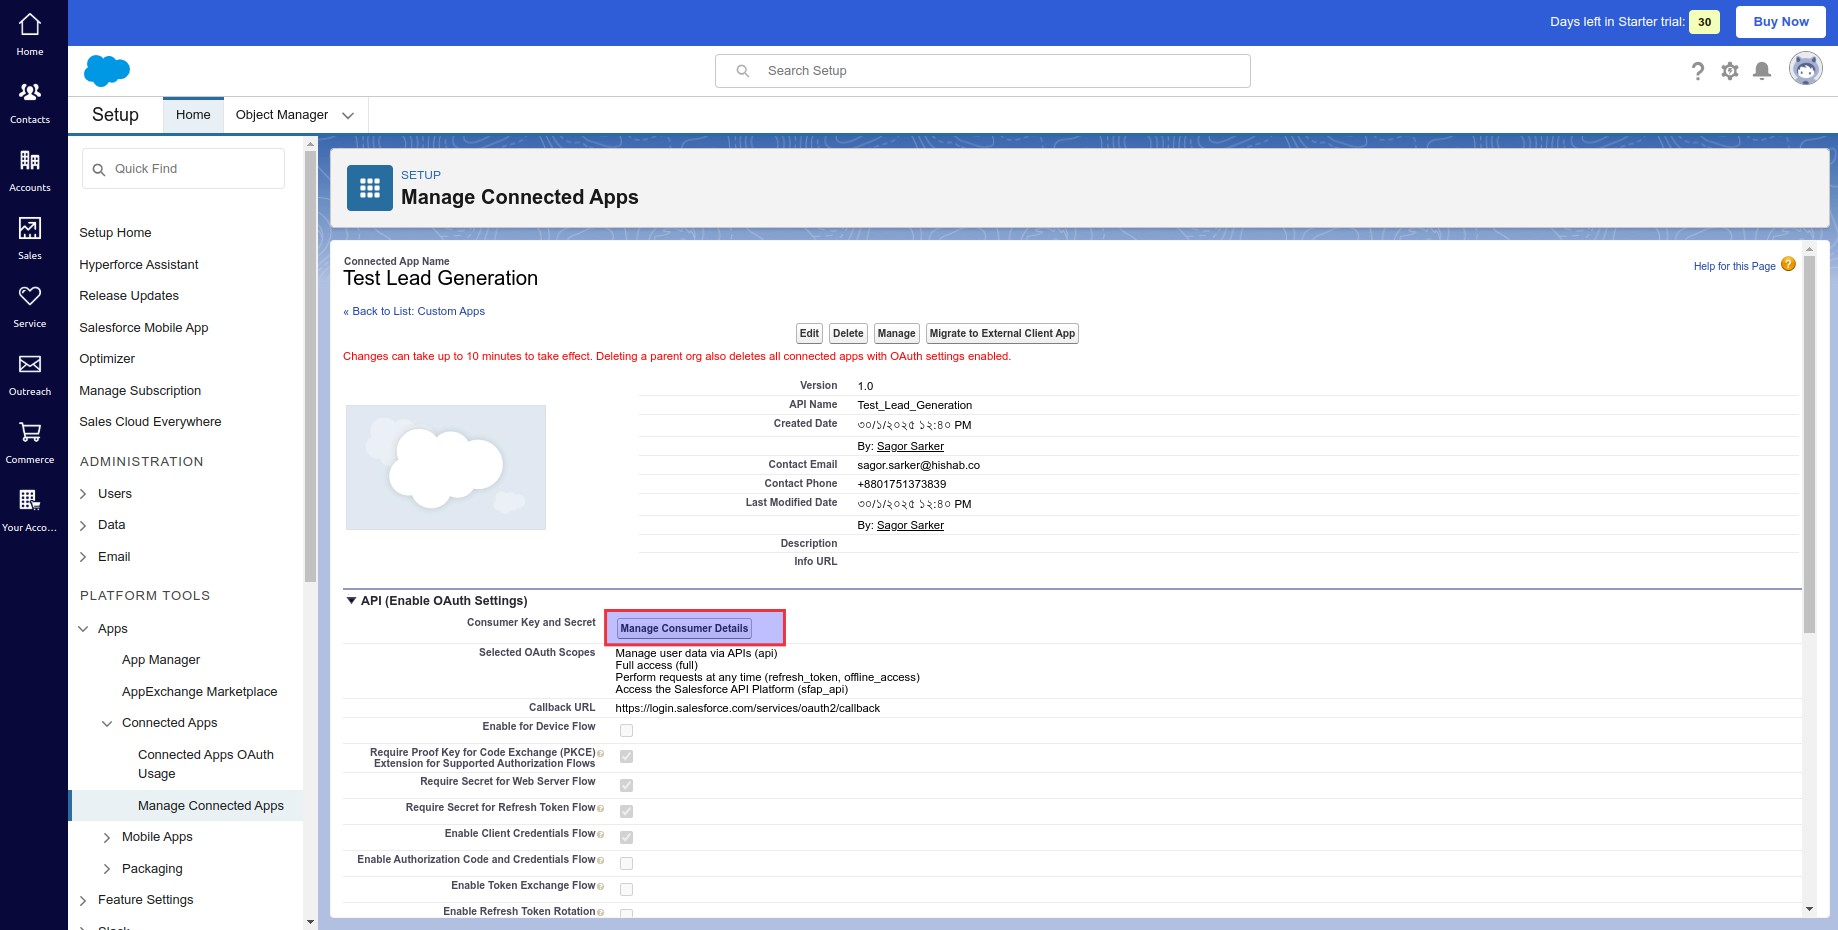
Click “Manage Consumer Details”
-
Complete verification process
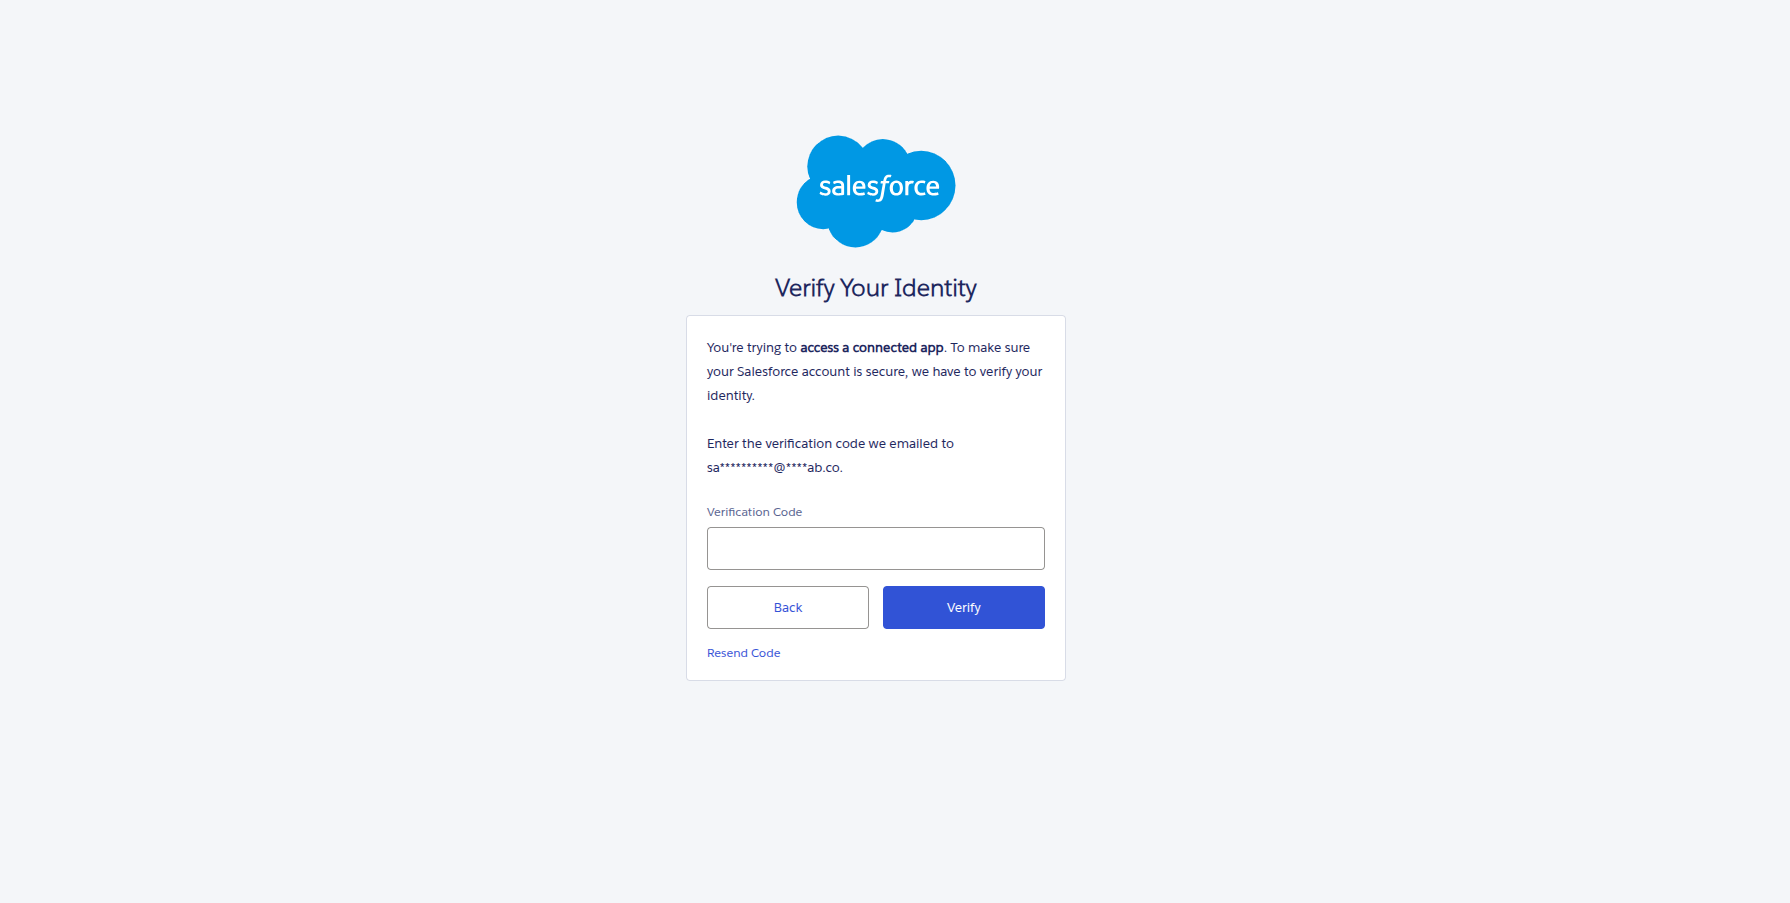
-
Save the following credentials:
- Consumer Key (Client ID)
- Consumer Secret
- Username
- Security Token
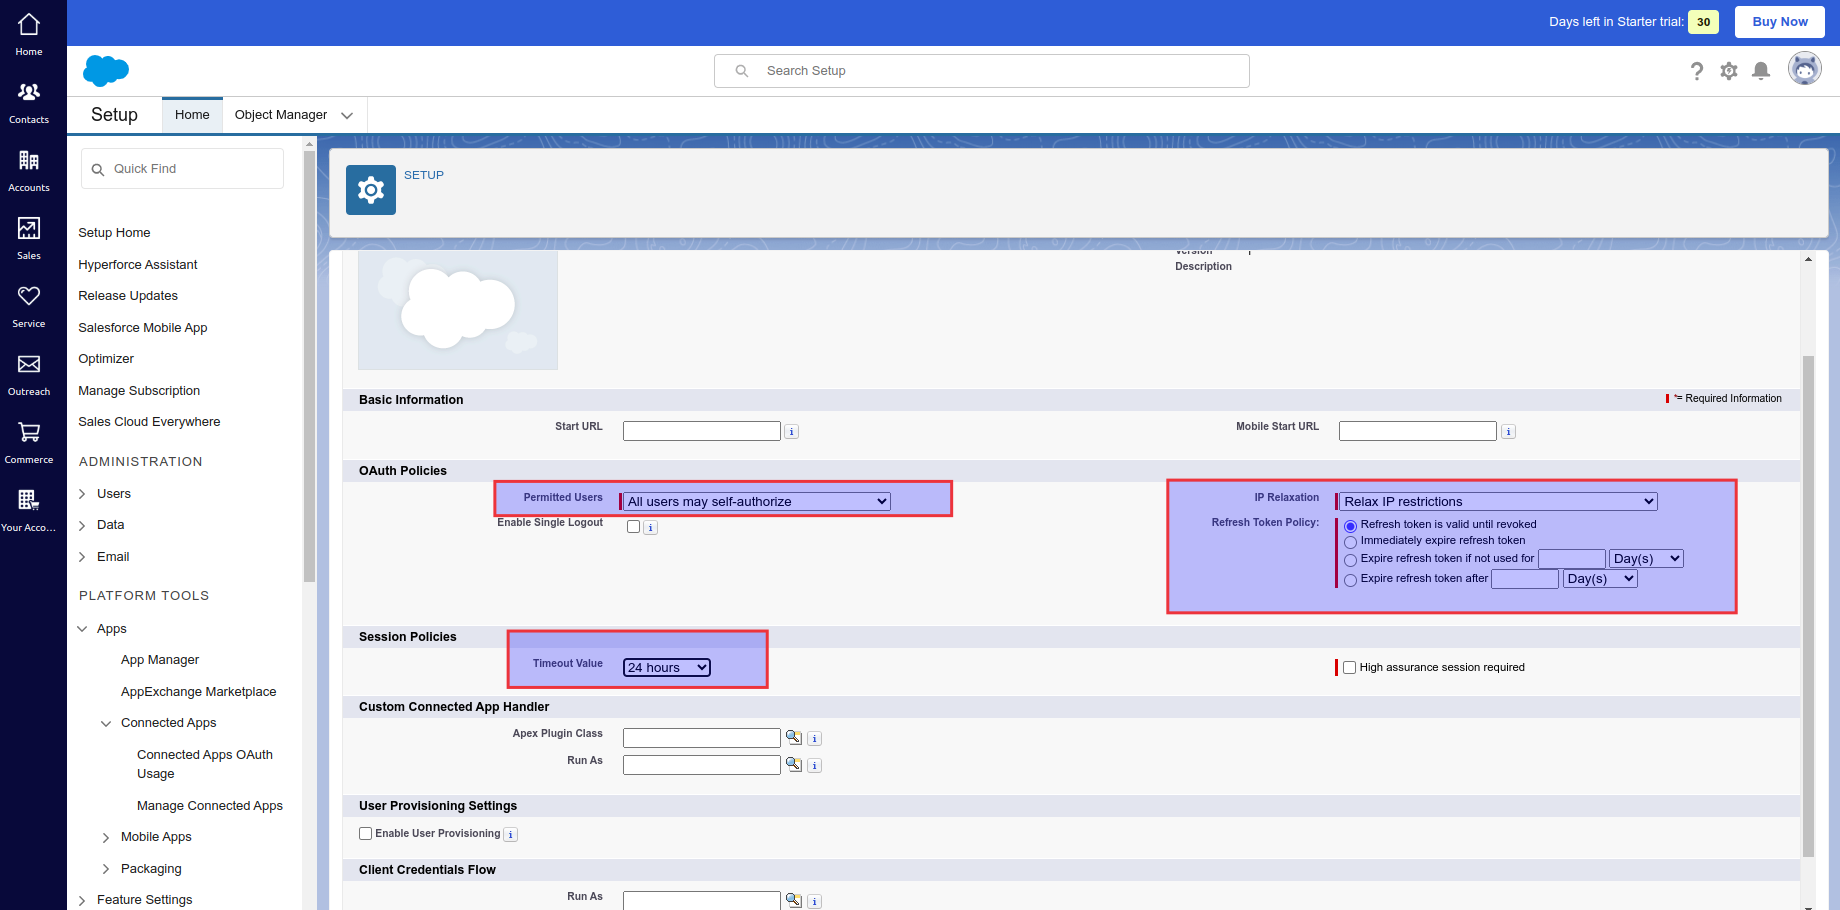
Step 3: Update Policies
- Go to your app and click “Edit Policies”
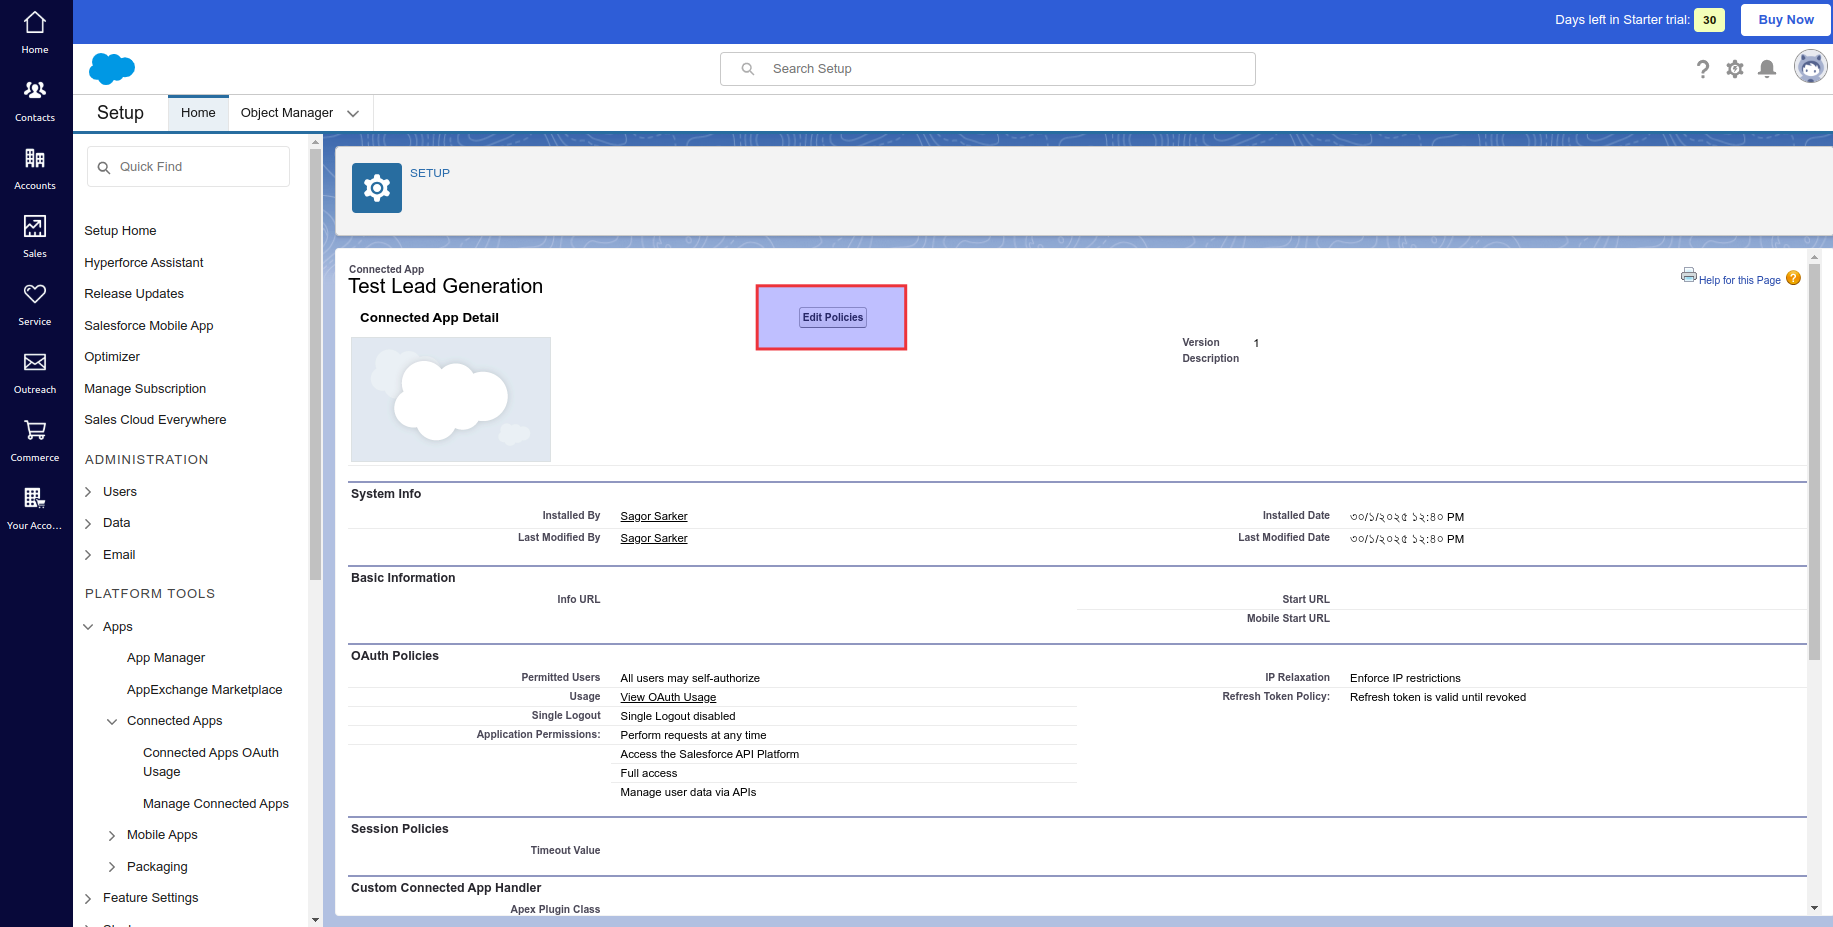
- Update the following marked policies:
Step 4: Generate Access Token
- Use this curl command template to get your access token:
The password should be your Salesforce password immediately followed by your security token (no spaces).
- The response will include:
- Test your access token using and data sending CURL or Postman.
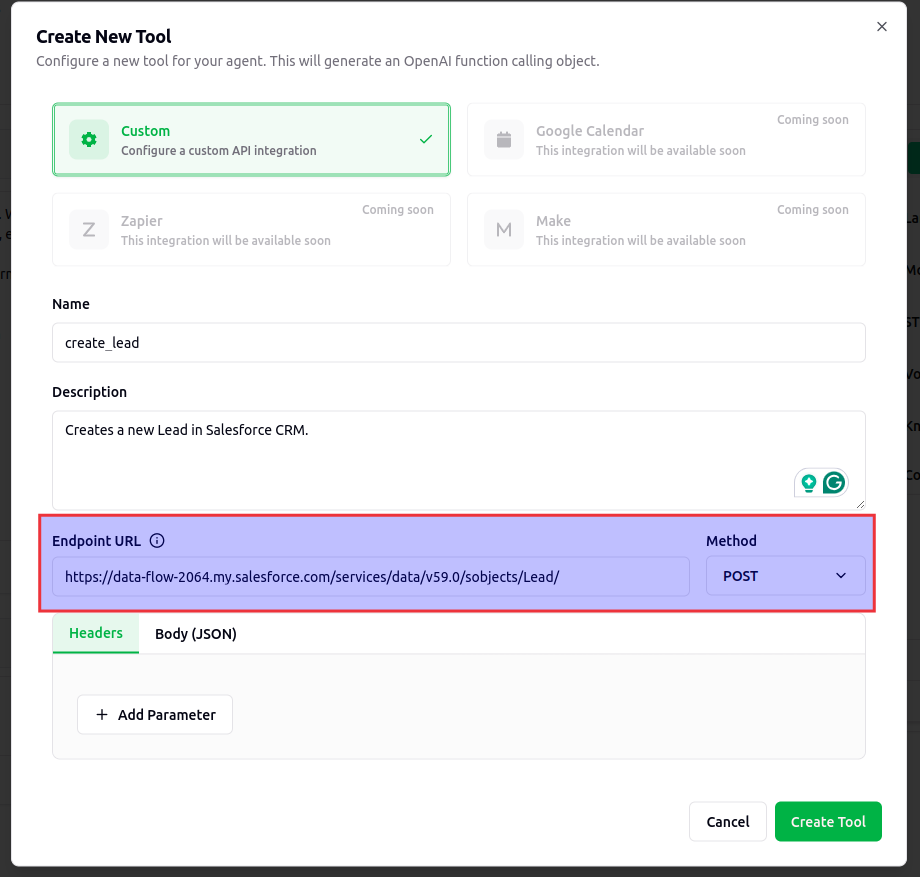
Step 5: Create Custom Tool in Verbex
- Go to “Add Tool -> Custom Tool”
- Configure the tool:
- Name: create_lead
- Description: Create new leads in Salesforce
- Endpoint URL: [Your Instance URL]/services/data/v59.0/sobjects/Lead/
- Method: POST
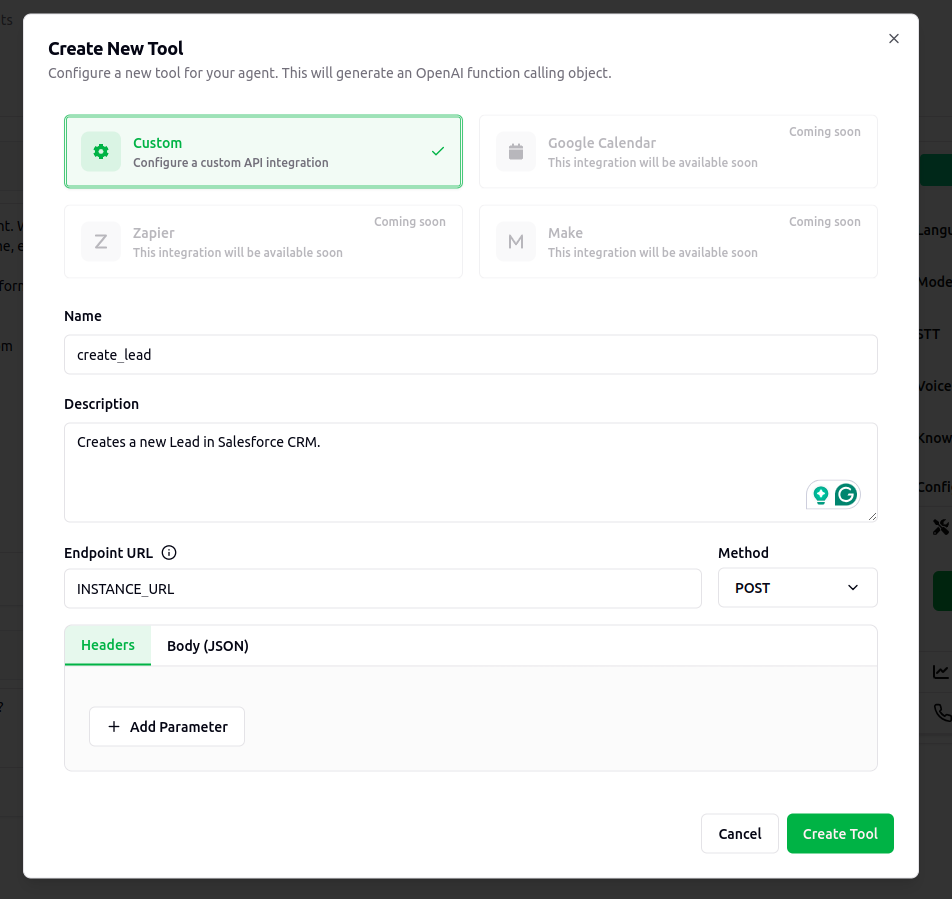
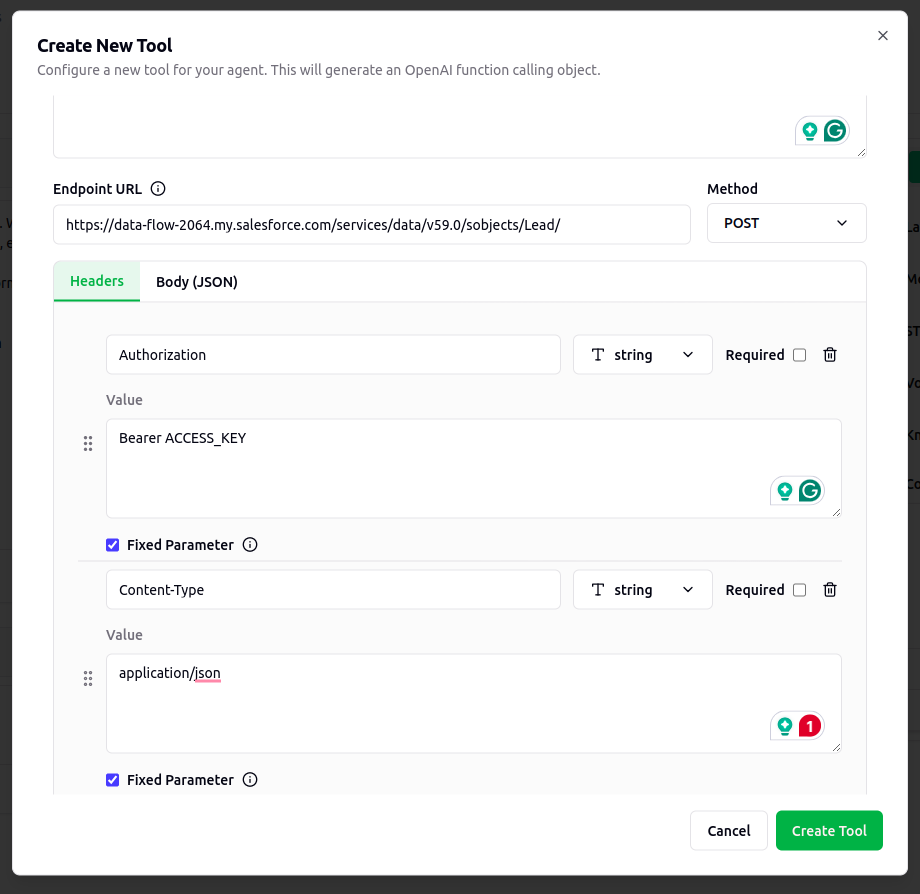
- Add Header Parameters:
- Authorization: Bearer [Your Access Token]
- Content-Type: application/json
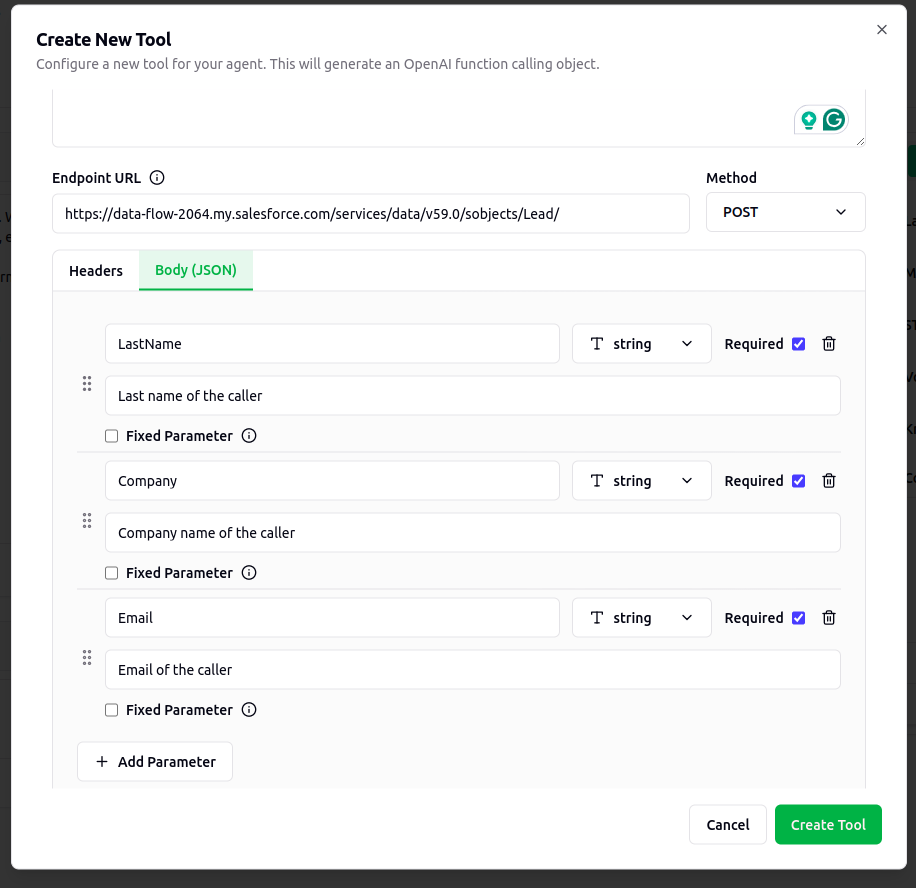
- Configure Body Parameters:
Best Practices
-
Naming Convention
- Use clear, descriptive names
- Follow a consistent pattern
- Include the system name
-
Error Handling
- Implement proper error catching
- Provide clear error messages
- Log issues for debugging
-
Security
- Regularly rotate credentials
- Use environment variables
- Implement rate limiting
-
Testing
- Test with sample data first
- Verify error scenarios
- Monitor integration health
Monitoring and Maintenance
-
Regular Checks
- Monitor API usage
- Check for failed requests
- Verify data accuracy
-
Updates
- Keep API versions current
- Update authentication tokens
- Maintain documentation