

This guide provides detailed, step-by-step instructions to help you connect Twilio phone numbers to Verbex using Elastic SIP Trunking. By following this guide, you will be able to make and receive calls via Verbex using Twilio’s telephony infrastructure.
Before proceeding with the integration, ensure you have all the prerequisites in place to avoid any setup issues.
Prerequisites
Before you begin, ensure that you have the following:- A Twilio account with Elastic SIP Trunking enabled
- A Verbex account with access to SIP configuration settings
- One or more phone numbers purchased or ported to Twilio
- A basic understanding of SIP trunking and VoIP concepts
Step-by-Step Integration
Step 1: Creating an Elastic SIP Trunk in Twilio
- Log in to Twilio and navigate to the Elastic SIP Trunking section
-
Click on Create New Trunk and enter a name for your trunk (e.g.,
Verbex_SIP_Trunk) - Now configure the SIP Trunk settings following the steps below
Creating Credential List
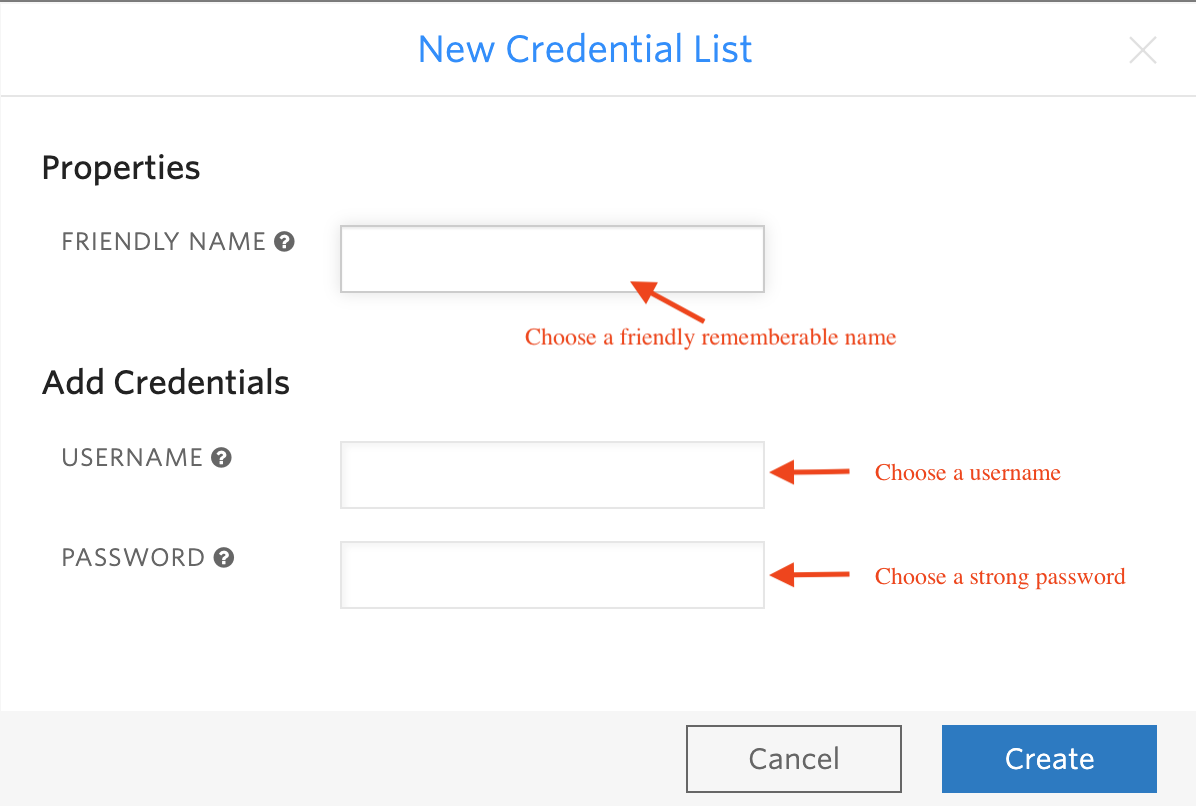
- In your Twilio console, create a new Credential List
- Choose a friendly rememberable name
- Set up your username and password
- These credentials will be used when importing numbers in Verbex
Configuring Termination Settings
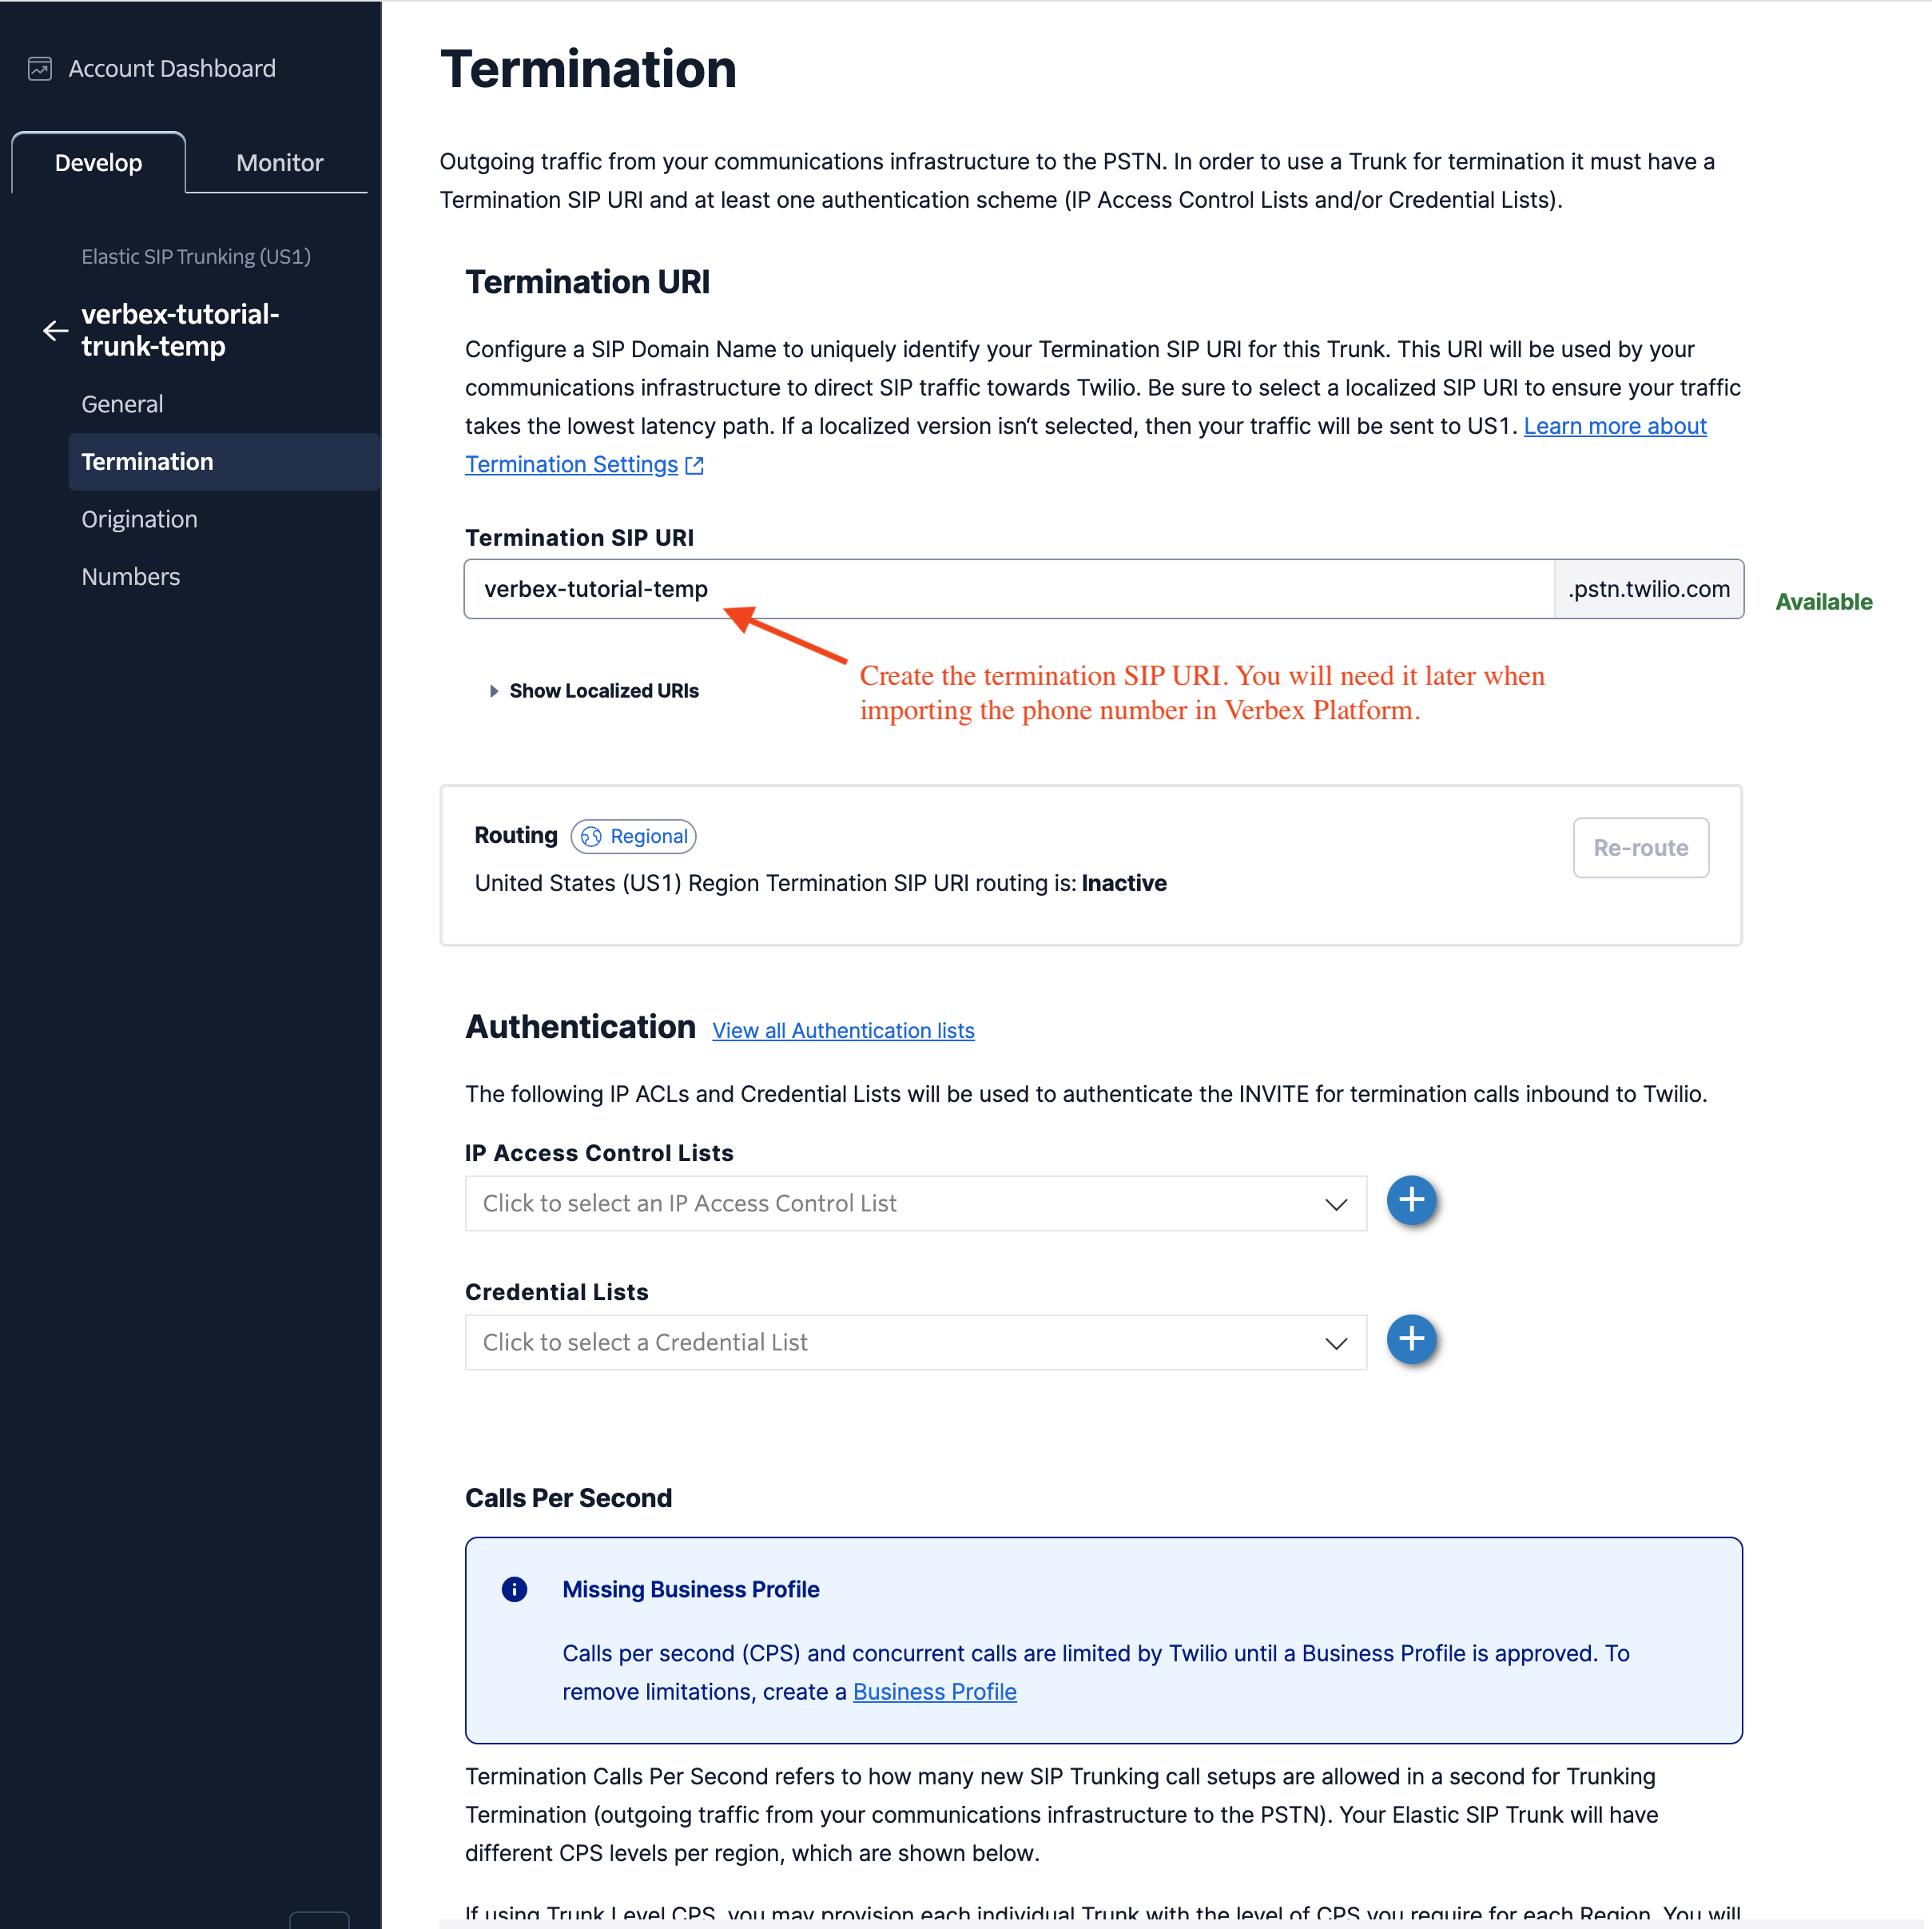
- In your Twilio SIP Trunk’s Termination settings, create your Termination SIP URI
- This URI will be needed when importing phone numbers in Verbex Platform
- Set up credential authentication by creating a username and password
- Save the changes
Setting Up Origination URL
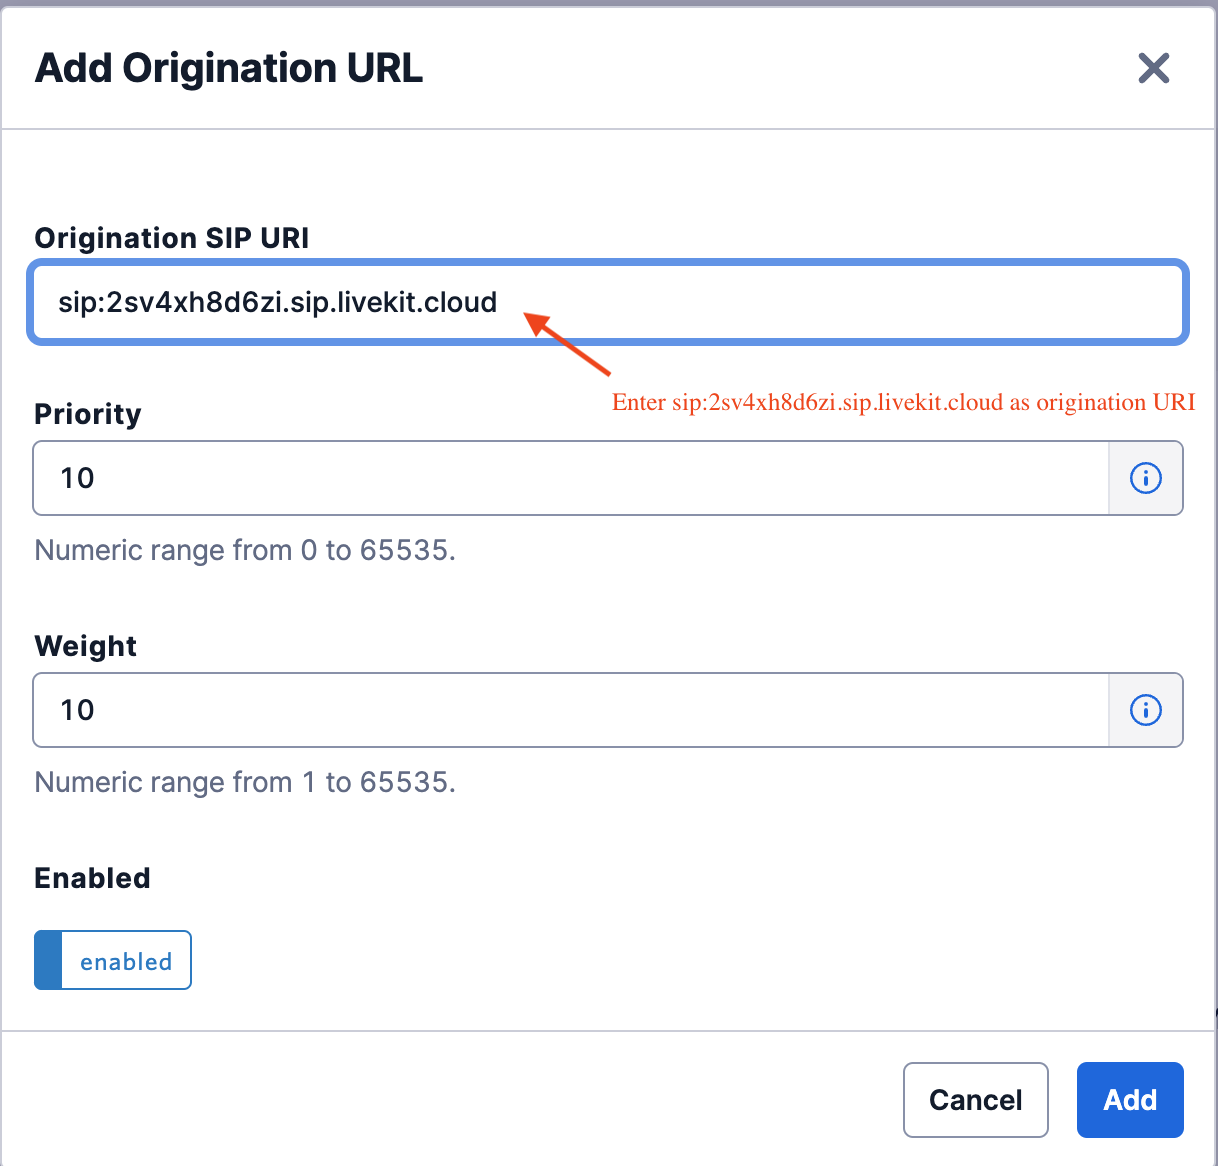
- Navigate to the Origination settings in your Twilio SIP Trunk
-
Add the Verbex SIP URI:
sip:2sv4xh8d6zi.sip.livekit.cloud - Set the priority and weight as needed (default: 10)
- Ensure the URL is enabled
Step 2: Managing Phone Numbers
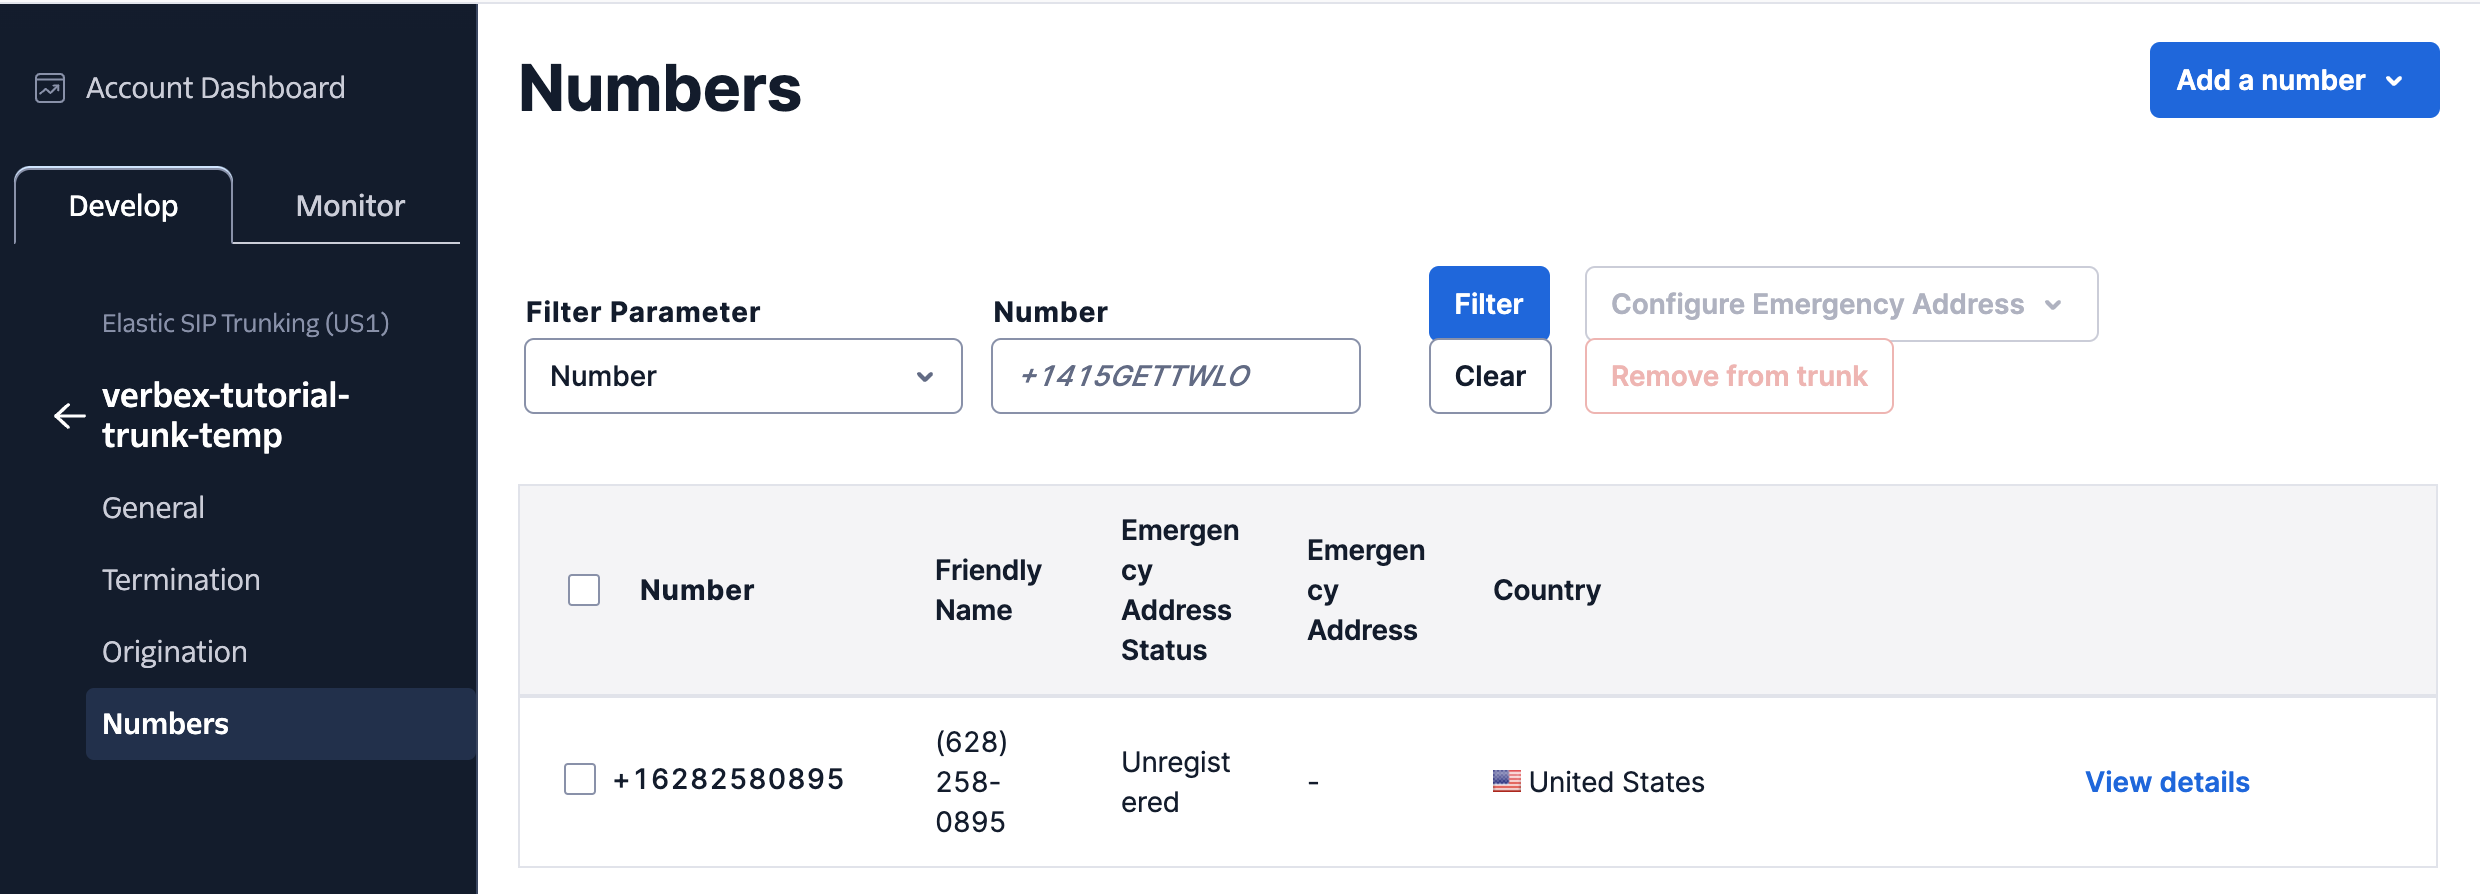
- Go to Phone Numbers > Manage Numbers in Twilio
- Either purchase a new number or move an existing Twilio number to the SIP trunk
- Assign the number to the Elastic SIP Trunk created in Step 1
- Save and confirm the configuration
Step 3: Importing Numbers into Verbex
After setting up numbers in Twilio, they need to be imported into Verbex for proper call routing.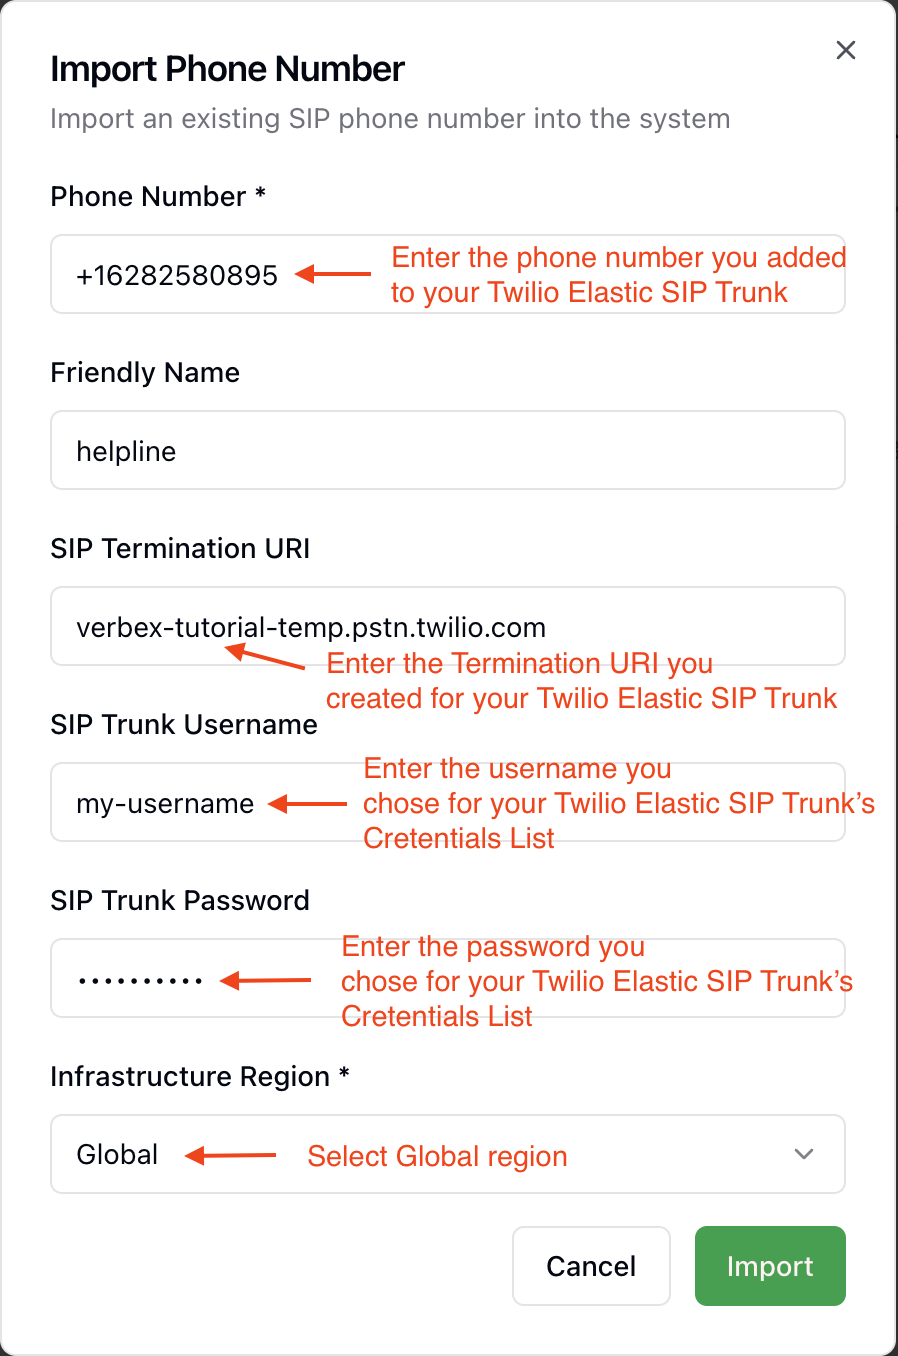
- Using Dashboard
- Using API
- Log in to Verbex and navigate to the SIP Trunking section
-
Click Import Numbers and enter the required details:
- Phone Number: Enter the Twilio number you want to import
- Friendly Name: Choose a memorable name for the number
- Termination SIP URI: Enter the URI from your Twilio Elastic SIP Trunk
- SIP Trunk Username and Password: Enter the credentials from your Twilio Credential List
- Infrastructure Region: Select your region (usually Global)
- Click Import to finalize the setup
Step 4: Making and Receiving Calls
Once the numbers are imported, they will be visible in the Verbex dashboard, allowing you to:- Make outbound calls using Verbex
- Receive inbound calls to the assigned number
- Use the Create Phone Call API to initiate calls programmatically
- Remove numbers when no longer needed using the Delete Number API
Import Number API
Learn how to programmatically import numbers
Create Phone Call API
Initiate calls through the API
Delete Number API
Remove numbers from your configuration
Troubleshooting & Best Practices
Outbound Calls Not Working
Outbound Calls Not Working
- Ensure Twilio SIP Termination settings are correctly configured
- Verify that the SIP URI and authentication credentials match on both platforms
Inbound Calls Not Working
Inbound Calls Not Working
- Check that Verbex’s SIP server address is properly configured in Twilio’s Origination settings
- Test call routing by placing a call to your Twilio number and checking Verbex logs
General Issues
General Issues
- Restart the Twilio and Verbex configurations if changes are not reflected
- Refer to Twilio and Verbex documentation for any platform-specific configurations
If issues persist after following the troubleshooting steps, contact support for additional assistance.
Additional Resources
Twilio Support
Access Twilio documentation and support resources
Verbex Help Center
Get help with Verbex-specific configurations