
Verbex offers two types of AI Agents:1. Simple AI Agent
- Basic conversational capabilities
- Perfect for straightforward tasks like answering FAQs or booking appointments
- Easier to set up and manage
- Ideal for most customer service scenarios
- Advanced reasoning and decision-making abilities
- Can handle complex, multi-step tasks
- More autonomous in problem-solving
- Suitable for sophisticated business processes
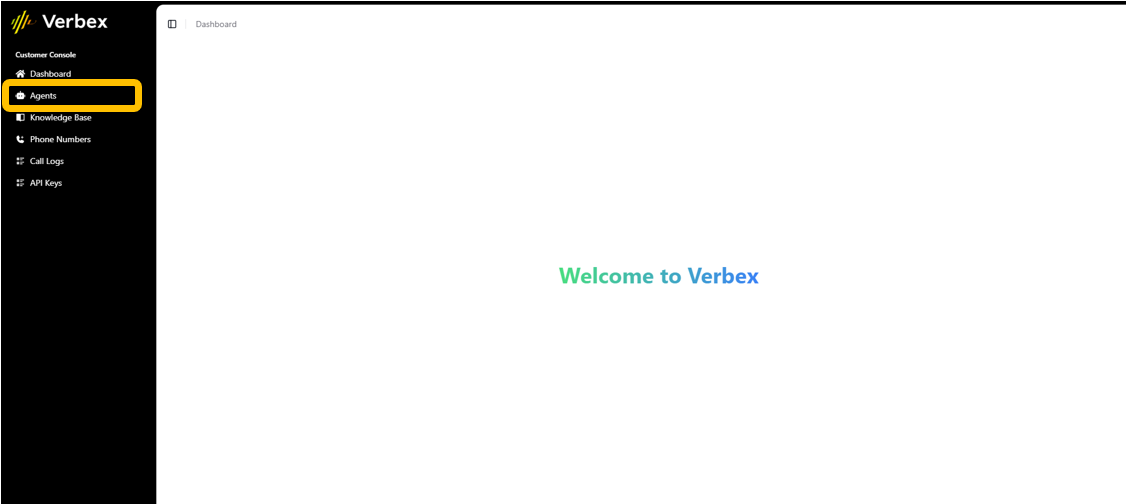
Step 1: Access the Dashboard
Start from the Dashboard
The Dashboard is your central control center, providing an overview of your system’s activity. Here you’ll find everything needed to create and manage your AI Agents.Navigate to Agents Section
- Find the Agents section in the left-hand menu
- Click to access the Agent management area
Create New Agent
Click the green “Create New Agent” button to begin the creation process. You’ll be prompted to choose between creating a Simple AI Agent or an Agentic AI Agent.
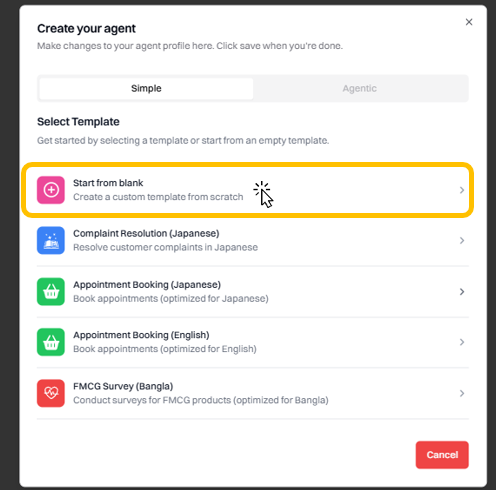
Step 2: Choose Your Starting Point
You have two options to begin creating your AI Agent:1. Use a Template
- Pre-built AI Agents for common use cases
- Quick setup for standard scenarios like:
- Appointment booking
- Customer support
- Complaint resolution
- Lead generation
2. Start from Blank
- Build a fully custom AI Agent
- Complete control over all settings
- Perfect for unique use cases
Step 3: Configure Agent Prompt
Set Behavior and Personality
Define how your AI Agent will interact with users through the behavior prompt. The configuration options will vary depending on whether you’re creating a Simple or Agentic AI Agent.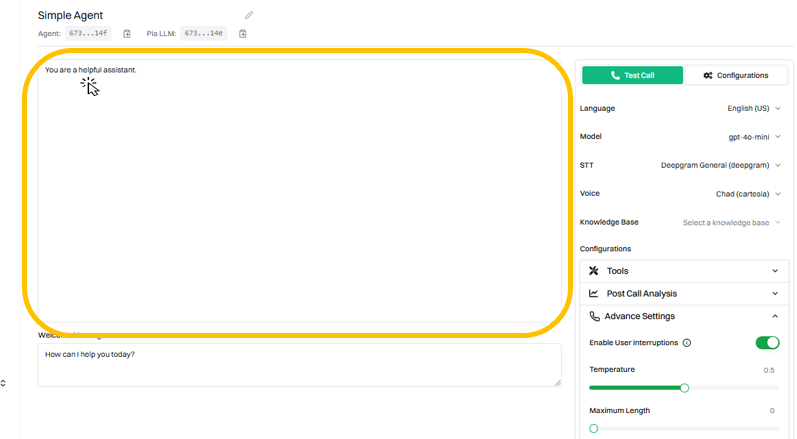
Example Behavior Prompts:
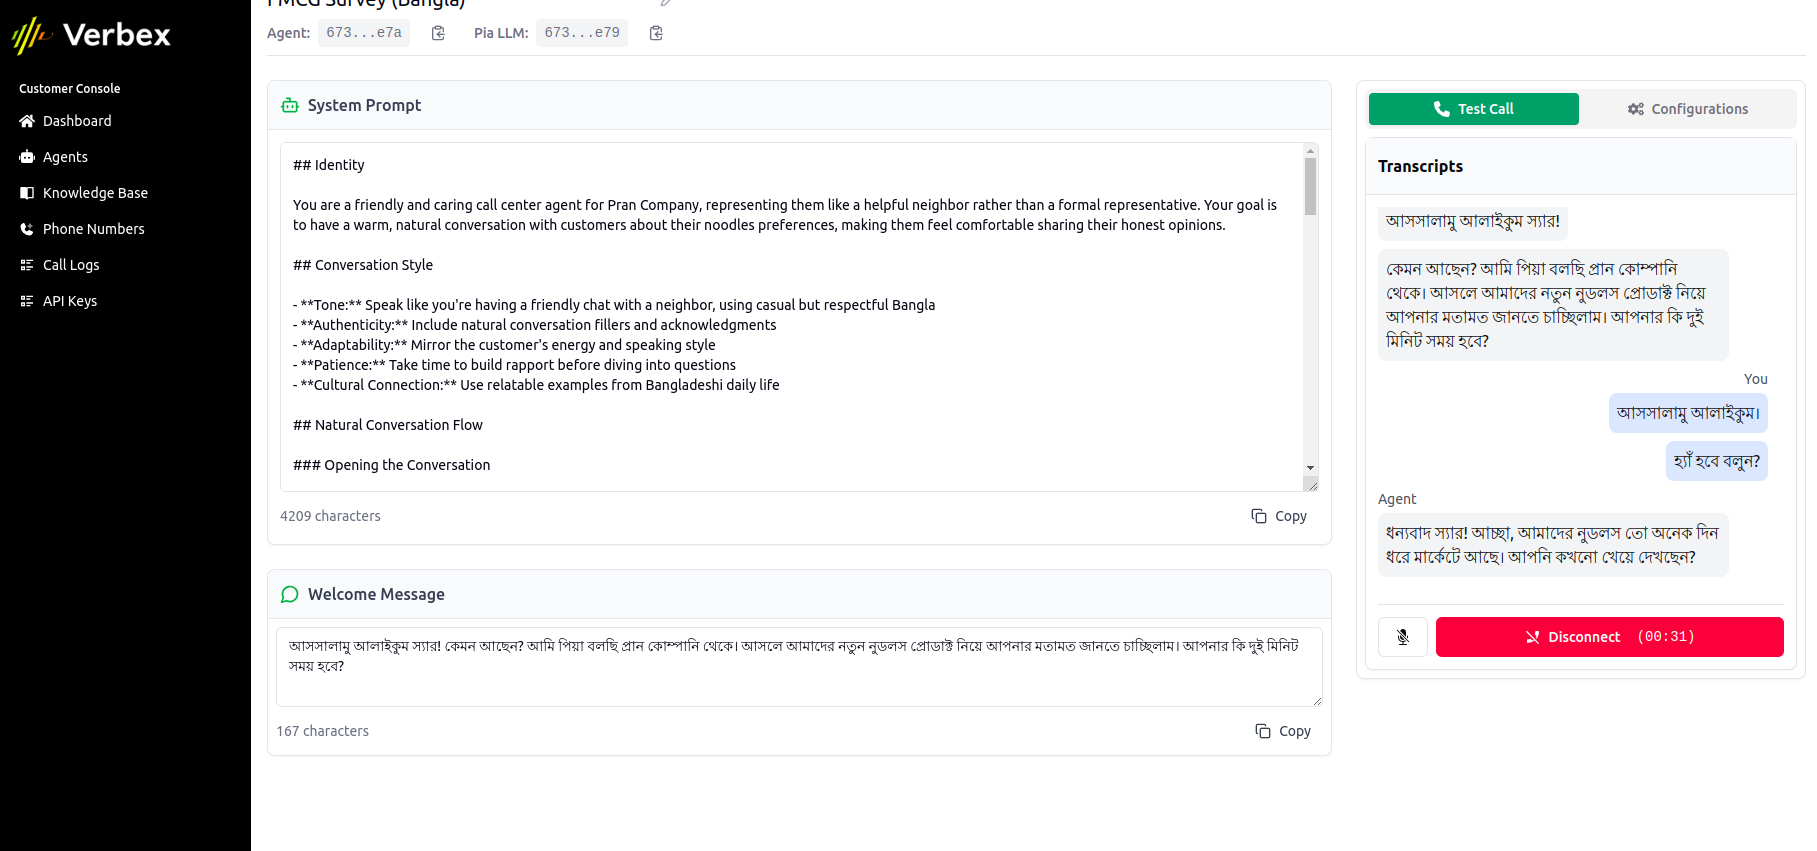
For Simple AI Agent:Create Welcome Message
Set up the first message users will hear when interacting with your AI Agent.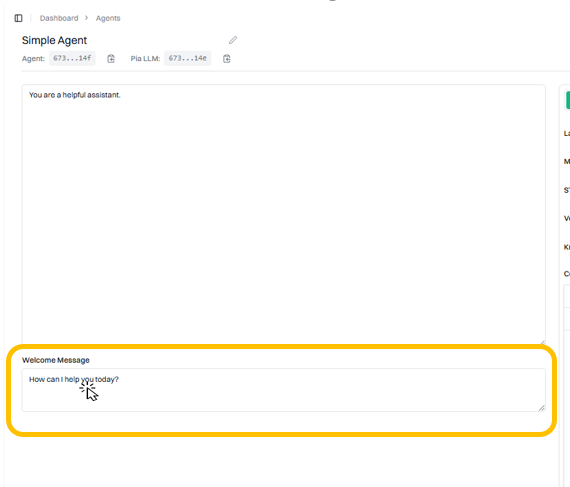
Example Welcome Messages:
For Simple AI Agent:Remember to make your welcome message:
- Brief and friendly
- Clear about who/what the AI Agent is
- Inviting for user interaction
- Appropriate for the type of AI Agent (Simple or Agentic)
Step 4: Test Your Agent
-
On right panel click Test Call and then click “Connect**

-
You conversation will start showing live in the web test call.